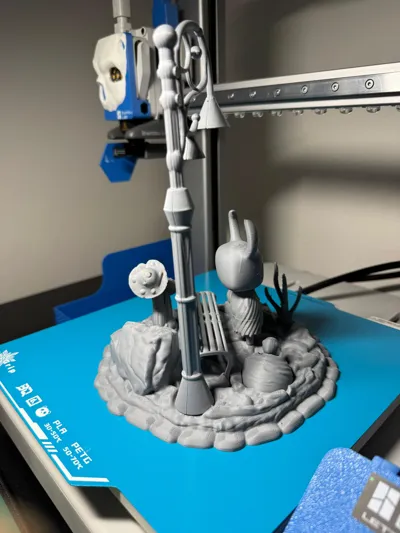
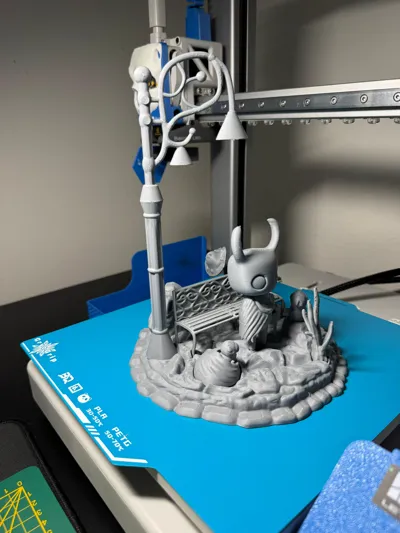
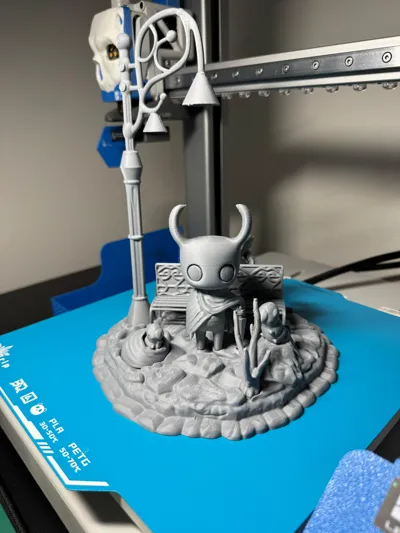
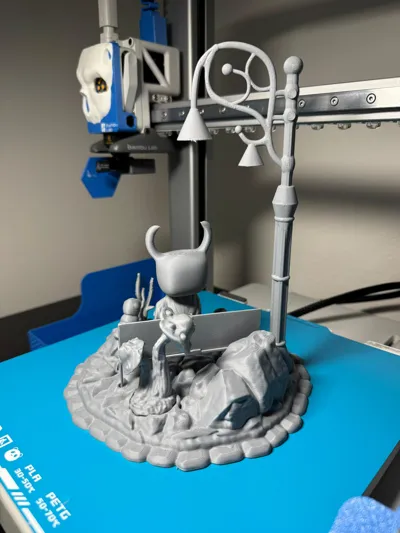
Hollow Knight - Checkpoint Bench Diorama fanmade


Print Profile(4)


Description
Boost Me (for free)
⏳ I dedicated a lot of time to this Hollow Knight diorama, optimized piece by piece 🧩 for printing. If you like the result, support me with a boost 🚀! Every boost is a huge encouragement to improve 💪 and share more and more :D
****NEW DIORAMA PUBLISHED - HK + HORNET - CLICK HERE****
Given the ENORMOUS success the Hollow Knight model is having
I have created a new model, also inspired by the famous game:
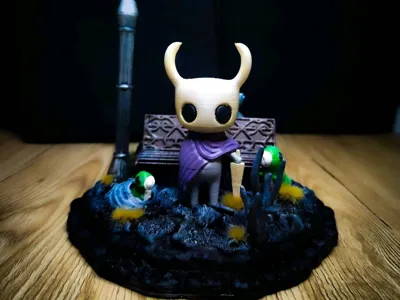
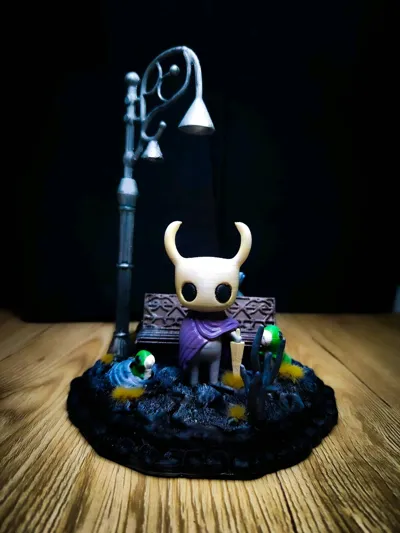
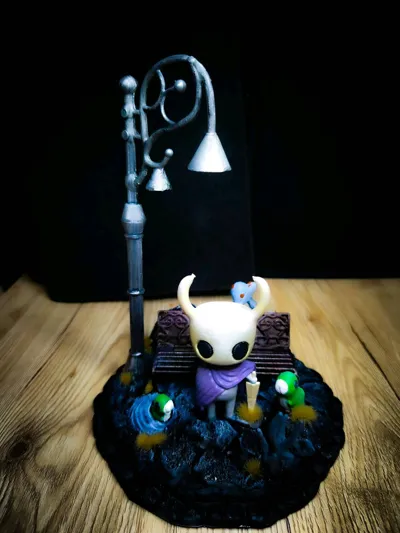
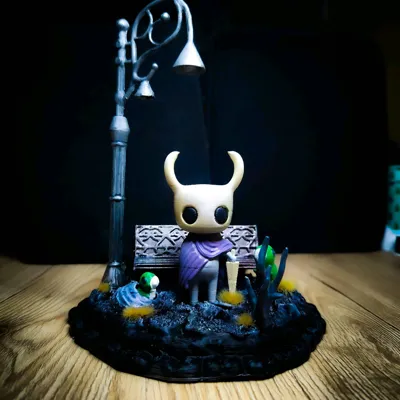
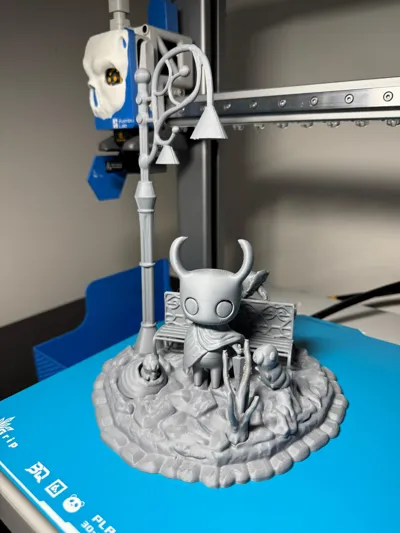
it's the Hollow Knight Diorama on the checkpoint bench! 🎉
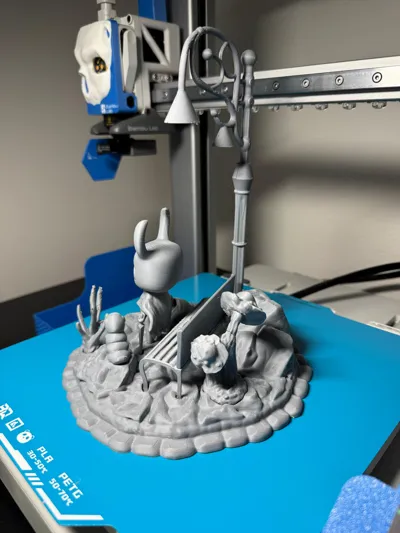
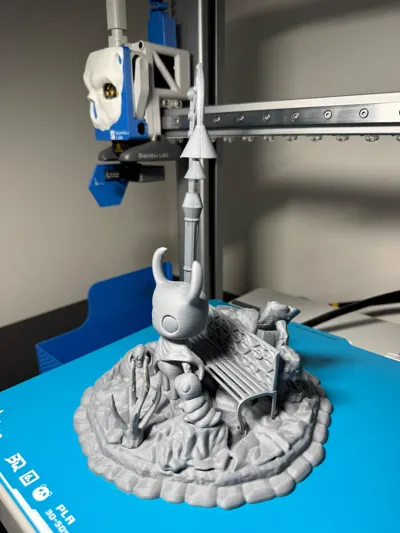
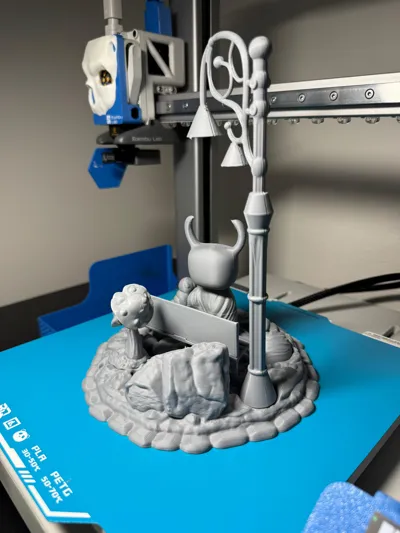
The model originates from my personal references and the previous Hollow Knight model, then I modeled, split, and optimized all the pieces with Nomad Sculpt on iPad to make printing easier and more precise
In the end, it measures approximately 18cm in diameter (base) and 22cm in height 😄
It took me quite a while to model and split each piece optimally, making it easy to print and assemble
Of course, let me know if you have any suggestions or ideas for improvements!
For printing, I used PLA Matte grey Bambu Lab on Frostbite BQ plate
I RECOMMEND PRINTING EVERYTHING ON A VERY CLEAN PLATE, ESPECIALLY THE BENCH!
GENERAL TIPS:
- When detaching the bench from the plate, do so carefully, it is quite fragile
- Model to be glued, but everything is made easy by the interlocking parts I created 💪
- I have created assembly and mounting instructions to simplify the work :D
- I ADVISE NOT TO TOUCH THE PRINTING PARAMETERS THAT I HAVE STUDIED FOR EACH INDIVIDUAL ELEMENT AND PERSONALLY TESTED. SUPPORTS AND BRIM HAVE BEEN MADE AD HOC FOR EACH ELEMENT.
For any doubts, feel free to write to me and let me know! THANK YOU ALL
OTHER MODELS IN THE HOLLOW KNIGHT SERIES:
- Hollow Knight base: link to the model
- Hornet: link to the model
- Hollow knight - moment of peace: link to the model
Documentation (1)
License
You shall not share, sub-license, sell, rent, host, transfer, or distribute in any way the digital or 3D printed versions of this object, nor any other derivative work of this object in its digital or physical format (including - but not limited to - remixes of this object, and hosting on other digital platforms). The objects may not be used without permission in any way whatsoever in which you charge money, or collect fees.
Comment & Rating (110)