Flow Test Flowrate calibration Yolo manually rate


Print Profile(2)


Description
Updates:
2026.03.23 added “OrcaSlicer 2.3.2 - FLOW TEST Calibration - Yolo vs Travis90x.3mf”
Use the Process: “FLOW TEST N0.4 Speed 100”
####################
Spoiler: there are no perfect values for flow, ironing, pressure advance, retraction etc. that work for everyone.
There are good values that work better than others, but if you’re chasing perfection you’ll have to find your own.
I released a version for BambuStudio and one for OrcaSlicer.
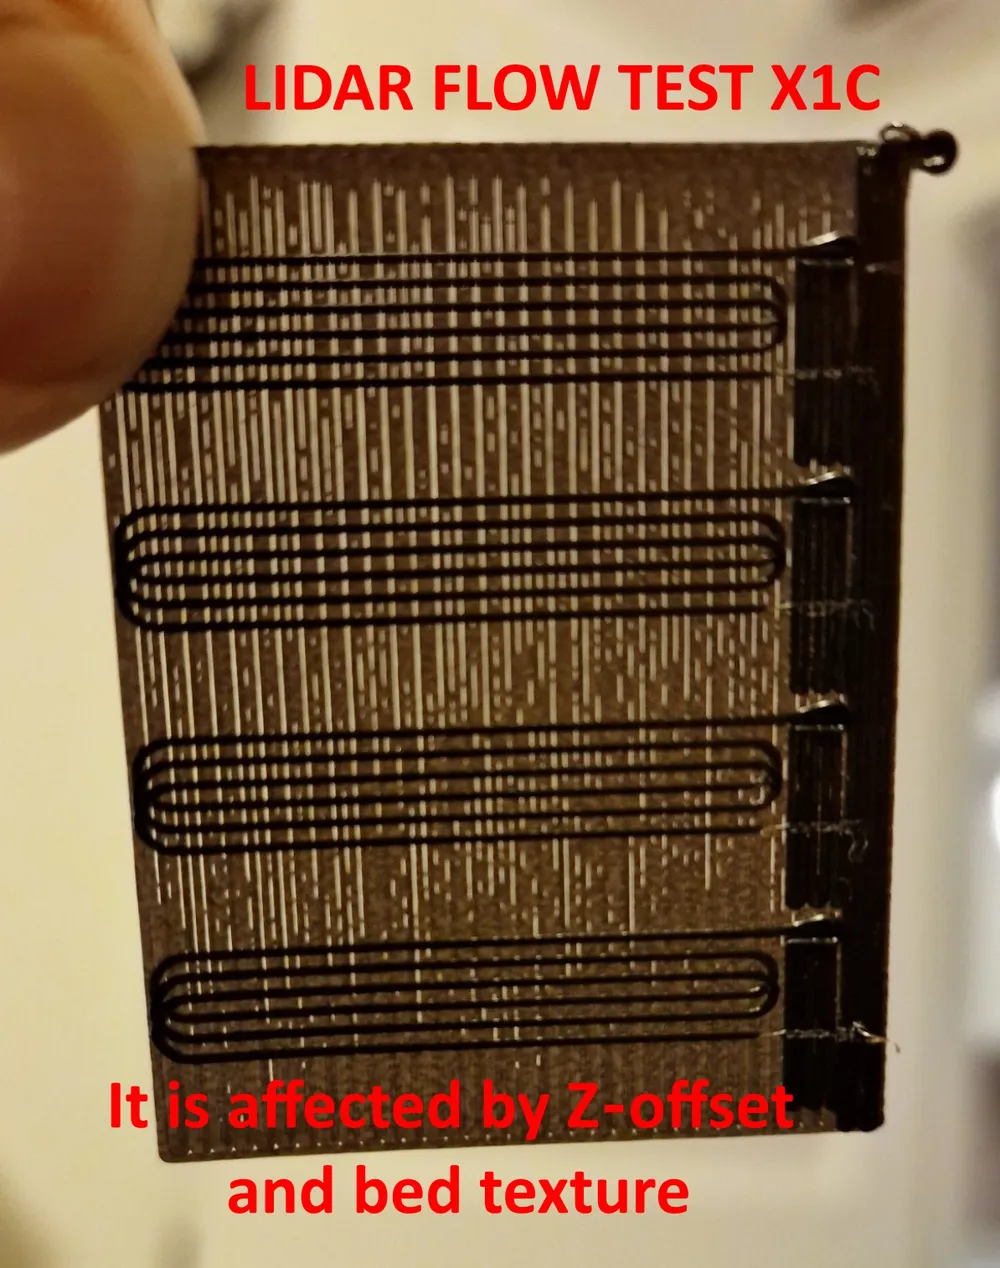
This is the manual flow test I use, and I’ll briefly explain how to set it up.
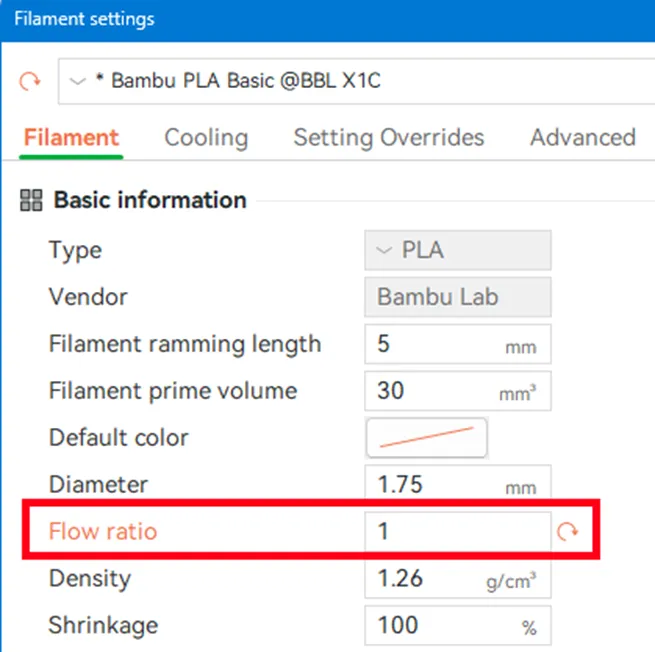
- Start by setting the filament flow to 1 (100%) for the material you want to calibrate.
Set the top surface speed and the top surface pattern to the same ones you will use in a “real print”.
If the printer is changed, you have to recreate the Process Profile “FLOW TEST”,
set all the speed at the “Top Surface” speed to notice differences of colours for different Flow in the Preview.


- Select the rectangles with the corresponding flow you want to test, right-click, and enable "Printable"

- Check whether the flow modifier is working; if you don’t notice differences, compare the color of the 50% and 115% rectangles.

Print the parts and compare them as in a normal calibration test.
Once you find the correct flow, enter that value in the filament’s Flow rate section.
If you start the test with a flow value of 1, you don’t need to use any formulas or make proportions.Only check the inner area of the rectangles — the outer edges will be affected by Pressure Advance, which may not be calibrated yet.

Why not use small rectangles?
If you want a good surface quality on top layers printed at high speed, you should actually test with rectangles even larger than in this test, so that the printer’s kinematics acceleration doesn’t limit the actual maximum speed of the print head on the part.
The slicer does not show the real print head speed — meaning the slowdowns and accelerations into and out of curves — it only shows the target speed set in the software.
Leave 1 bottom layer, but make sure you have at least 1 mm thickness for the top:
if you need to test large nozzles and therefore require more top thickness, increase the height of the rectangles and the number of top layers.
Why do it manually with this 3mf?
Unlike OrcaSlicer, Bambu Studio does not allow you to manually adjust the flow of a single object on the build plate, nor does it let you customize and test different top layer patterns.
That’s why I imported my test from OrcaSlicer, keeping the modified flow values for each individual object.

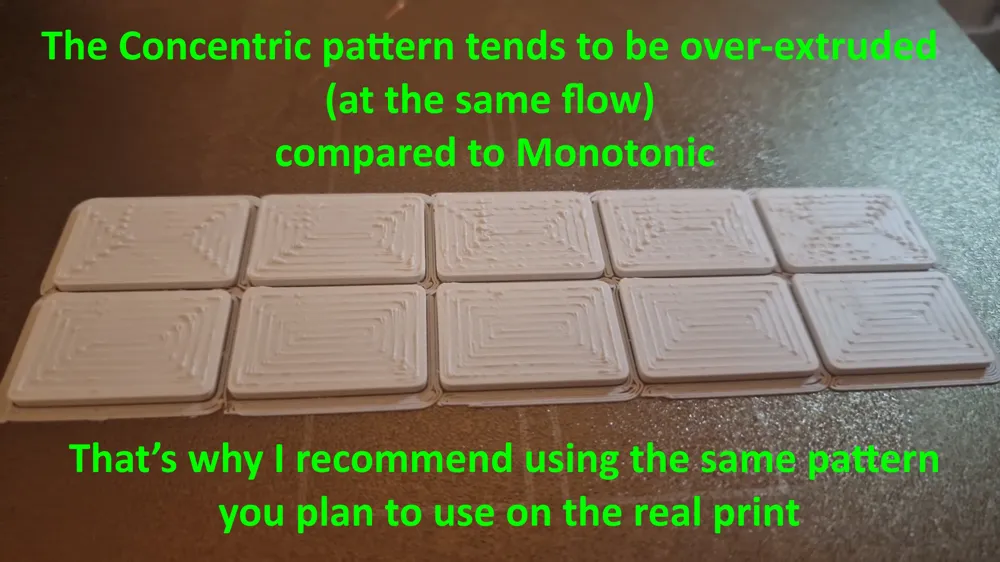
Recently OrcaSlicer has been recommending Archimedean chords for the top infill, but I don’t agree with this choice.
My advice: use the same top infill pattern that you actually plan to use on the real part you’ll be printing.
Why use only 1 bottom layer with infill underneath?
This way, the top surface won’t be affected by possible z-offset errors that could alter the flow.
The top layers will have free space underneath, on the infill.
For this reason, I also recommend making the top thick enough to compensate for any potential filament sagging into the infill.

A bit of history
Years ago, flow calibration was done using the Thin Wall Test, a cube with one or more walls that you measured with calipers.
This method was gradually abandoned, partly because it didn’t provide a reliable surface quality evaluation, and partly because other factors influenced the measurements.
For example, the slicer might let you measure the thickness of three 0.4 mm walls, if there’s overlap between them, or give a different result when using outer-inner wall order without overlap. (I’ll refer you to articles that go into detail on this.)
The correct flow value based on the surface quality of the top layers can change depending on the chosen top infill pattern.
That’s why IMHO you should set the same top pattern in the test as the one you’ll actually use in the real print.
Only if you cannot clearly see the difference between flow values — for example because of the filament color or material — you could use the Archimedean chords pattern, which highlights the differences more clearly (sometimes even by touch, scratching lightly with a fingernail).
⚠️ Note (IMHO): this doesn’t necessarily mean you’ll get the best surface quality if you later print the actual part with a different pattern than the one used during the test.
Example:
- In the test I use Archimedean chords and get a correct flow value of 0.98.
- On the real part, I use Monotonic top infill: the surface might actually look better with 0.97 or 0.99 flow.
The same reasoning applies to the surface quality of ironing or perimeters, where Pressure Advance comes into play, as well as Retraction and Wipe settings that might show stringing, etc.
All of these are influenced by flow, so if you want to find correct values for PA, ironing, retraction, etc.,
you must always start from a consistent flow calibration.
Just like flow, the parameters for PA, ironing, retraction, etc. will also vary depending on:
- filament type, color, and material (even between two spools from the same brand);
- printer hardware (extruder, hotend, nozzle, kinematics, and their software management);
- environmental factors such as temperature, humidity, etc.
References:
https://manual.slic3r.org/advanced/flow-math
https://github.com/SoftFever/OrcaSlicer/wiki/flow-rate-calib
https://github.com/SoftFever/OrcaSlicer/wiki/quality_settings_precision#precise-wall
Next Step?
Pressure Advance and
try my Ironing Calibration Test by Flowrate & Line spacing

License
You shall not share, sub-license, sell, rent, host, transfer, or distribute in any way the digital or 3D printed versions of this object, nor any other derivative work of this object in its digital or physical format (including - but not limited to - remixes of this object, and hosting on other digital platforms). The objects may not be used without permission in any way whatsoever in which you charge money, or collect fees.
Comment & Rating (14)