Rumi belt and suspender pieces


Print Profile(1)

Description
Belt and suspenders accessories for Rumi cosplay. This print is for the squares on the belt and the triangle pieces on the suspenders.
Note: These pieces are delicate and the supports are tight. Take your time removing the supports to avoid breaking the pieces. I used a metal pick and nippers to remove mine. If you are finding support removal troublesome, You can use PLA for support material instead (if you print with PETG), or increase the top and bottom Z distance for the supports.
I printed mine with PETG, but these would also print fine in PLA.
I will be adding a thin layer of clear resin to the parts to add a shiny effect and make them look less 3d printed. I haven't ordered the resin yet, so that is not in the pictures unfortunately.
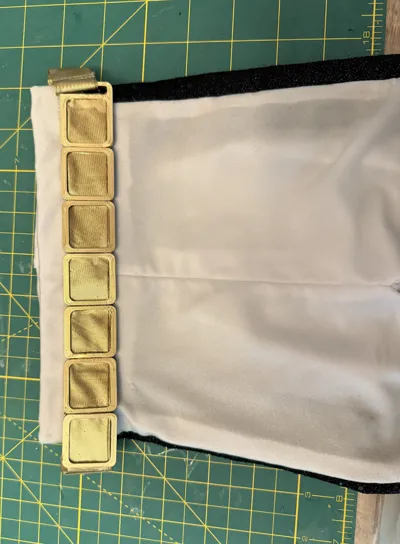
Belt:
The pictures I have included are for a CHILD sized costume. Please measure your waist to decide how many squares you need to print. Each square is 29mm wide (1.14 inch). Measure your waist (in inches), divide by 2, then divide by 1.14 to figure out how many squares you need to cover the front of your waist.
I put each of these on some gold bias tape I had that is 7/8 in (2.22cm) wide. I would personally recommend you use elastic or ribbon though for a cleaner look.
If you choose to use a 1 inch ribbon, you will need to make the squares 4 mm taller.
After you thread all the square pieces for the belt, glue the ribbon to the hook square (see pic with blue circle to see where to glue. This will keep the ribbon from falling out of the belt on one side.
The belt squares only go on the front of her waist, so after putting on enough to cover the front, I wrapped the rest of the bias tape around my waist and marked the length to go fully around the waist. At the end of the ribbon, sew or glue a loop to hook onto the belt. My loop is about ½ inch.
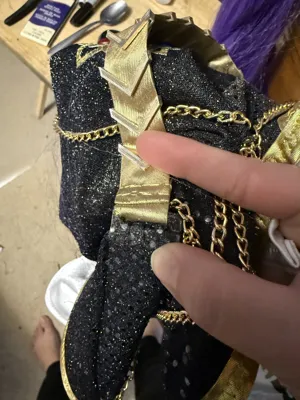
Suspenders:
For the suspenders, I glued the triangles 1 inch apart (measuring from the tips of each triangle) on 7/8 inch bias tape until I had enough on the tape to cover the distance I wanted. I made one for each shoulder to match her Golden outfit (suspenders are visible on both sides and no shoulder armor). I used 9 triangles on each ribbon (18 total) for a child sized costume.
If you choose to use a 1 inch ribbon, you will need to make the triangles 5 mm wider.
The triangles have a tall face and short face. make sure you have them all threaded the same way before gluing. I glued the triangles to the back of bias tape to keep them from slipping out of place then sewed a loop on the end of both sides of the bias tape that is big enough to just barely go through the clip opening (about ½ inch).
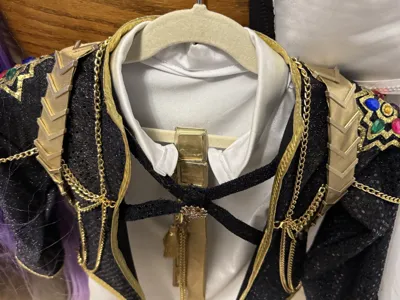
The clip-
Before sewing, I glued a piece of my black shiny fabric onto the clips to make them blend into the jacket. You could also paint them gold to match the suspenders if you prefer that.
The clips have 4 holes on them that I sewed onto the jacket. I sewed across the clip to secure it, then looped around the clip to make a ‘plus’ shape with thread on each hole to secure it to the jacket. They are secured to the shoulder blades and to just under the armpit on each side. For orientation-I faced the clip opening on the shoulder blades DOWN with the opening towards the collar and the armpit clip opening UP towards the belly (see last 4 pics - first 2 are top (collar), last 2 are bottom (armpit)).
License
You shall not share, sub-license, sell, rent, host, transfer, or distribute in any way the digital or 3D printed versions of this object, nor any other derivative work of this object in its digital or physical format (including - but not limited to - remixes of this object, and hosting on other digital platforms). The objects may not be used without permission in any way whatsoever in which you charge money, or collect fees.
Comment & Rating (20)