N/HO Scale Town Building/Shop


Print Profile(2)


Description
Membership
Wanna sell physical prints of my models? Subscribe to my Commercial Membership today for only $5 a month! The support helps so much! Thanks!
!!!PLEASE READ AND UNDERSTAND ENTIRE MODEL DESCRIPTION BEFORE PRINTING!!!
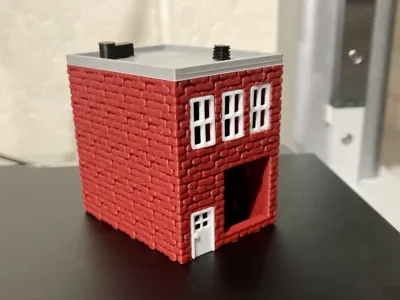
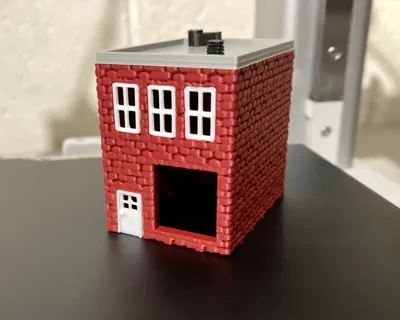
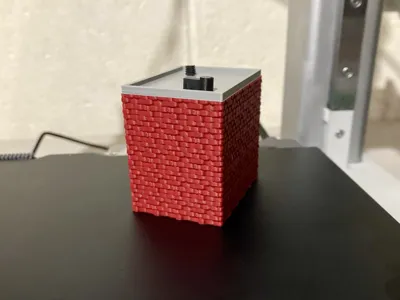
Hey everyone! This is my N/HO Scale Town Shop Building for your model railroad, or other miniature setup. I took lots of time on the immaculate detail on the bricks, and roof accessories, so I hope you enjoy it!
*Please use my uploaded .3mf files for best print quality*
- I recommend using tree supports for the overhangs over the windows and door, and use a somewhat small layer height for best detail.
- Please clean your build plate before printing, to ensure best adhesion.
- Read the assembly guide fully before printing.
- Print objects separately for optimized color options, or print all the same color and paint it yourself.
ASSEMBLY GUIDE:
Step 1: Print out all parts and use appropriate supports where needed. Glue will be needed for the roof and door, windows may need glue depending on your printer's tolerances.
Step 2: Take the two black pieces, labeled “Roof Pieces” and correctly install them on the notches of the roof, as shown in the model photos above.
Step 3: Glue the roof onto the main base, ensuring it is centered, for a more polished appearance.
Step 4: Snap the windows in place, using the model photos above as a reference if needed. You may need glue depending on your printer's tolerances.
Step 5: Place a dot of glue on the back of the door piece (the side without the door handle) and place in door space as shown in photos above.
Step 6: Allow glue to dry as long as necessary, and enjoy! I recommend using similar colors to the ones I used for best visual appeal.
Thanks for reading this description before printing! Hope you enjoy the model and make sure to provide a photo of it in your layout in the comment section and leave feedback to help me improve! :)
License
You shall not share, sub-license, sell, rent, host, transfer, or distribute in any way the digital or 3D printed versions of this object, nor any other derivative work of this object in its digital or physical format (including - but not limited to - remixes of this object, and hosting on other digital platforms). The objects may not be used without permission in any way whatsoever in which you charge money, or collect fees.
Comment & Rating (20)