Cooling Pad for Laptops stand


Print Profile(1)

Description
Hello everyone, I'm adding a modified model of a great cooling pad that works better than purchased cooling pads because it uses powerful PC fans.
To build the base you will need:
2x 120mm PC fans. (You can also use old ones you have lying around at home.) (I used ARCTIC P12 120mm)
Six M3x8 screws and a screwdriver
8x M4X35mm countersunk head screw + nut
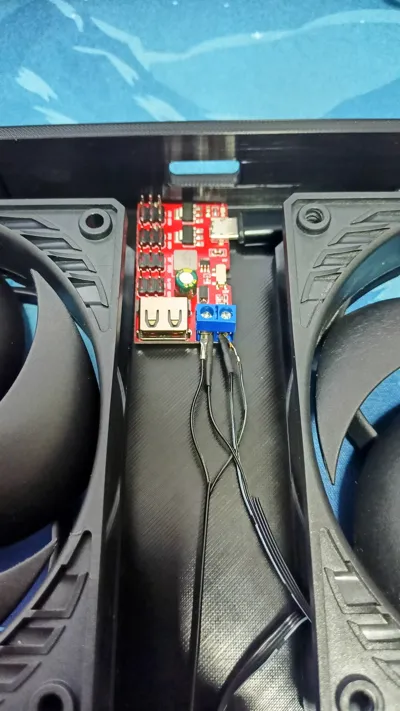
Step-Up module (USB breakout power supply module DC-DC micro USB 5V on 9V/12V)
1)Assemble the mat according to the photo.
2)The module can be attached with double-sided adhesive tape.
3)Fan connection. We will start by preparing the power cables from the fans. For our purposes, we are interested in the first two wires from the left, the first is minus (GND) and the second is plus (+12V). We will therefore separate these two wires from the connector using a knife or other tool. We can cut the remaining wires, as they will not be needed. Just for fun, the remaining two cables are either sense (sensor) or control (control). The sensor is responsible for sending the transmission of the fan speed back to the controller or motherboard, for monitoring the speed in the computer. Control is then a PWM control signal that allows you to dynamically regulate the fan speed. However, our pad will have a fixed fan speed and therefore we do not need these cables.
I was inspired by the most expensive cooling pads. Which use memory foam for greater cooling efficiency. That's why I added insulating material under the pad that fits right up to the laptop. The air then passes through the laptop and doesn't come out the side. You don't have to worry about damage, today's laptops have a lot of holes and cracks where any excess air can escape.
What did I change on the model compared to the original?
The main modification is to widen the pad to the sides, because in the original model the laptop's feet were in the air. Another modification is the bottom laptop grip, the original one was not sufficient and the laptop would slide off.
Some photos and parts of the description are from the original creator's description in accordance with the license
Original instructions from the creator including cooling test: https://www.geekboy.cz/clanek/vlastni-chladici-podlozka/
This remix is based on

License
You shall not share, sub-license, sell, rent, host, transfer, or distribute in any way the digital or 3D printed versions of this object, nor any other derivative work of this object in its digital or physical format (including - but not limited to - remixes of this object, and hosting on other digital platforms). The objects may not be used without permission in any way whatsoever in which you charge money, or collect fees.
Comment & Rating (1)