Mini-ITX Cube PC Case Chassis


Print Profile(1)

Bill of Materials


- Momentary power supply switch x 1: See link to Amazon for example
- M3 heat set inserts x 12:
Description
Hi there.
This model is the result of a desire to re-use some parts from an old PC, the original desktop had outlived it's usefulness as a day to day machine but could still work as a network server. Additionally, I wanted to to be set up as a Minecraft server for my daughter and her friends to use. So I decided to make it into a more decorative case.
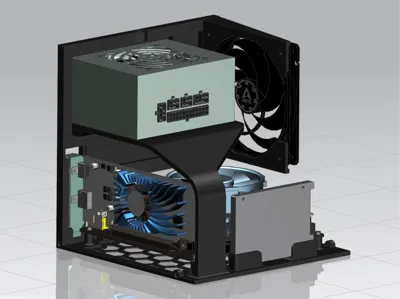
Using some inspiration from other mITX cases online I have designed this fully 3D printable case which is an exact cube. It is somewhat tailored for the hardware I have used but it should work with other configurations. I have printed this in PETG so it will be resistant to the temperatures generated by the CPU/GPU, I cannot guarantee that it will be sufficiently strong if you print it in PLA.
Example PC Hardware list:
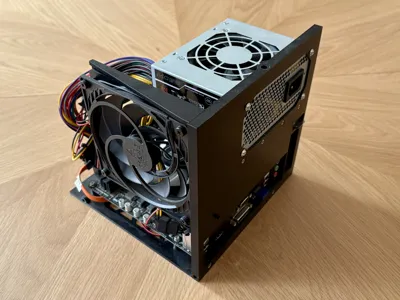
- Asus H110i mITX motherboard
- Intel i5 CPU with low profile cooler
- Half height GPU
- Single SSD
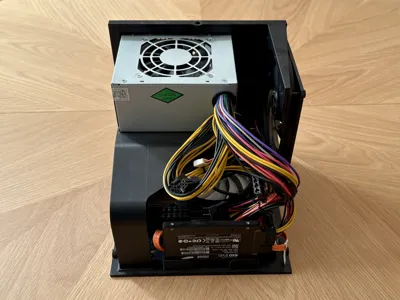
- SFX PSU - Amazon Link
Additionally the following hardware is needed:
- Momentary power supply switch - Amazon Link
- Diameter 5x2mm magnets x4
- M3 flat washers x4
- M3x8 cap head screws x6
- M3x6 cap head screws x2 (to attach the SSD)
- M3x12 cap head screws x6
- M3 heat set inserts x12
- Plus usual PC internal cables (though I only used a SATA)
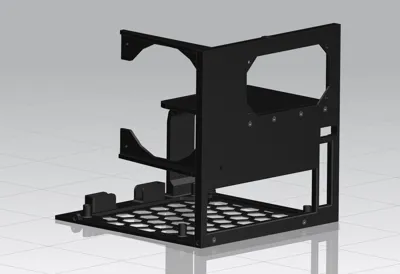
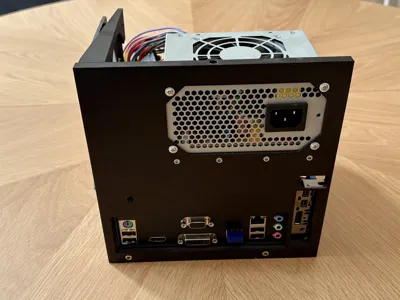
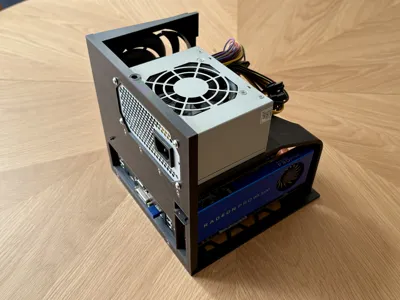
The size of the case is mostly driven by the size of the motherboard, the cube design was the easiest way to house the motherboard, graphics card and the PSU. I have another case in the works that doesn't include the PSU or a GFX card, and will be more slimline.
I will write some instructions for case assembly soon, however it is only three prints and a few cap screws to fit it all together so it is fairly simple, as long as you assemble the motherboard onto the base before adding the back and support pieces. Note that the SSD will only go in one way up otherwise the ports will be blocked (this is by design to support the SSD fully).
One final note, the IO shield is a separate printable piece, this is because I did not have the shield for the original motherboard, this works great for the model of board I have but you may need to print your own. I have included a STEP file of the blank IO shield for you to modify and add in whatever portholes you need.
Take care installing the magnets if you use them, keep the same polarity facing the outside of the case.
Covers
These covers can be printed to go over the base chassis of the case:
- Borg Cube - LINK
License
You shall not share, sub-license, sell, rent, host, transfer, or distribute in any way the digital or 3D printed versions of this object, nor any other derivative work of this object in its digital or physical format (including - but not limited to - remixes of this object, and hosting on other digital platforms). The objects may not be used without permission in any way whatsoever in which you charge money, or collect fees.
Comment & Rating (1)