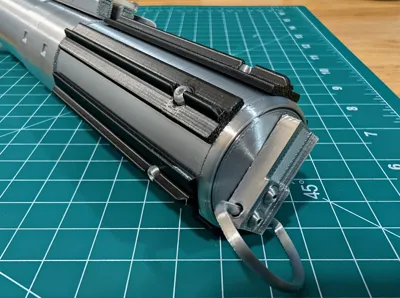
Luke Skywalker's ESB Hilt


Print Profile(4)


Description
This is the one. This is the lightsaber that started my journey towards Star Wars Geekdom. My first Memory of Star Wars was going to the movie theater with my father to see Empire Strike back. I was about 6 years old so it must have been a re-run in the theater… but it was the most incredible thing I had ever seen that has stuck with me to this day.
I tried to do this hilt justice. Schematics were pulled from the interwebs, my own Disney saber for reference, as well as a plethora of Graflex flash cell pics. I tried to make this easily printable so I had to make certain design choices along the way. If you are interested, I will have the ANH version of this saber posted in a couple days.
If you're looking for Luke's OG hilt from ANH, you can find it here: https://makerworld.com/en/models/1840636-luke-skywalker-s-anh-hilt#profileId-1966260
Before you get started, please read everything below. This saber has a couple VERY DELICATE PARTS:
- Silk PLA is brittle and has horrible layer adhesion - especially with small parts. On this saber, the shroud and ‘bunny ears’ are especially delicate. Treat those two parts like glass when you are assembling.
- Silk PLA is brittle; The bunny ears, shroud, and the square hole in the upper hilt must fit perfectly together. Take EXTRA care in removing all of the support material and test fit the parts before final assembly.
- Silk PLA is brittle. This will look great on your shelf or bookcase - I would not recommend this hanging from your belt for cosplay. If you feel you must (and I don't blame you), I would recommend printing the bunny ears and shroud out of regular PLA and spray painting it.
Filaments Used:
- Ziro Silk PLA - Silver
- Ziro Transparent PLA
- Sunlu Silk PLA - Gold
- Elegoo PLA - Black.
Assembly:
Assemble the 3 hilt sections using the hilt bolt. Note that there are orientation tabs between the upper and mid sections of the hilt.

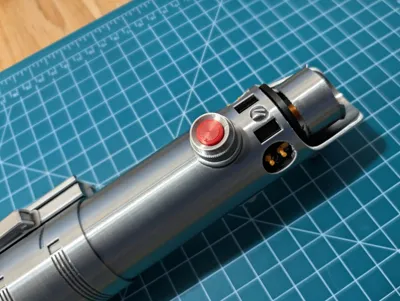
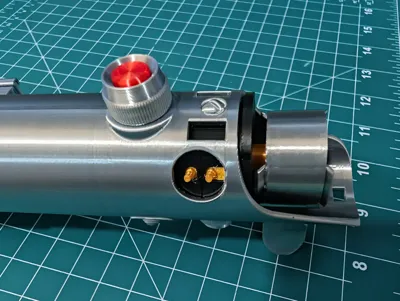
Insert the emitter plug and secure it with the front button and button collar. You can then insert the charging pins and pin blocks. Complete the assembly with the emitter top cap secure with the emitter pin.

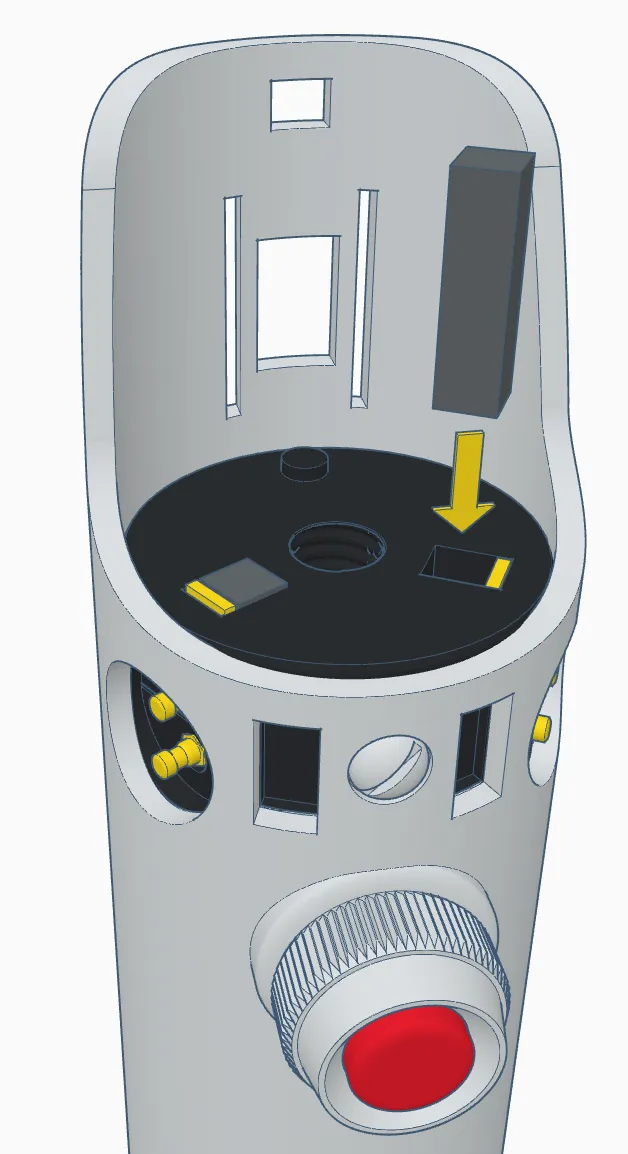

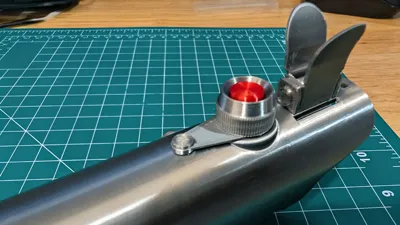
For the mid section, slide the activation panel into the clamps. It will lock into place with the notches. Then assemble the clamping lever and press fit it into the clamp.

Press the ‘screw heads’ into the grips from the rear, then slide each of the grip t-tracks into the lower hilt.


Secure the grips by installing the lower cap assembly. Note that the D-Ring will need to be snipped before installing.

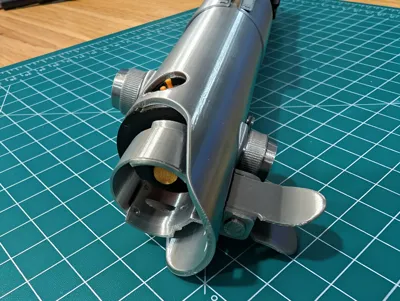
Now for the delicate part. Gently install the shroud and bunny ears as shown. If you feel resistance, STOP, LOOK, and pull out the file if needed. The shroud assembly will be secured with the other two push pins.

At this point, you're either jumping for joy or cursing my name. Either way, you're almost there. Last step - install the second red button and collar to complete the build.

Enjoy!
Boost Me (for free)
If you like my work, consider giving me a boost!
Or you could always…

Comment & Rating (71)