Search models, users, collections, and posts

Useless Box with USB-C

GIF

Print Profile(1)

All
X1 Carbon
A1 mini
P2S
A1
H2S
X1
H2D
H2D Pro
P1S
P1P
X1E
H2C
X2D
A2L

0.2mm layer, 6 walls, 25% infill
Designer
7.3 h
3 plates
4.5(4)

Open in Bambu Studio
Boost
133
304
29
9
141
54
Released 

Description

I have always wanted to design my own wonderfully pointless gadget to 3D print! Now powered using USB-C!


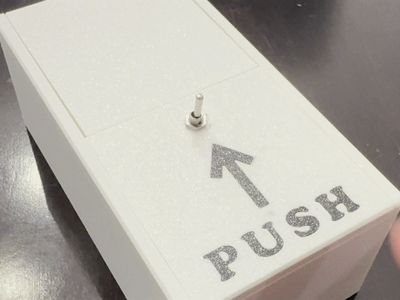
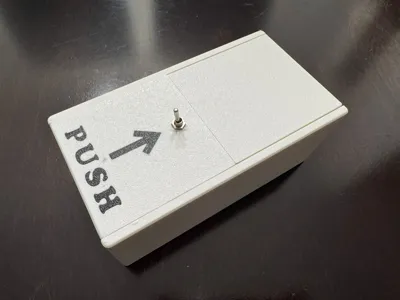
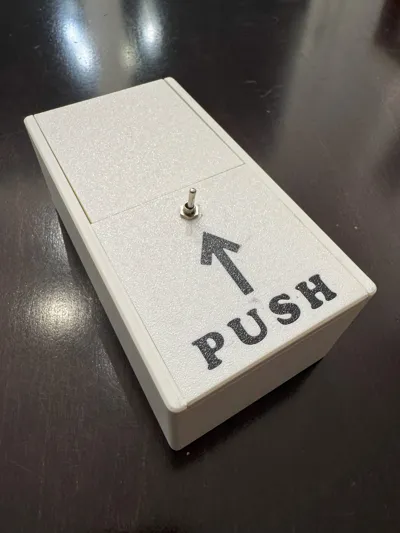
How it works: Simply flip the switch to “ON” and watch as a mechanical finger emerges from the box to flip it right back to "OFF" before retreating. That's it. That's literally all it does. And it's absolutely perfect.


Key Features

Modern USB-C Power - Say goodbye to searching for batteries or wall adapters! Powers directly from USB-C source 

🎯 Classic Useless Action - Faithfully recreates the original pointless experience 

⚙️ Reliable Mechanism - Smooth, consistent operation for maximum uselessness 

🎪 Conversation Starter - Guaranteed to amuse, confuse, and delight visitors

Perfect For

  • Desk toys that serve no purpose
  • Gifts for engineers, makers, and people who appreciate absurdity
  • Demonstrating negative feedback loops
  • Teaching basic electronics and mechanics
  • Adding pointless joy to your workspace

Print Details

  • Prints without supports
  • The letters in the cover can be printed multicoloured in place or separately and glued

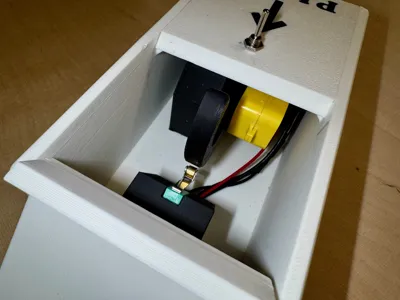
Additional components required

Assembly instructions

  • Push the USB-C connector into the opening behind the box
  • Solder extension leads into the micro switch
  • Push the micro switch into the slot in the end stop support, roller facing down
  • Fasten the motor and the finger into the motor support using the M2 and M3 screws 

  • Fasten the DPDT Switch to the cover
  • Solder the connections according to the wiring diagram

  • Fasten the preassembled end stop mount, motor mount, and cover using super glue.
  • Route the cables through the channel below the end stop mount.


  • Fasten the lid by pushing a piece of filament as a hinge pin

✨Additional tips

  • The pins in the DPDT Switch are quite small. You can twist the outermost pins to get a little more space for soldering
  • Do a dry run to check that everything is working as intended before attaching the finger to the motor and the motor to its mount

🤔 Why Build This?

Because sometimes the most satisfying projects are the ones that accomplish absolutely nothing. In a world obsessed with productivity and efficiency, the useless box stands as a monument to the joy of pure, unadulterated pointlessness.


Warning: May cause uncontrollable giggling, existential questions about the nature of purpose, and an inexplicable urge to show it to everyone you meet.


This design is part of my Gadgets collection. Check it out for more useful prints like this.
https://makerworld.com/en/collections/4371323


If you like the design, consider buying me a coffee or contact me for a custom design inquiry at:

https://buymeacoffee.com/tinkerer_designs


Check out my portfolio:
https://makerworld.com/en/@tinkererdesigns


Boost Me (for free)

Would you like to see other designs like this?


Comment & Rating (29)

(0/1000)

Pinned by Designer
Print Profile
0.2mm layer, 6 walls, 25% infill
A very useless box, exactly as intended.
The profile uploader has replied
profile
1
Reply
Indeed :D Thanks for the review!
0
Reply
The designer has replied
0
Reply
I used quite thin cable for this, like 26 awg I had lying around. But it really doesn't matter what you use as long as you can solder it to the connectors and make it fit inside the box
0
Reply
Replying to @tinkererdesigns :
any color matter or follow color? likely red and black and short or long line ? @tinkererdesigns 26Awg?
(Edited)
0
Reply
Replying to @RichWoman3D :
The colour doesn't matter, it's just for convenience. I had only black and red in my disposal at the time making this
0
Reply
@tinkererdesigns wow I would love it but I need get link for full Parts I can order them for Parts then printer it :) then I’ll would boost you
(Edited)
The designer has replied
designer
1
Reply
Certainly. I Added links to AliExpress items in the description. You can find these same components from pretty much every electronics shop.
(Edited)
1
Reply
Replying to @tinkererdesigns :
thank you so much! and one more thing what about Basic wiring? link? @tinkererdesigns
(Edited)
0
Reply
Replying to @RichWoman3D :
I just found this on AliExpress: $1.28 | 1/10M 14/16/18/20/22/24/26/28/30AWG UL3239 3KV Silicone Wire Insulated Tinned Copper Electrical Cable 3000V https://a.aliexpress.com/_m0s0yT3 @tinkererdesigns I not sure which one? likely that
designer
1
Reply
Print Profile
0.2mm layer, 6 walls, 25% infill
changed my rating because maker provided great infos about wiring and was able to succeed. thanks A LOT 🙏🙏🙏
(Edited)
The profile uploader has replied
profile
1
Reply
I can check If I can get some clarifying pictures and explain the wiring more. Could you clarify, what kind if information you require?
0
Reply
Replying to @tinkererdesigns :
the motor and switch on/off position wiring, they can both be inversed we don't know which position it is. Also the usb connection has black/red wires, maybe change the green wire on your diagram for black color. When i first tested the motor wasnt acting like it should. So it's hard to understand if the problem is the motor, usb wires are inversed or if the switch is inversed since it's 2 lines of 3.
(Edited)
profile
1
Reply
Replying to @akom_plice :
Regarding the motor and switch orientation, you're right that both could be inverted and that makes troubleshooting tricky when you're not sure which element is the culprit. I switched the green and black colors in the wiring diagram like you suggested. I also put together a second diagram using the 3D model with the same color scheme, and I enlarged and tilted the DPDT switch on its side so the connections are easier to follow. Please take a look and let me know if the updated diagrams are clearer for you. Any feedback is welcome!
(Edited)
1
Reply
the diagram you posted is clear but how to know the orientation of the switch and motor for the wiring?
(Edited)
The designer has replied
0
Reply
I've added another schematic that hopefully clarifies the wiring. Also, I suggest doing a dry installation first, without any printed parts, to ensure that the motor spins in the right direction in both switch orientations.
(Edited)
0
Reply
this seems fun but i'm really not very ready to buy components so im going to make the lego version, very impressive model besides that
The designer has replied
designer
1
Reply
Understandable. It's a small project. Fun, but still a project
0
Reply
Hello Do you actually have to program for the useless part
The designer has replied
Show original
0
Reply
No need for programming. It works with simple analog components
0
Reply
Print Profile
0.2mm layer, 6 walls, 25% infill
excellent design
0
Reply
Boosted
Print Profile
0.2mm layer, 6 walls, 25% infill
The profile uploader has replied
profile
1
Reply
Thank you so much for the boost and review!
0
Reply
No more

License

This user content is licensed under a Standard Digital File License.

You shall not share, sub-license, sell, rent, host, transfer, or distribute in any way the digital or 3D printed versions of this object, nor any other derivative work of this object in its digital or physical format (including - but not limited to - remixes of this object, and hosting on other digital platforms). The objects may not be used without permission in any way whatsoever in which you charge money, or collect fees.