Search models, users, collections, and posts
ADV3 Display to CYD adapter
IP Report


Print Profile(1)

0.16mm layer, 2 walls, 15% infill
Designer
22 min
1 plate
Open in Bambu Studio
Boost
1
2
0
0
1
0
Released
Bill of Materials
Maker's Supply Kits and Parts
Select all

List other parts
- CYD x 1:
Description
⚠️ Important: This adapter is only intended for the Adventurer 3 running Klipper.
It is not compatible with the stock firmware.
For support and discussion, please join the Klippventurer Discord:
https://discord.gg/NhamDbpxSF
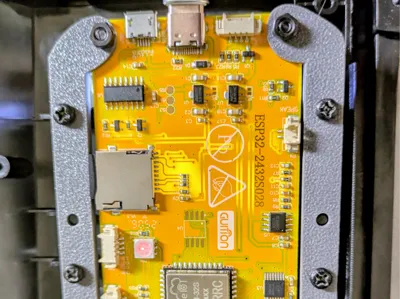
This is an adapter designed to connect the original Adventurer 3 screen to a 2.8-inch CYD (Cheap Yellow Display), primarily the ESP32-2432S028R. Other 2.8-inch models may also be compatible.
You can use either Wi-Fi or USB for data transfer. If you choose USB, you will also need to follow this guide:
https://github.com/MaizeShark/CYD-Klipper/blob/master/serial/README.md#install-linux
💡 Recommendation:
- If you want USB data, use a 180° USB-C (or micro-USB) adapter to the Raspberry Pi.
- If you are fine with Wi-Fi, the JST 1.25 mm connector is the simplest option.
Installation
- Plug the CYD into your PC.
- Follow the installation guide here: https://github.com/MaizeShark/CYD-Klipper/blob/master/README.md#install
Wiring
You have several options for powering and connecting the CYD:
- Connect the JST 1.25 mm connector to the Raspberry Pi’s 5 V pins (CYD pinout: https://github.com/witnessmenow/ESP32-Cheap-Yellow-Display/blob/main/PINS.md#p1).
- Use a 180° USB-C or micro-USB adapter to connect the CYD directly to the Raspberry Pi’s USB port.
- Use an FPC breakout board to draw 5 V from the original display cable.
- Use the Adventurer 3’s front USB-A port:
- For power only, this should work without modification.
- If you also want USB data, you must build an adapter cable from the original mainboard to the Raspberry Pi.
Bill of Materials (BOM)
- Original 4 screws (M3×10 self-tapping)
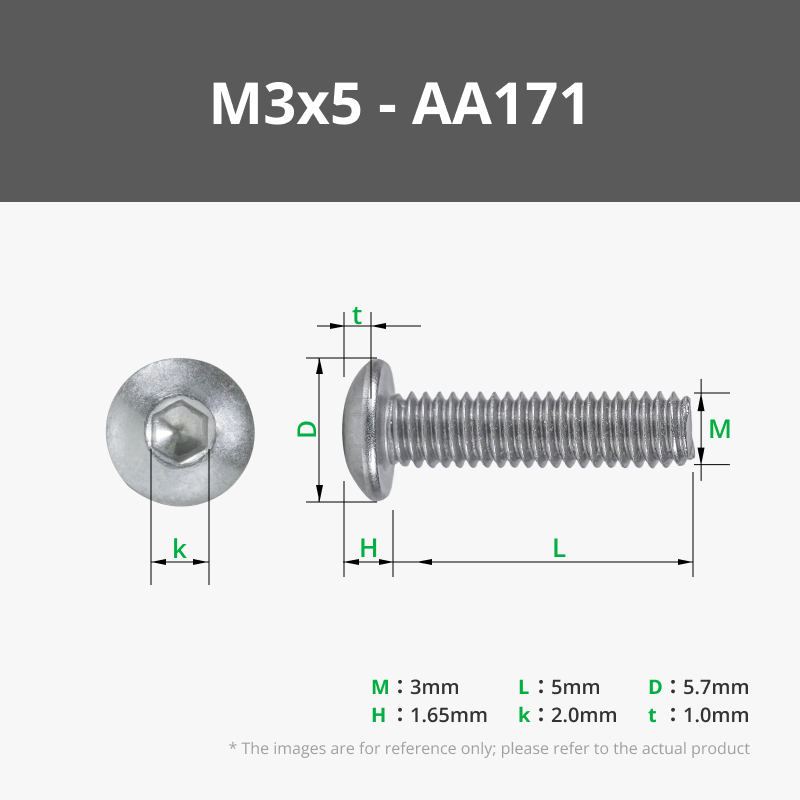
- 4× M3×5 (or longer) screws
- 4× M3 nuts
- Adventurer 3 with Klipper (https://github.com/synthread/Klippventurer)
- 2.8" CYD
- One of the following power/data connection options:
- 180° USB-C or micro-USB adapter
- FPC breakout for the original FPC cable
- Power/data taken from the Adventurer 3’s front USB port
- JST 1.25 mm connector (or directly soldered to the pins)
License
This user content is licensed under a
Creative Commons Attribution-Noncommercial-Share Alike
Comment & Rating (0)