Search models, users, collections, and posts

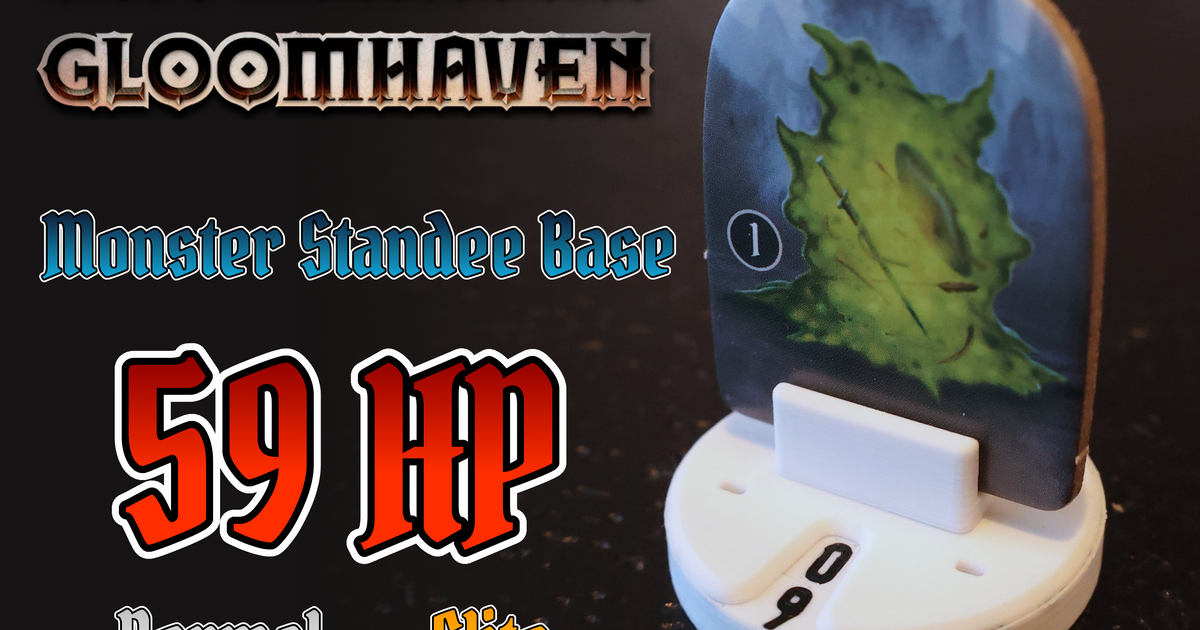
Frosthaven / Gloomhaven monster standee health tracker up to 59 HP

Remixed by

Print Profile(2)

All
P1S
P1P
X1
X1 Carbon
X1E
A1
H2D
H2D Pro
H2S
P2S
H2C
X2D
A2L
A1 mini

5 stands, black/white
Designer
1.6 h
1 plate
4.6(21)

0.2mm layer, black/white
Designer
33 min
1 plate
4.5(11)

Open in Bambu Studio
Boost
80
290
52
43
487
372
Released 

Description

I adapted the original model by @SgtCaffran_841785, tweaked the tolerances to better work on my P1S with 0.4 mm nozzle and 0.2 mm resolution and colored the numbers for easy multicolor-print. I also added the remixed top from @krzysztofk_351979 in one, easy print-ready Bambu project.


About this design

This standee for Frosthaven/Gloomhaven monsters allows for easy tracking of HP using its built-in mechanism to count the 10s digit automatically. You only need to move a single disk to adjust the monster HP from 0 all the way to 59. This also gets rid of accidental rotations of HP like other models have. Other advantages include the option to add condition modifiers as well as being able to read the HP from both sides of the standee. The multicolor-print makes the numbers very easy to read as well!


Print this design

You can use my pre-defined profile that works well on my P1S with the standard 0.4 mm nozzle. I printed about 10 standees so far and had no issues. The profile uses Bambu PLA basic, but I used generic (Giantarm) PLA as well and that also worked without issues.


Note that printing multiple stands at once will result in fewer filament changes/flushes and thus less waste. Use my 5x profile to print 5 standees at once.

Assembly

Step 1

Start with the bottom piece and put in both gears. Be careful to align the gears such that the lower/smaller teeth poke out the sides. I used blue gears to increase the visibility/clarity for this guide.

Step 2

Put the inner ring on top of the bottom piece. The empty number spot should line up with the small gears.

Step 3

Align the outer ring, such that the gear teeth match the notches on the ring. This should match so that the 0 on the outer ring lines up with the empty spot on the inner ring.

If necessary push the holding arms of the bottom piece a litte inwards, so the outer shell can slide all the way down.

Take care to align th notch with gear

Step 4

Finally, add the top piece.


Comment & Rating (52)

(0/1000)

Hi guys! I'm the original designer of this model, I happened to stumble upon this page be chance. Nice to see the positive feedback here as well! It would be amazing if you could also leave a download/comment/rating on my original Printables page as well, to help the model get some more traction. If you have any questions, let me know!
(Edited)
13
Reply
Print Profile
5 stands, black/white
These things are brilliant
1
Reply
Nice to read you enjoy them!
0
Reply
Thanks for posting the design. These will work out great for my group.
1
Reply
Hi man, awesome that you guys use them in the group!
1
Reply
Print Profile
5 stands, black/white
Perfect! I did take the advice from another comment and only did one of the gears and they spin fine now. Thanks!
1
Reply
Print Profile
0.2mm layer, black/white
very impressive model.
0
Reply
Nice to see! Hope you can use them well!
0
Reply
Print Profile
5 stands, black/white
perfect
0
Reply
Boosted
Print Profile
0.2mm layer, black/white
working with the gears can be finicky, but once I learned to make sure the small gears have free movement on their pins, and that the number dials don't have too much friction when they spin and it works great. Bambu PLA basic seems to work better for this tha Matte, but I like the look of Matte better.
0
Reply
Boosted
Print Profile
0.2mm layer, black/white
Beatifull, but hard to rotate
0
Reply
These are tricky to turn, but I omitted one of the small gears and it became much easier. You might try incorporating a magnet into the bottom so that things can be added underneath. A flying stand is most obvious, but you could also add magnetic discs underneath for an additional 60 hp per disc. Would work for high hp bosses at that point.
0
Reply
I'm working on a new design which has a swappable cardboard holder. My current idea is to actually have higher holder to represent flying monsters, so the disk is still on the board. Would that work? Magnetic disk is a nice idea although I'm not sure if it's worth it for the few times you need so much XP. Can easily use a dice for that? I haven't found a good solution for things like shield yet (including the shield number).
0
Reply
Print Profile
5 stands, black/white
Almost perfect
0
Reply
What should change to make them perfect? I'm currently redesigning and testing the model to optimise for 0,4mm nozzles. Also trying different fonts.
0
Reply