Mini Cooper racing door pulls (R50, R52, R53)


Print Profile(1)

Description
Boost Me (for free)
A lot of work went into this design to make it clean, functional, and easy to print. Similar kits for the Mini cost around 90 €, but here you get an improved DIY version for free. If you like the project, consider boosting – it really helps to keep designs like this coming.
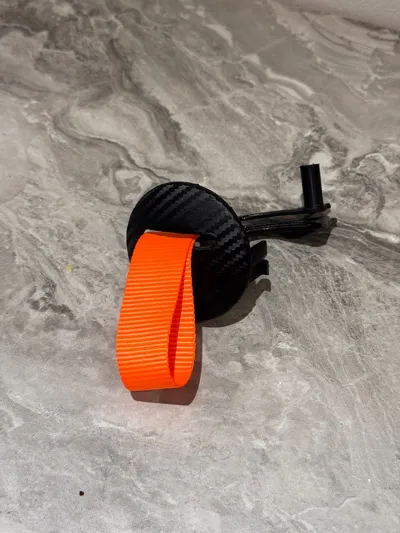
Improved Racing Door Pulls for Mini R50, R52, R53
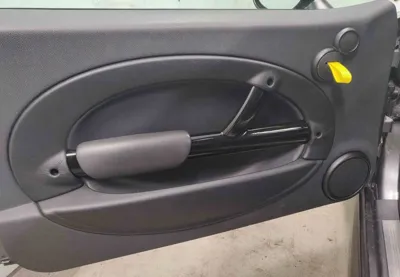
There are aftermarket door pull kits for the first generation Mini (R50, R52, R53) that cost around 90 € https://www.3f-motorsport.de/en/product-page/mini-cooper-s-jcw-r50-r52-r53-rs-gt3-t%C3%BCrgriffe-gurte-door-pulls. While these products look nice, I felt the price didn’t match the actual value. That’s why I decided to design and improve a 3D-printed version that not only recreates the same racing look and feel but also refines the mechanism and cover.
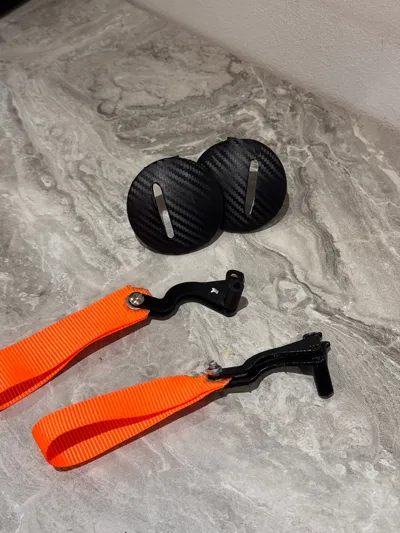
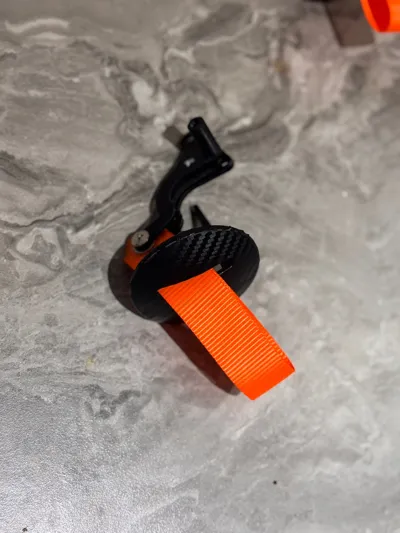
The main improvement in this version is the way the covers mount: they snap into place without the need for a visible screw in the center, which keeps the design clean and minimalistic. I also optimized the models for easier printing and assembly, while keeping the modification reversible so the original parts can be reinstalled at any time.
For durability and heat resistance, I recommend printing the parts in PETG. PLA may deform inside a hot car
I tested the setup on my own Mini R50 for about two summers (roughly 4000–5000 km), and the parts held up without breaking. That said, this is still a DIY part – use it at your own risk. I don’t take responsibility if parts break or you manage to lock yourself inside your car.
What you’ll need
- 2x low-headed M5 bolts (I used washer head type)
- 2x M5 locknuts
- 2–4x M5 washers (depending on the bolt head you choose)
- 2x straps of your desired length (I cut mine from a ratchet strap)
Optional:
- Drill bits to adjust hole sizes
- Wood burning tool / soldering iron for strap holes (melts edges together and makes them stronger)
- Sandpaper for smoothing the cover
- Finishing material for the covers (leather, vinyl wrap, paint, etc.)
Assembly
If you can remove the door panel and OEM handle, installing this kit will be straightforward.
For the left side (mirror for the right):
- Stack the lever pieces with the spacer beneath.
- Insert the lever into the top slot of the inner door handle assembly.
- Use the OEM pin to hold it in place and make sure the cable end is fitted into the lever before closing it up.
- Mount the strap between the lever pieces and lightly tighten the bolts so the strap can still swivel.
- Re-install everything back into the door.
The covers are split into two parts to minimize support material and improve printing. Glue them together using a flat edge as a guide. Finish them however you like, but avoid adding thickness that might affect the fit. Finally, snap them into place and enjoy the satisfying click.
Note: This model is based on an existing 3D design but has been improved and modified with a refined cover and mechanism.

Comment & Rating (3)