
Improved Preset Bambu Lab P1S – by PrintinBad
Print Profile(1)

Bill of Materials

Description
📌 Description – Bambu Lab P1S (PrintinBad Preset)
If you only want to rush, sacrificing quality, these presets are not for you.
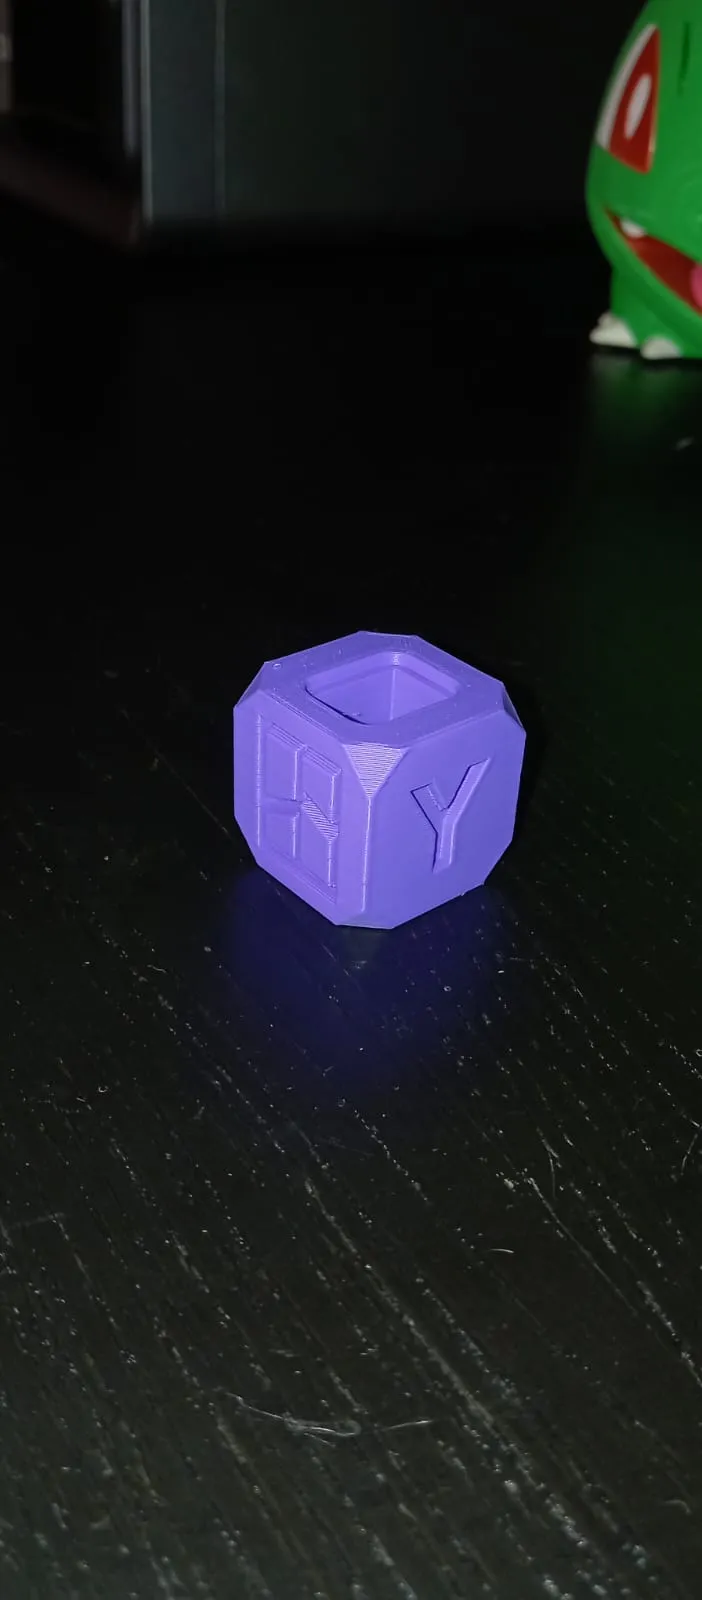
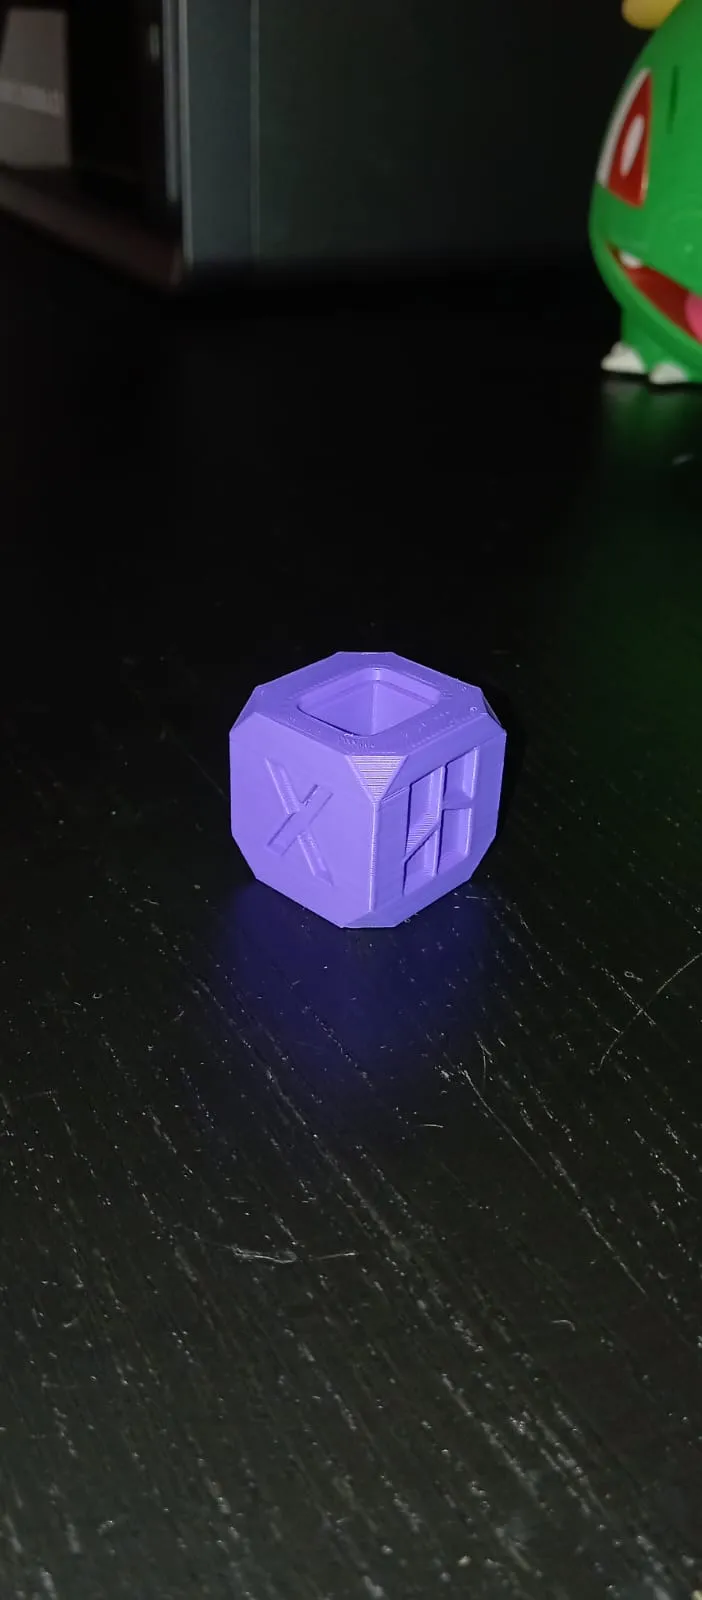
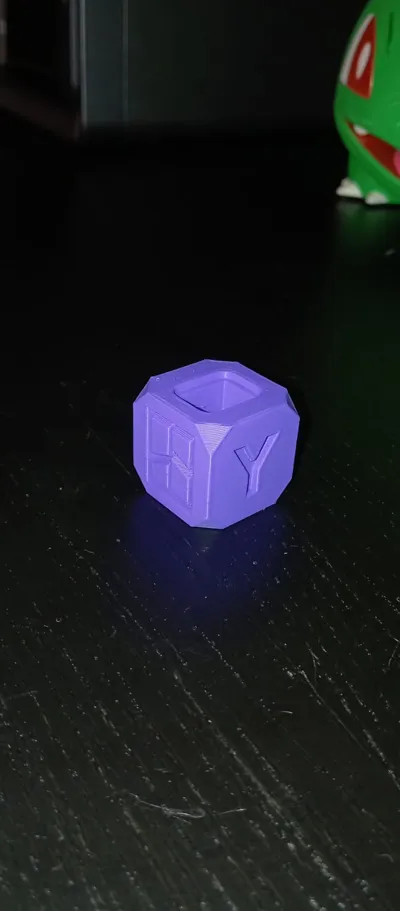
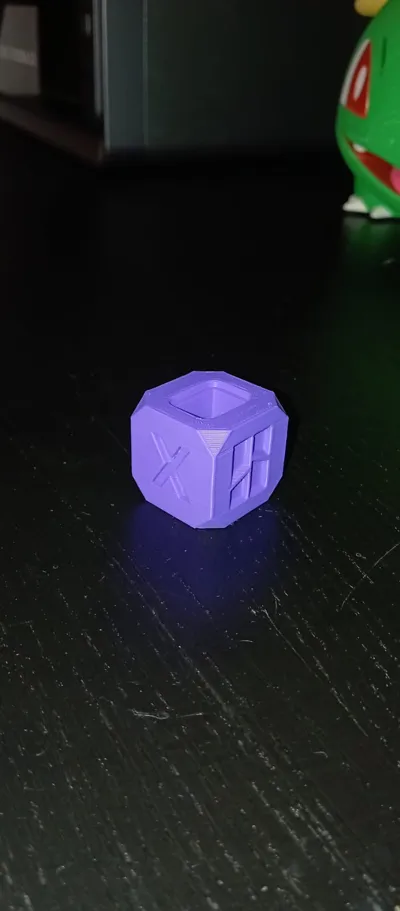
However, if you are looking for clean surfaces, sharp details, and less noise, then yes: they are made for that!
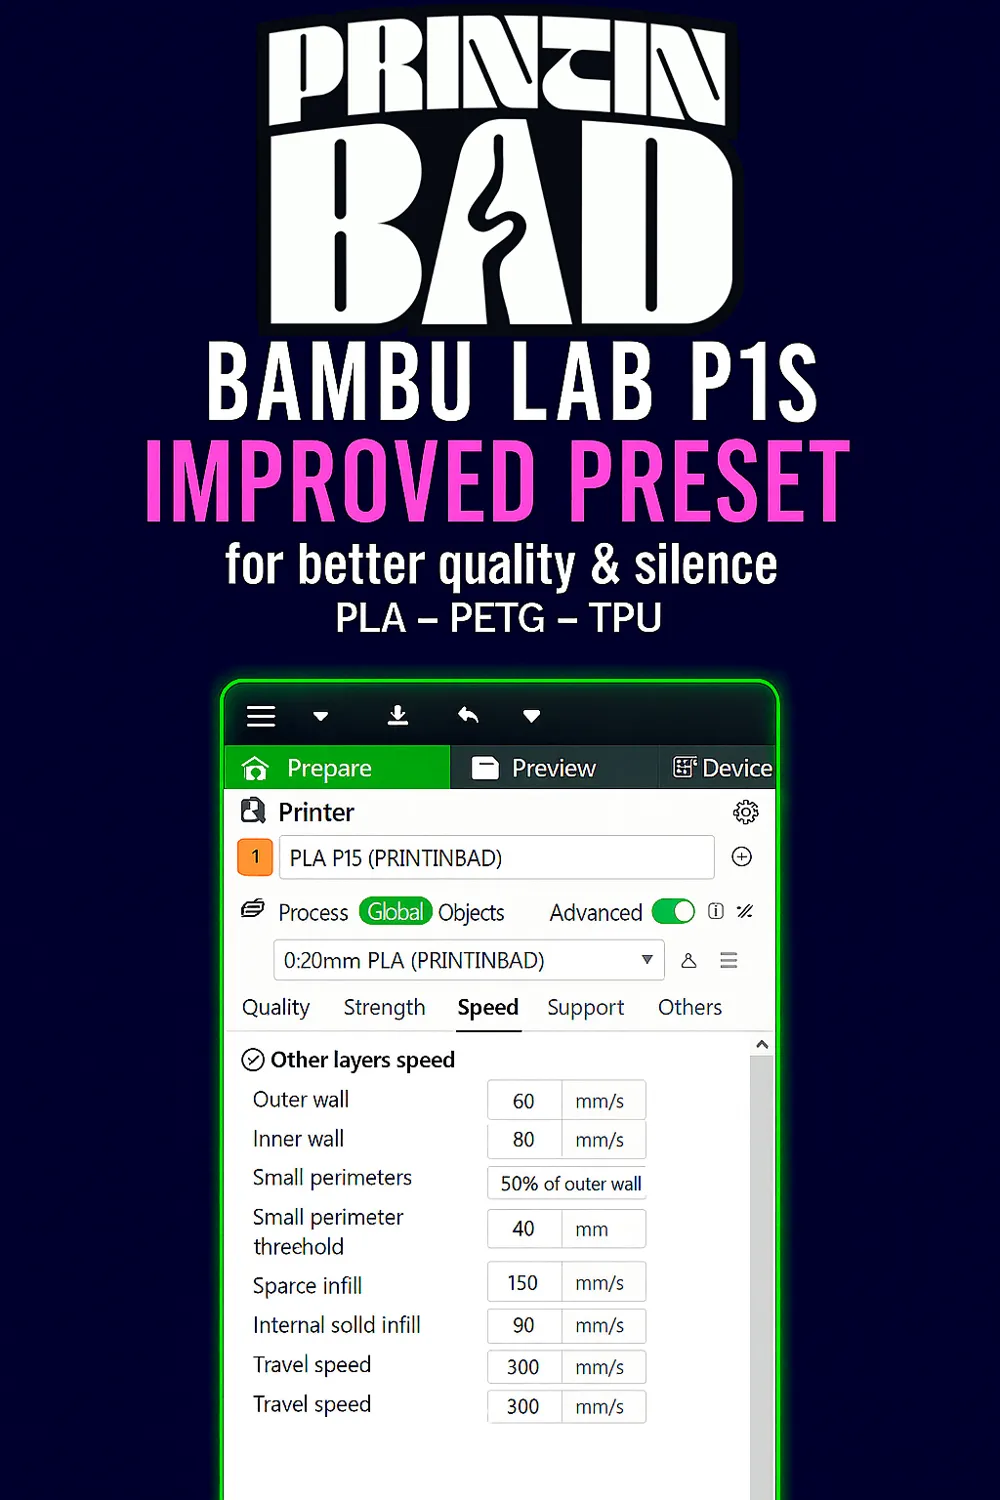
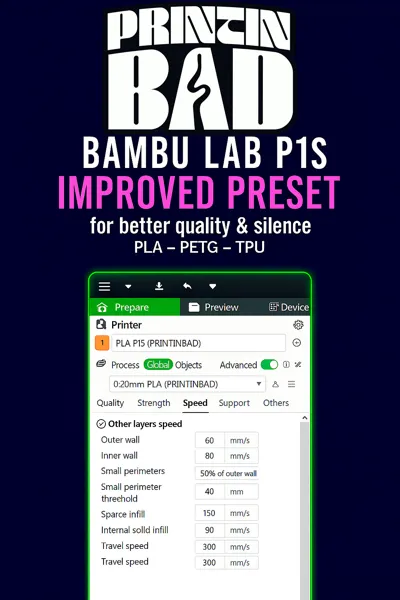
I have created truly useful print profiles, with layer heights of 0.20 / 0.12 / 0.08 mm plus variants for PLA, PETG, and TPU, optimized for the P1S.
🔴 Important: if you do not save them as User Preset, they will only remain within the open .3MF file. Close the file = everything disappears.
The printer preset you save only once.
Filament and Process presets (layer profile), however, must be saved one by one (or only those you are interested in). Once done, you will always have them available.
📷 How to save presets from the .3MF (photos 1 → 18)
First, save the printer preset:
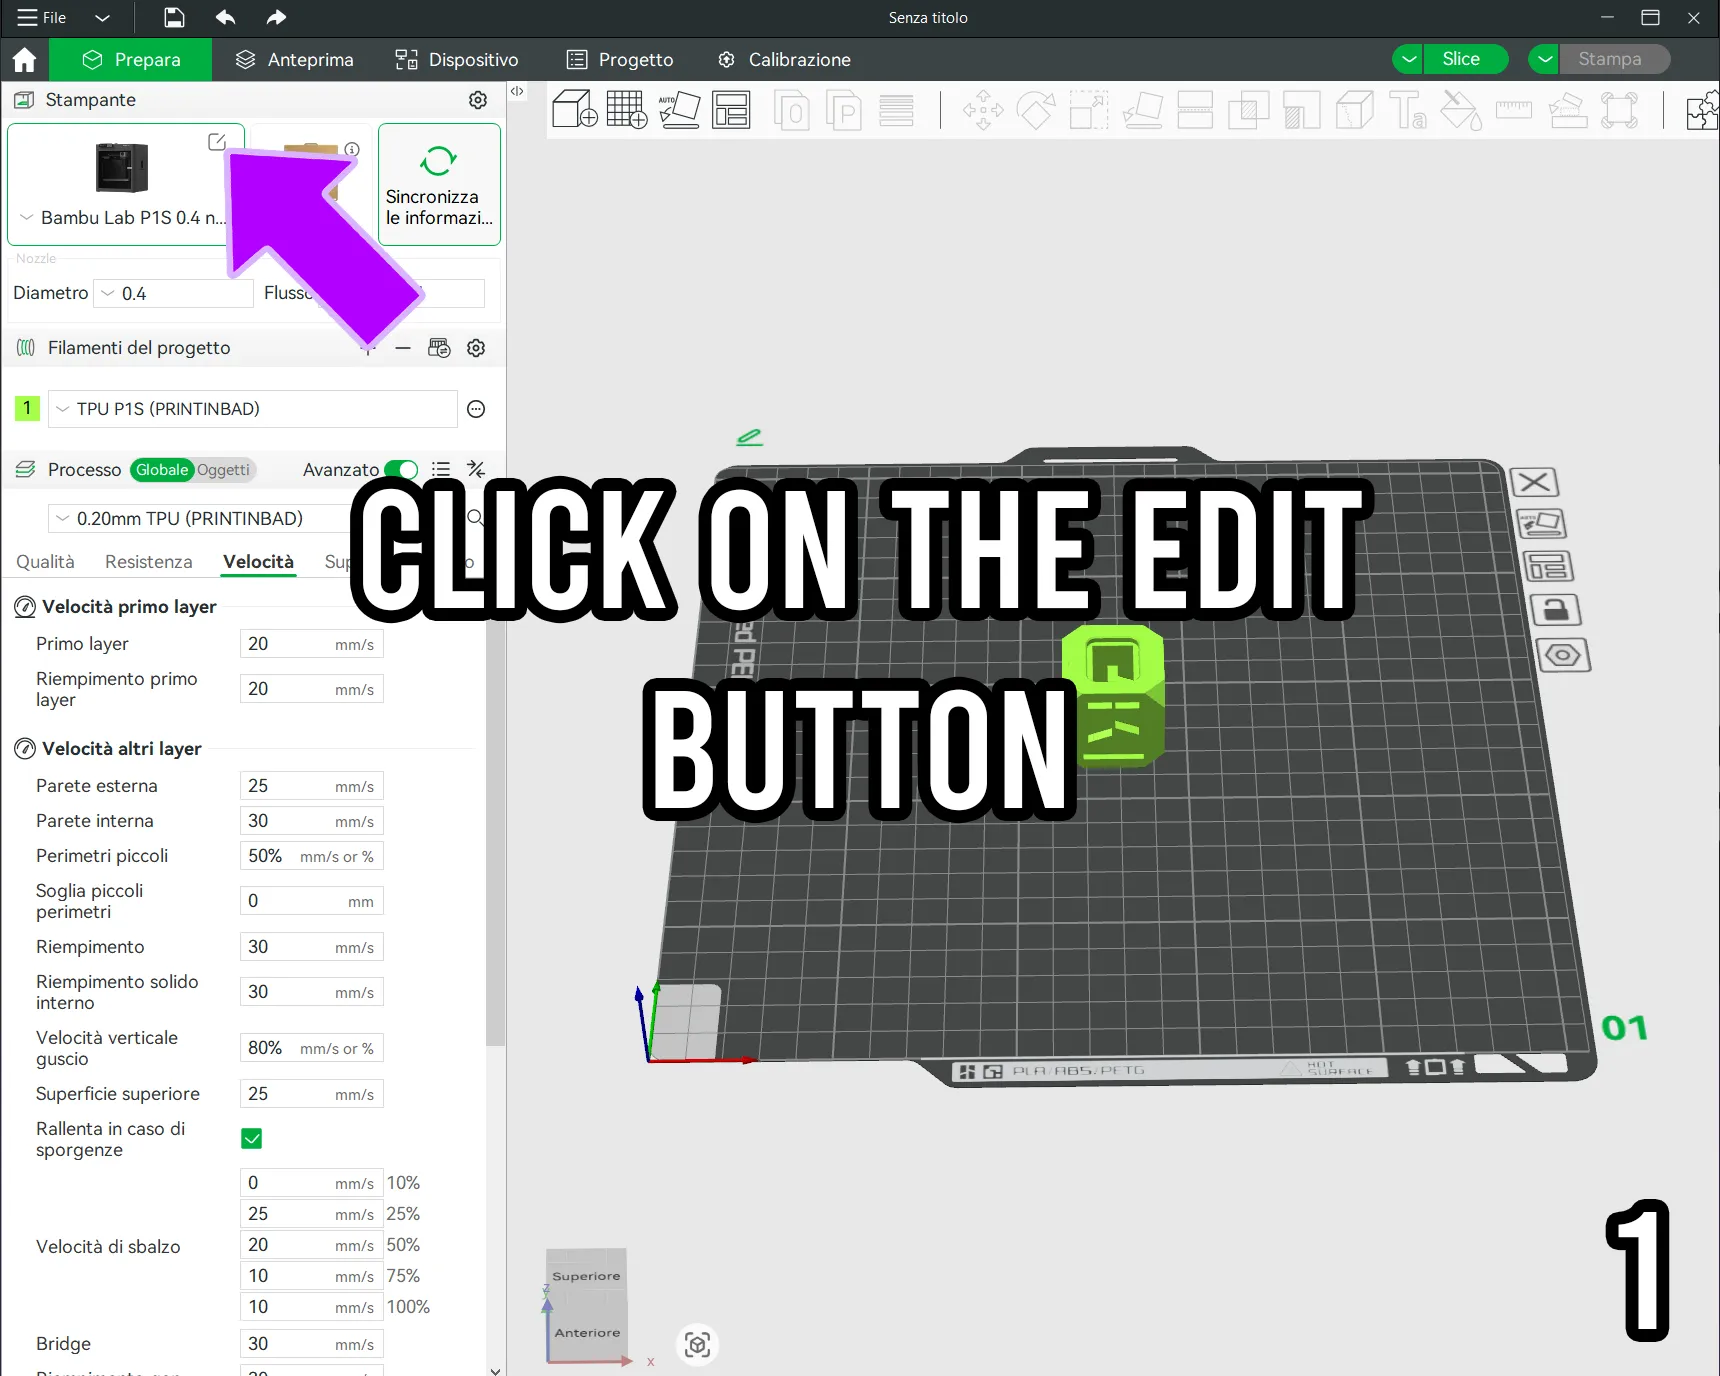
– In Prepare, click the edit icon (photo 1).
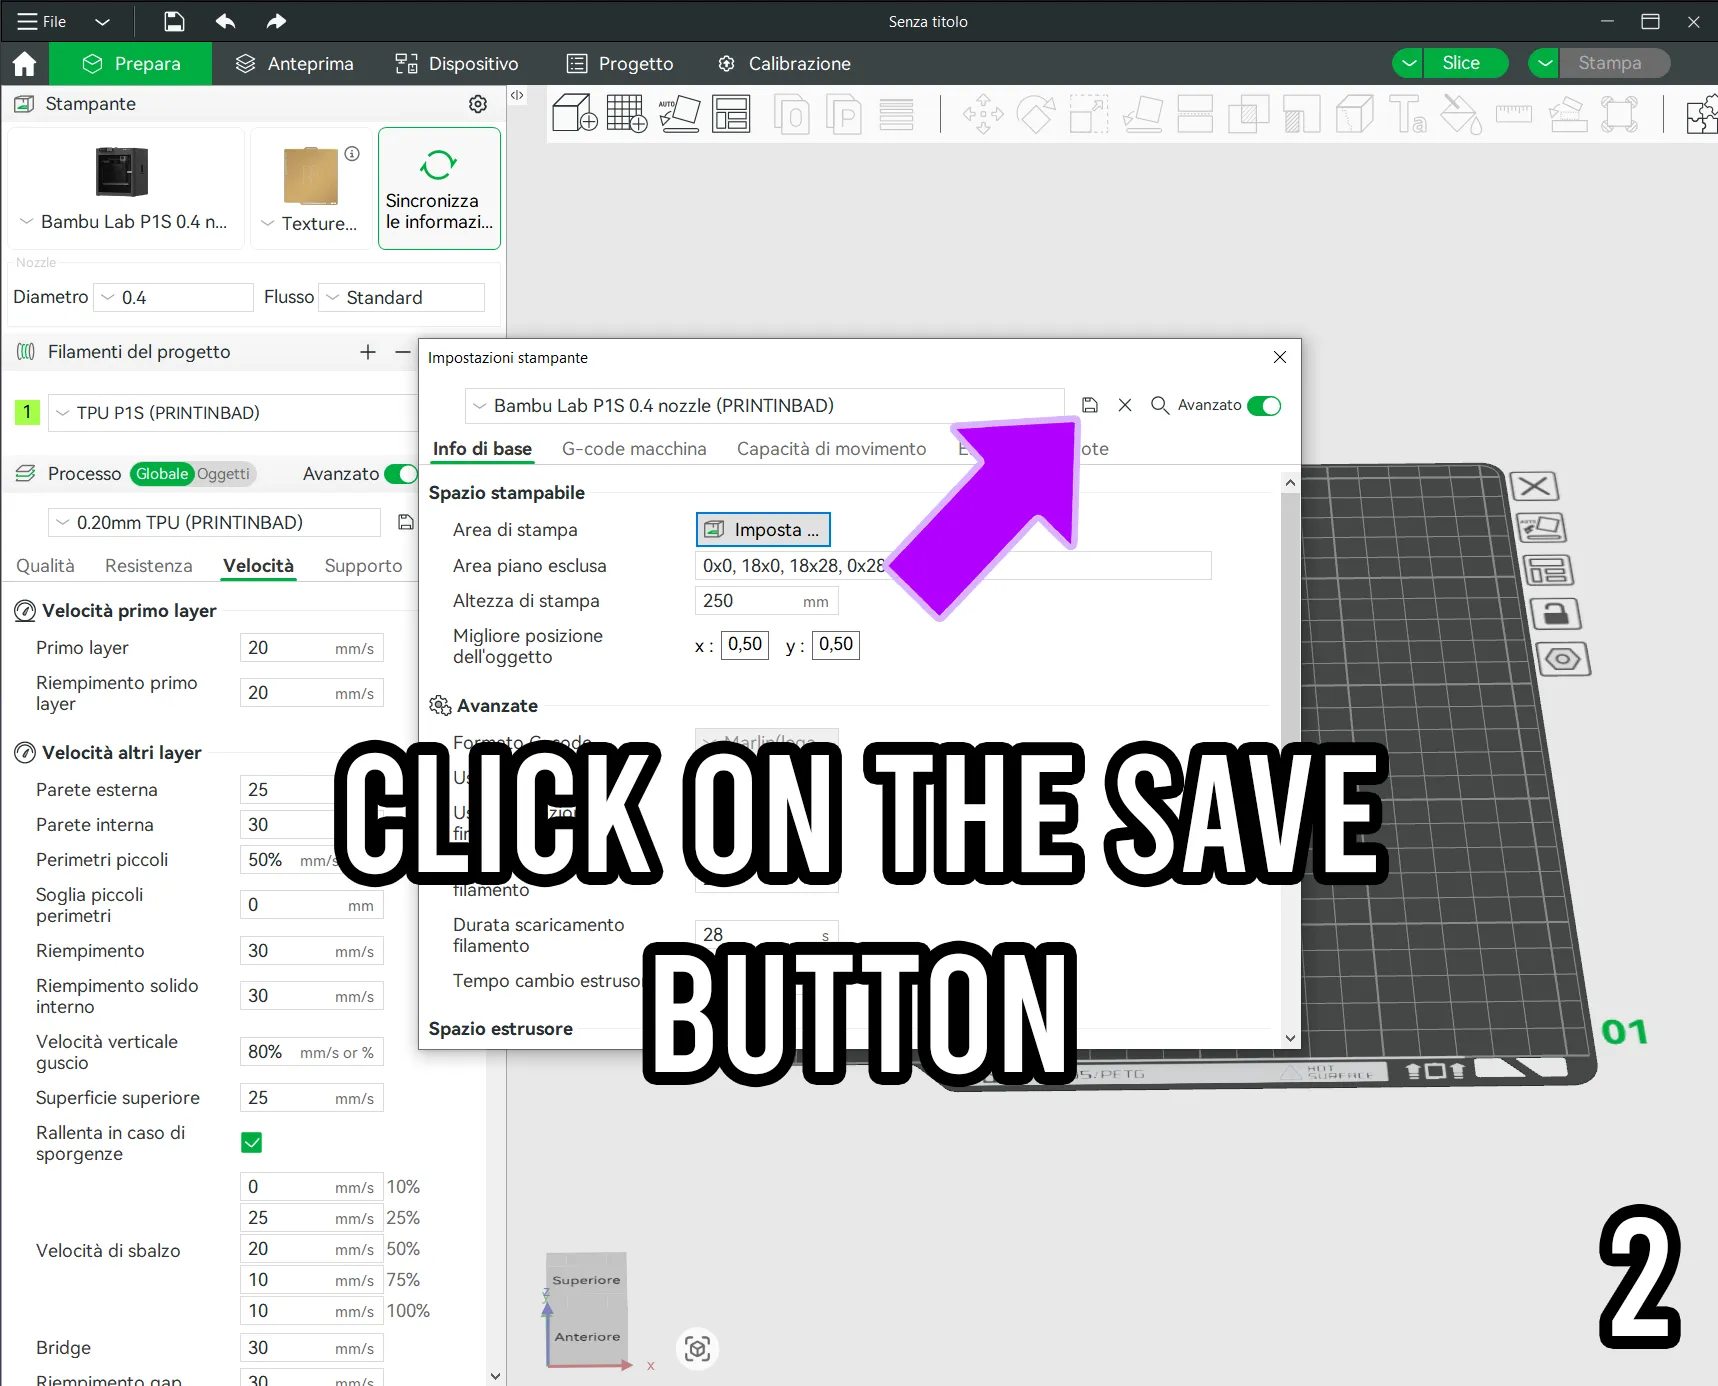
– In the “Printer Settings” window, press Save preset (photo 2).
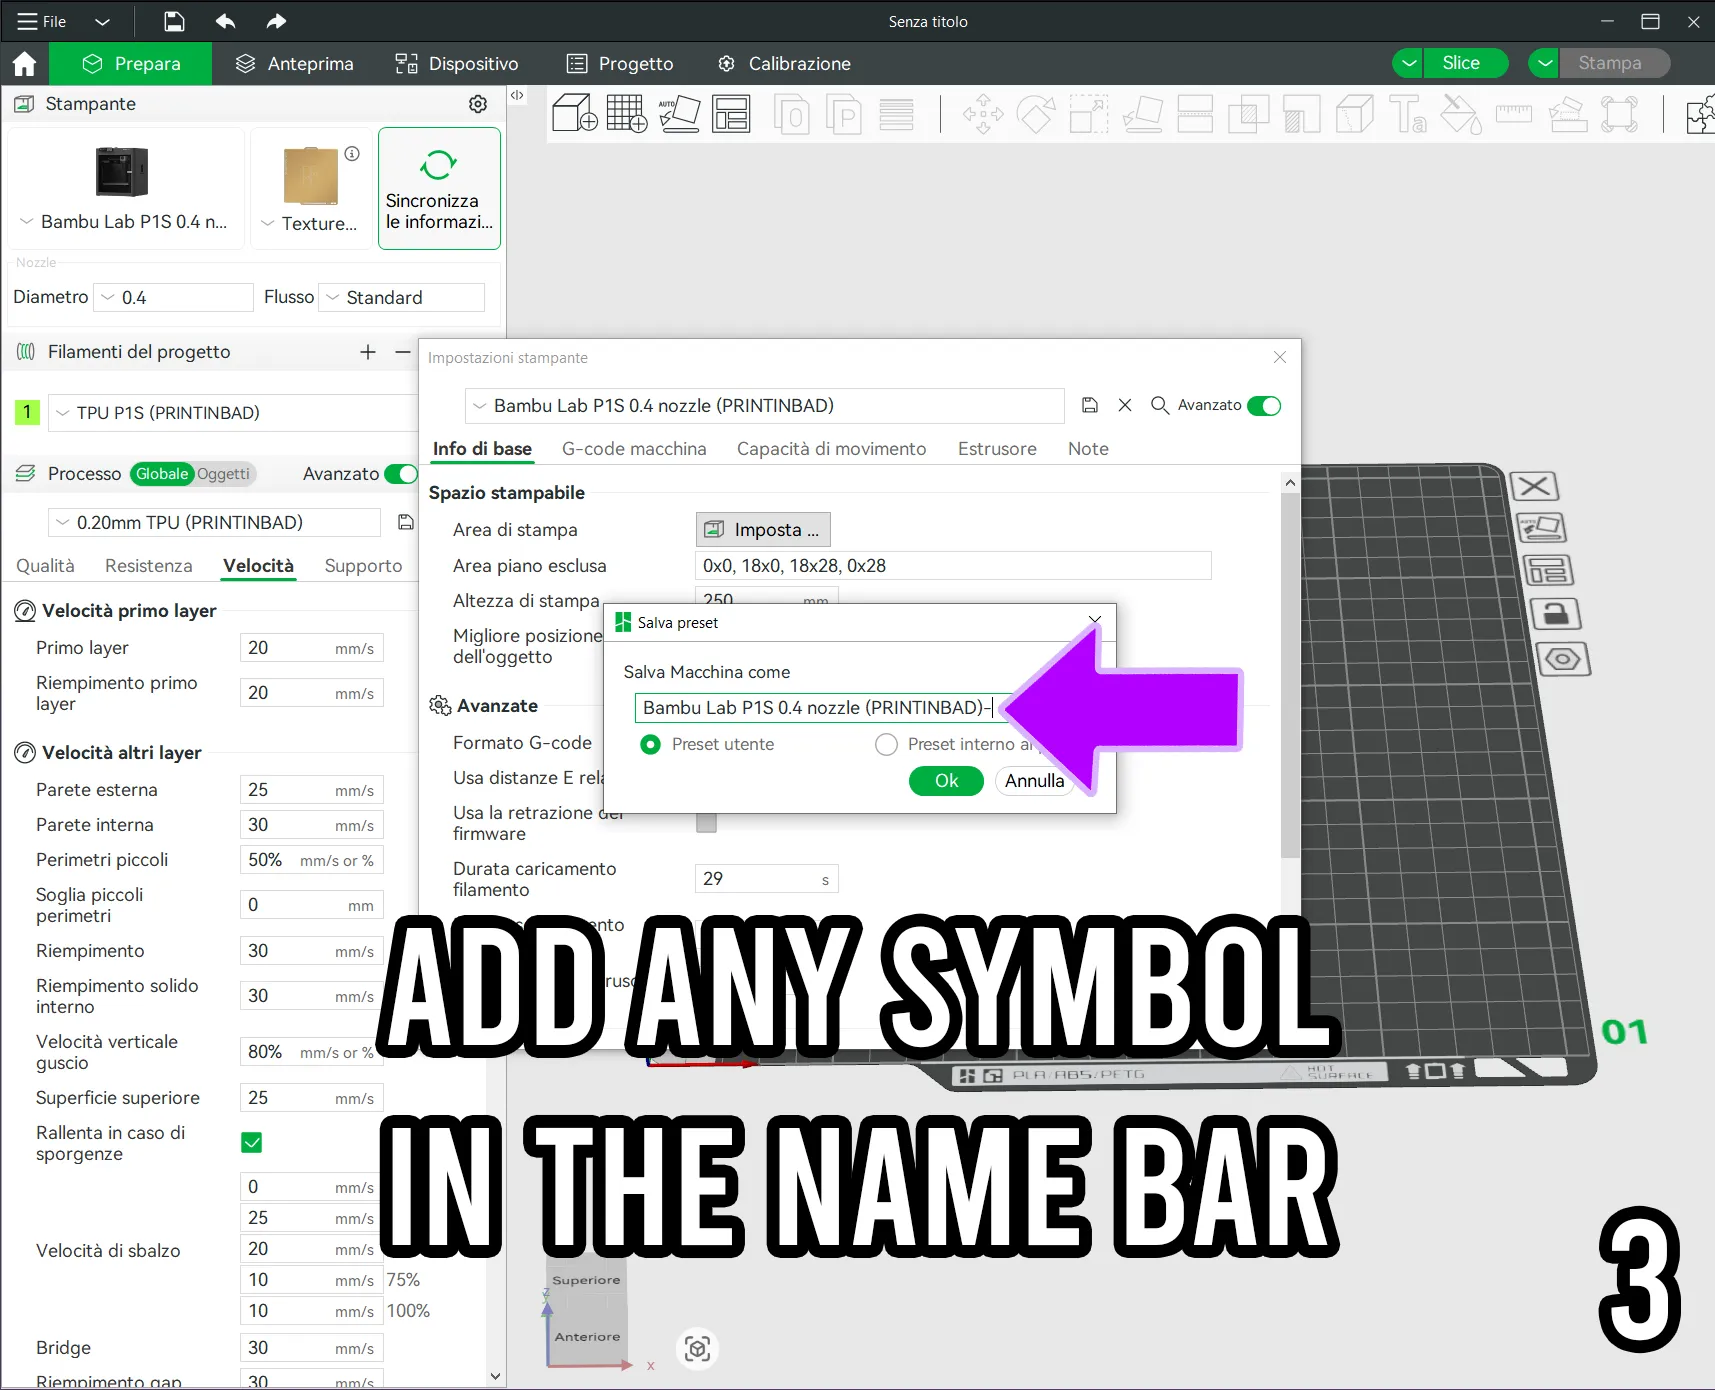
– Add a symbol (_ or -) to the name to make it unique (photo 3).
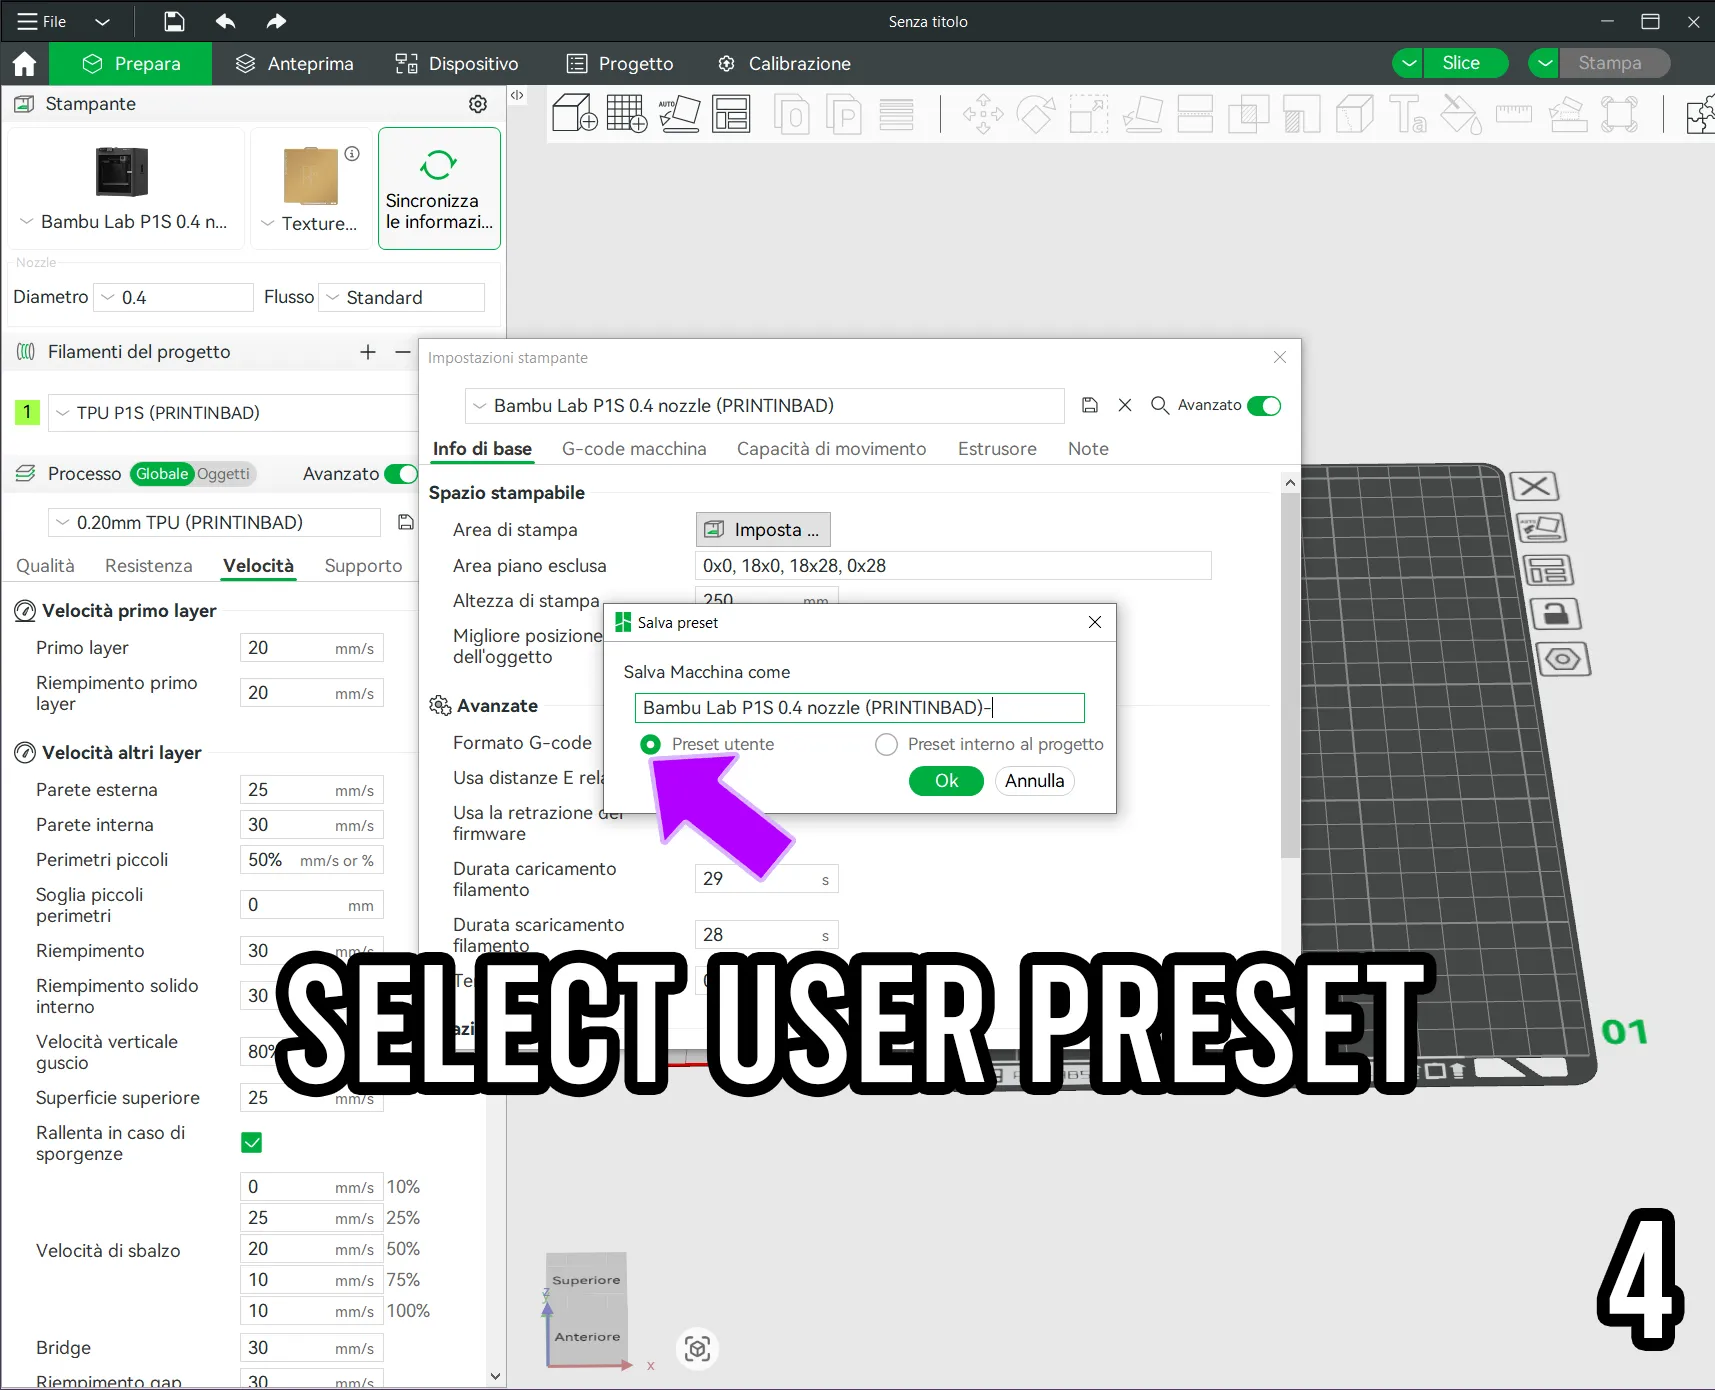
– Select User Preset (photo 4) and confirm with OK.
Now move to the filament presets:
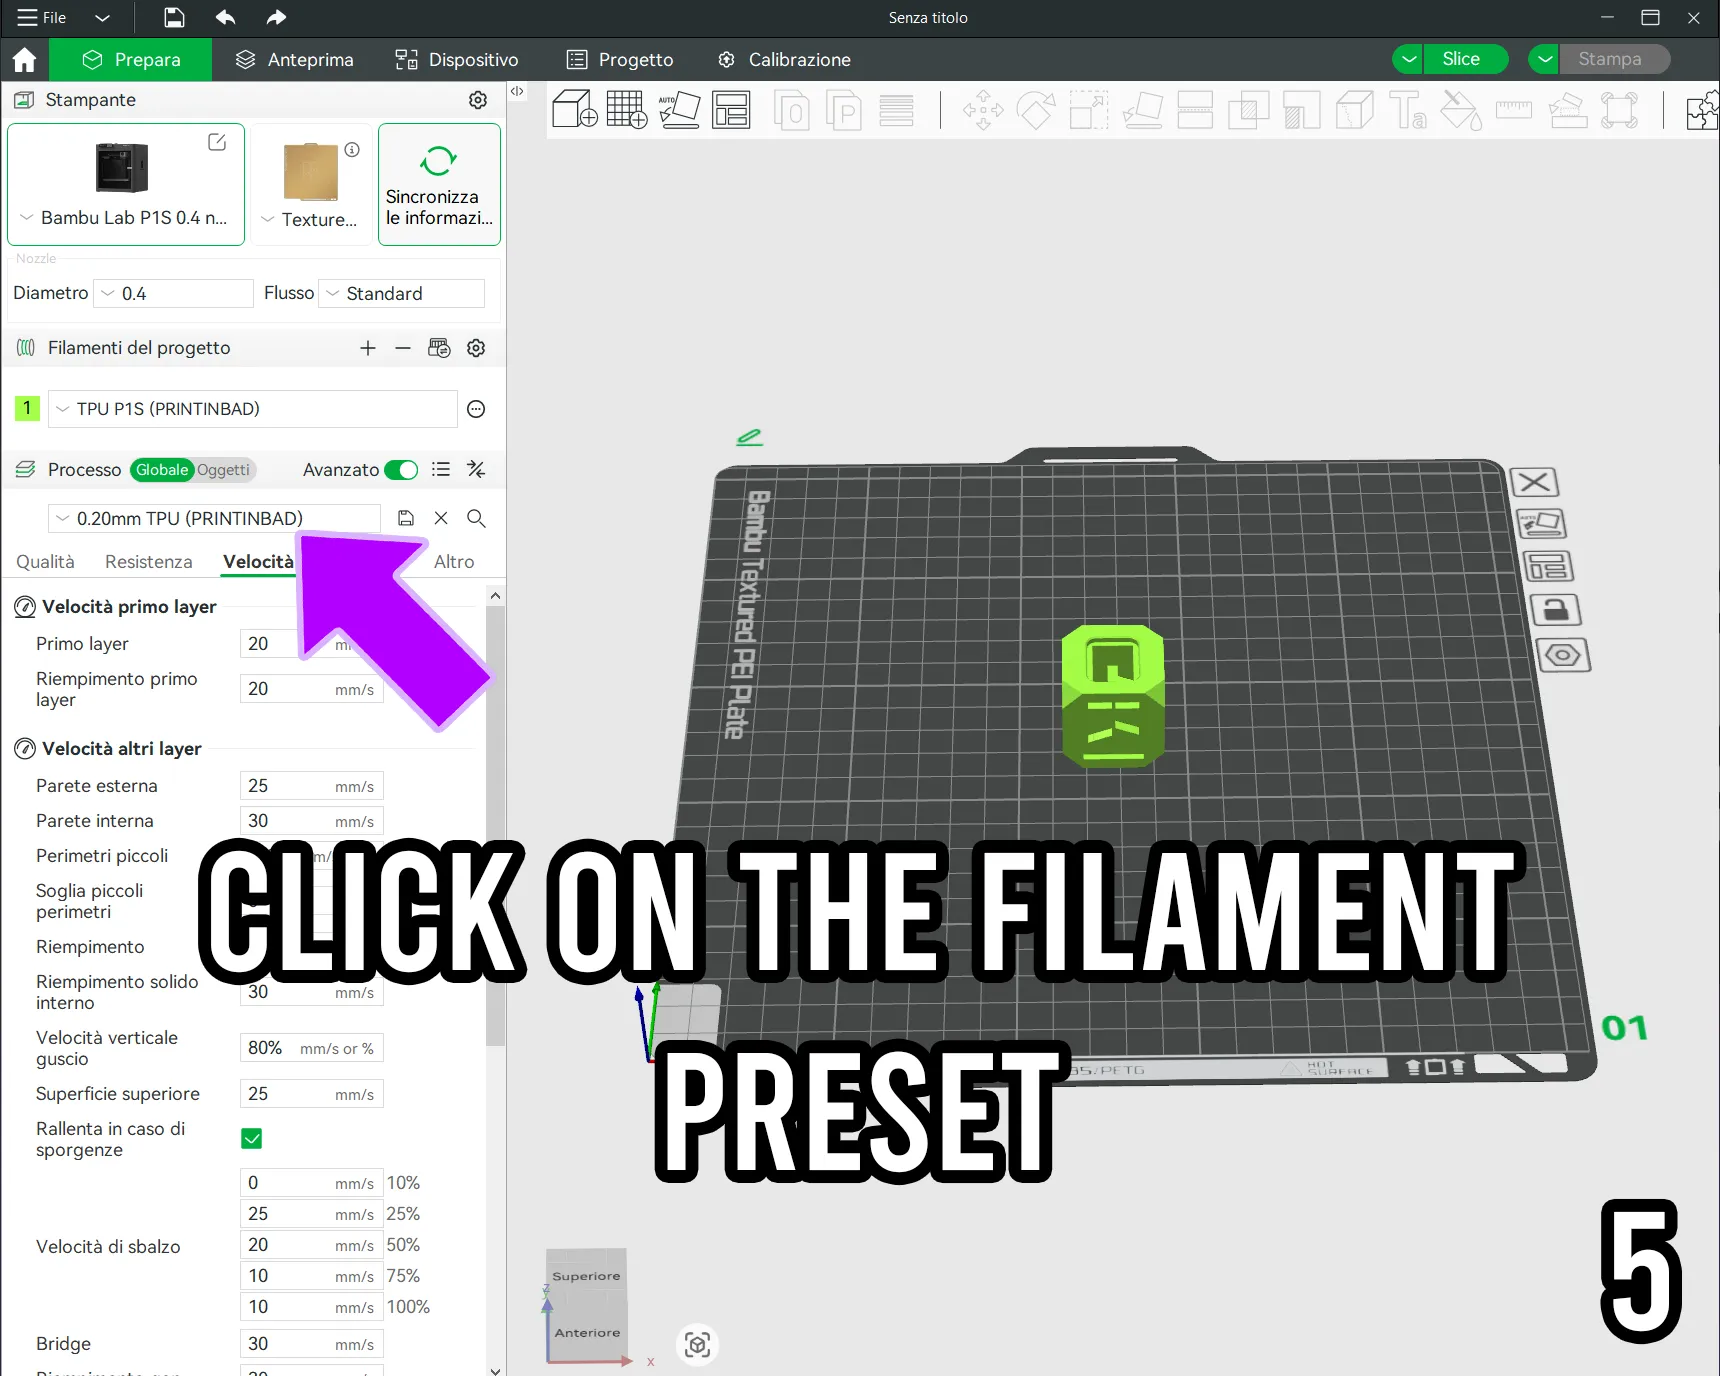
– Click on the filament preset (photo 5).
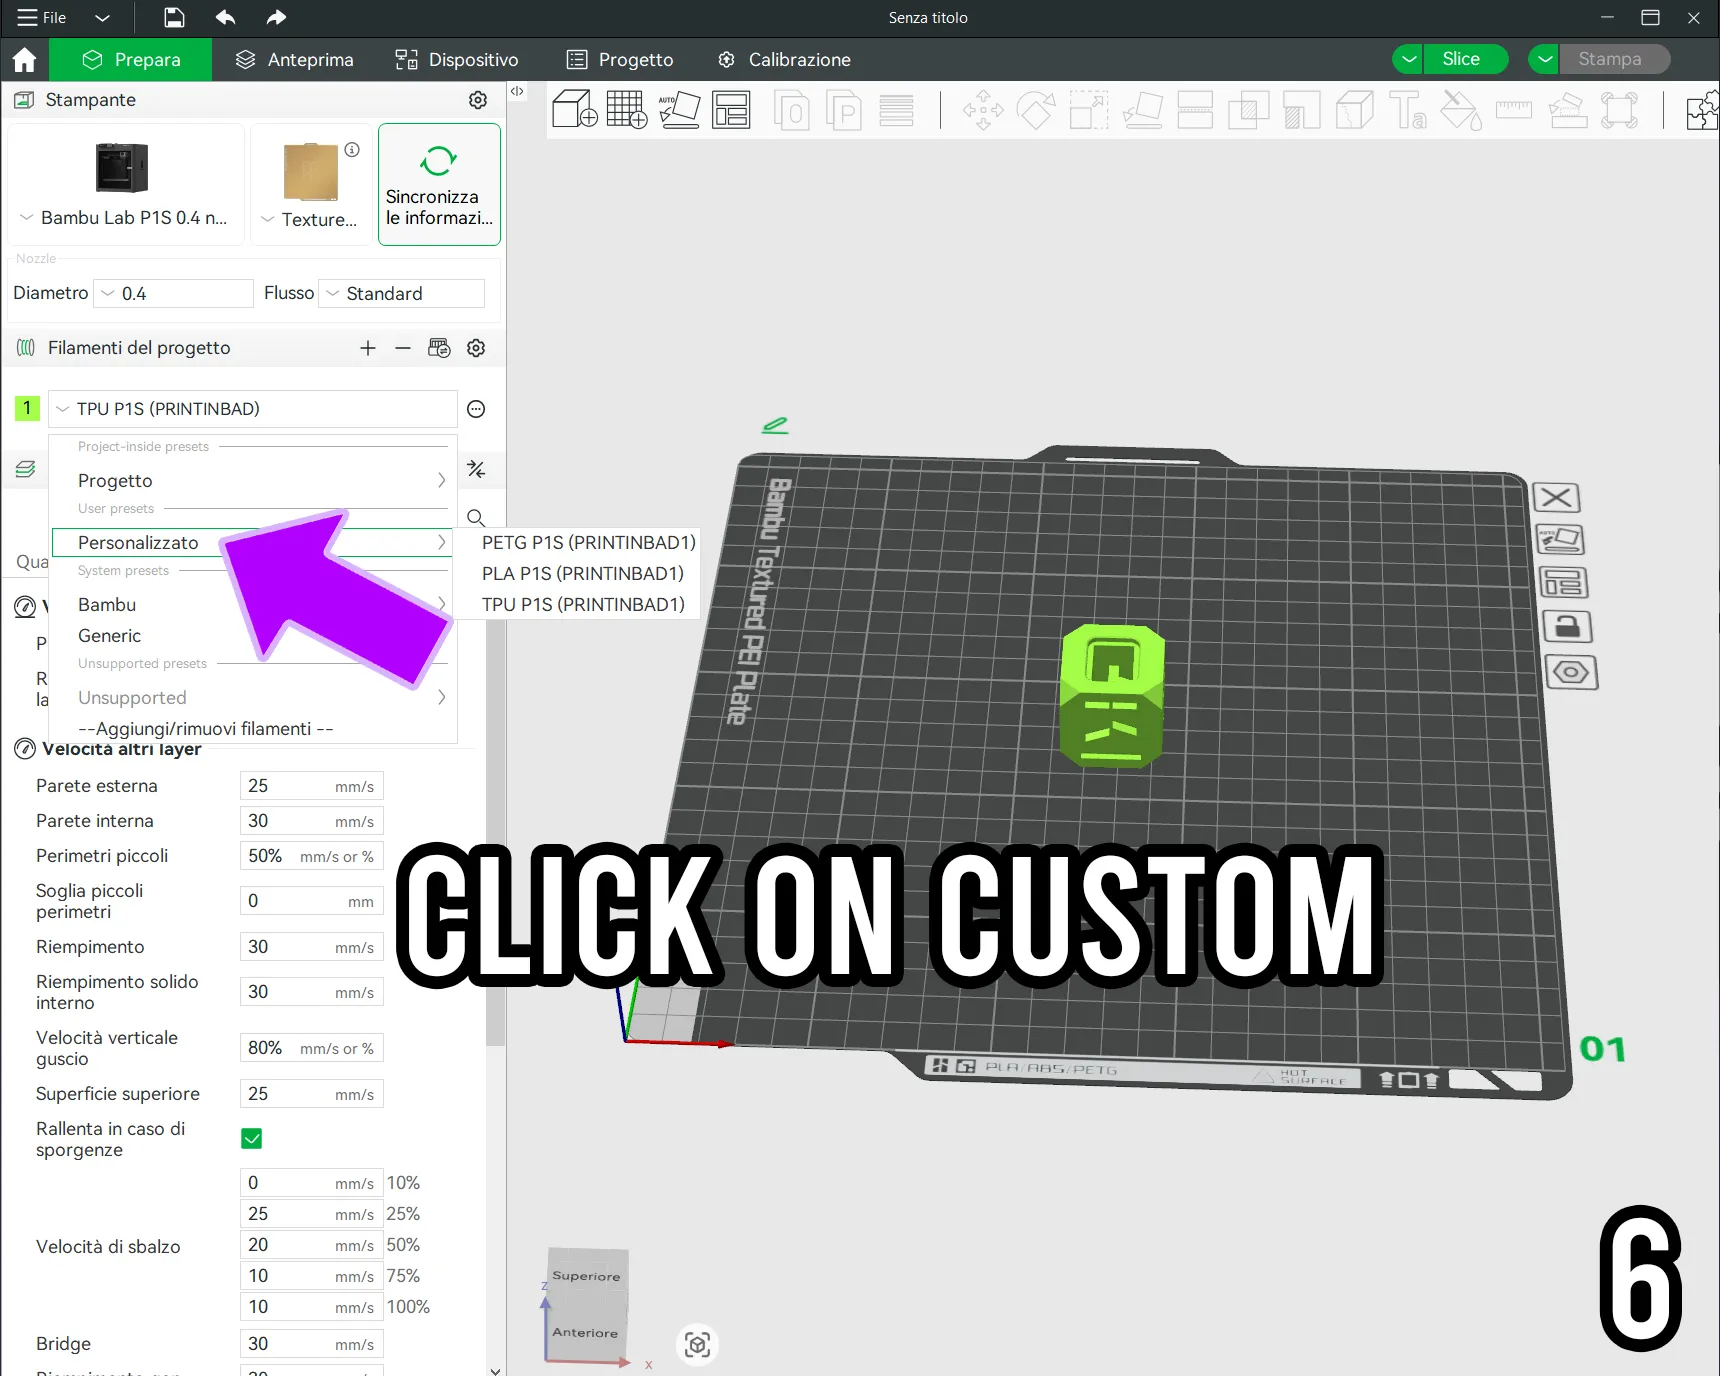
– Go to “Custom” (photo 6)
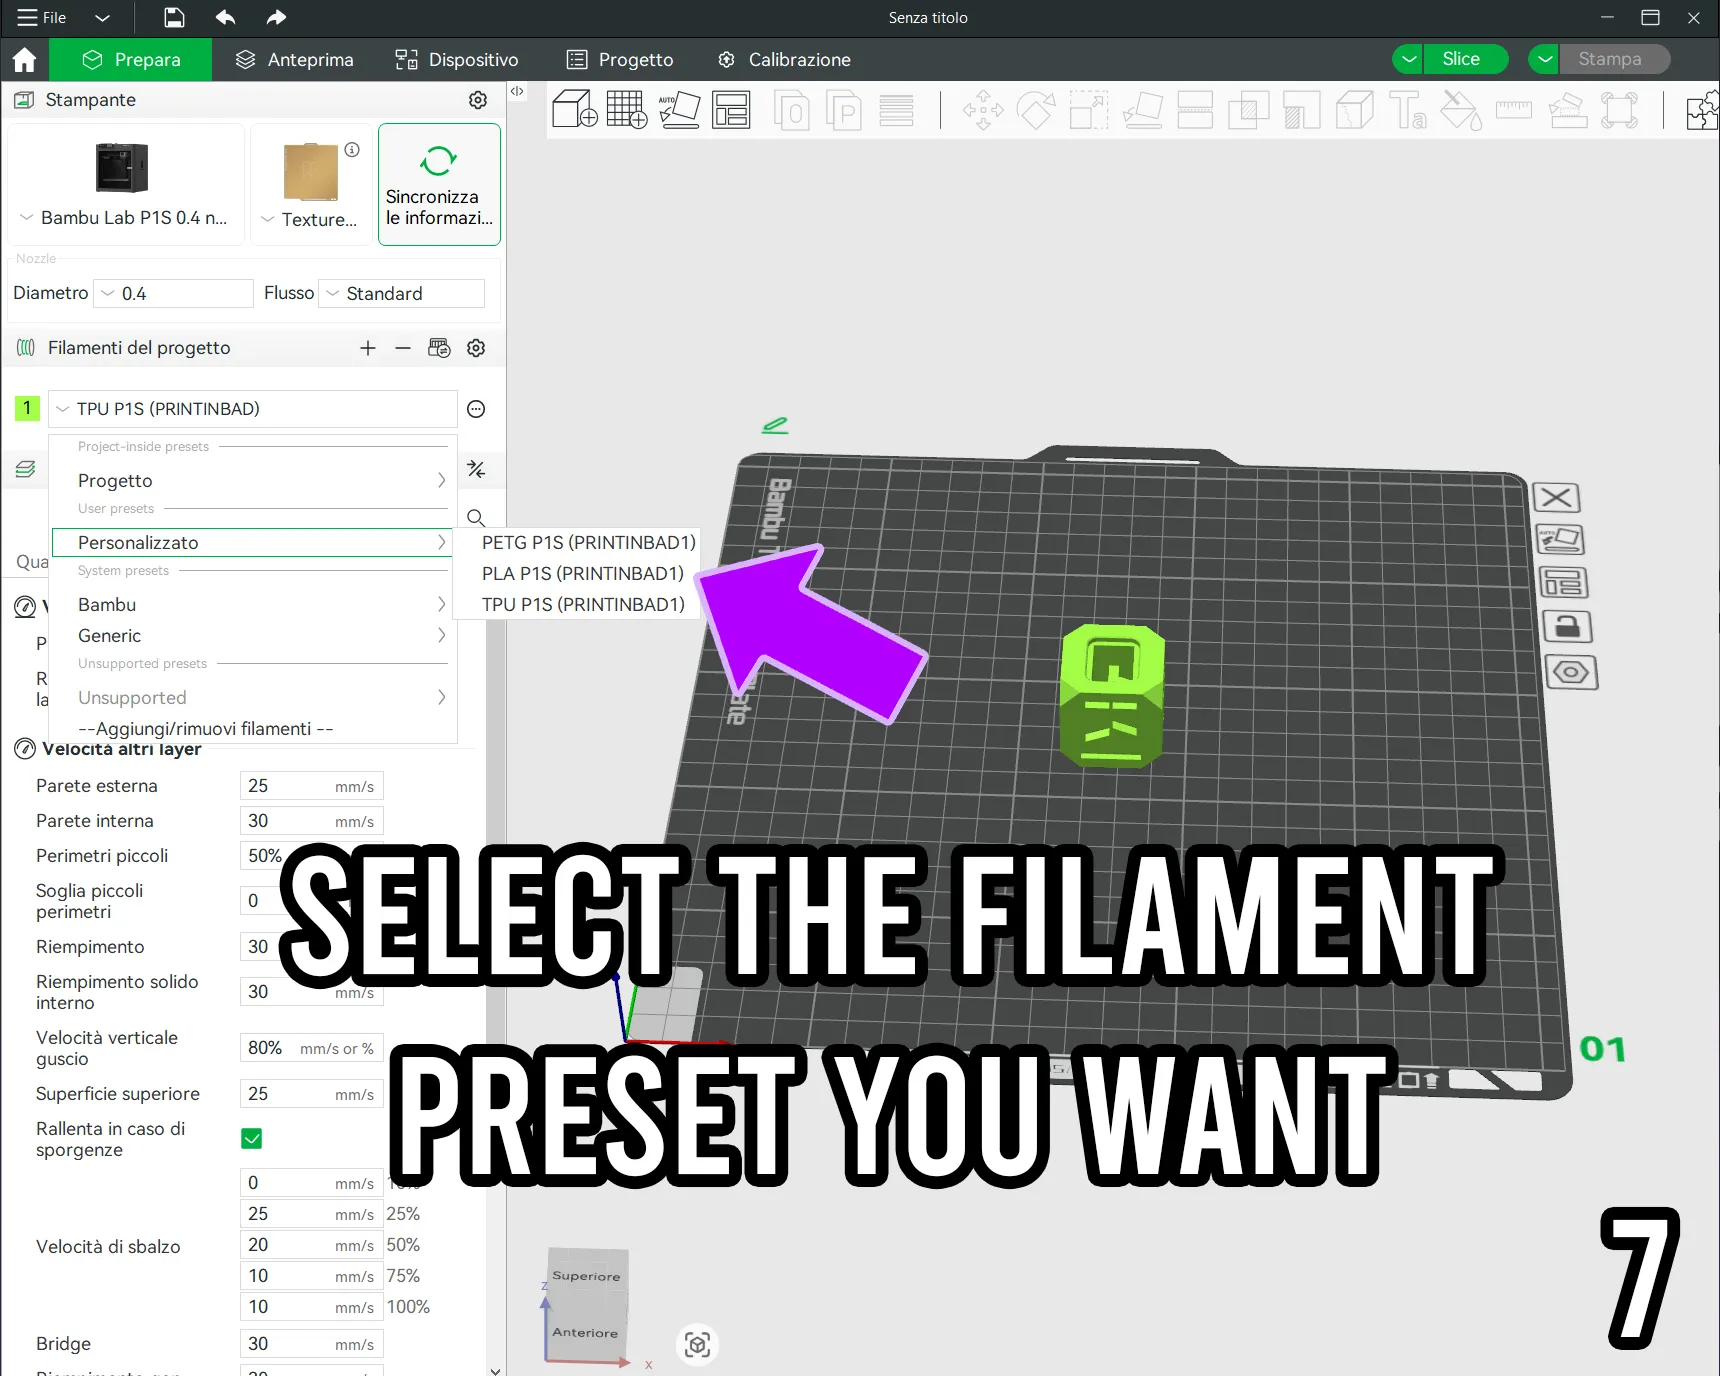
– Choose the filament you want to save (photo 7).
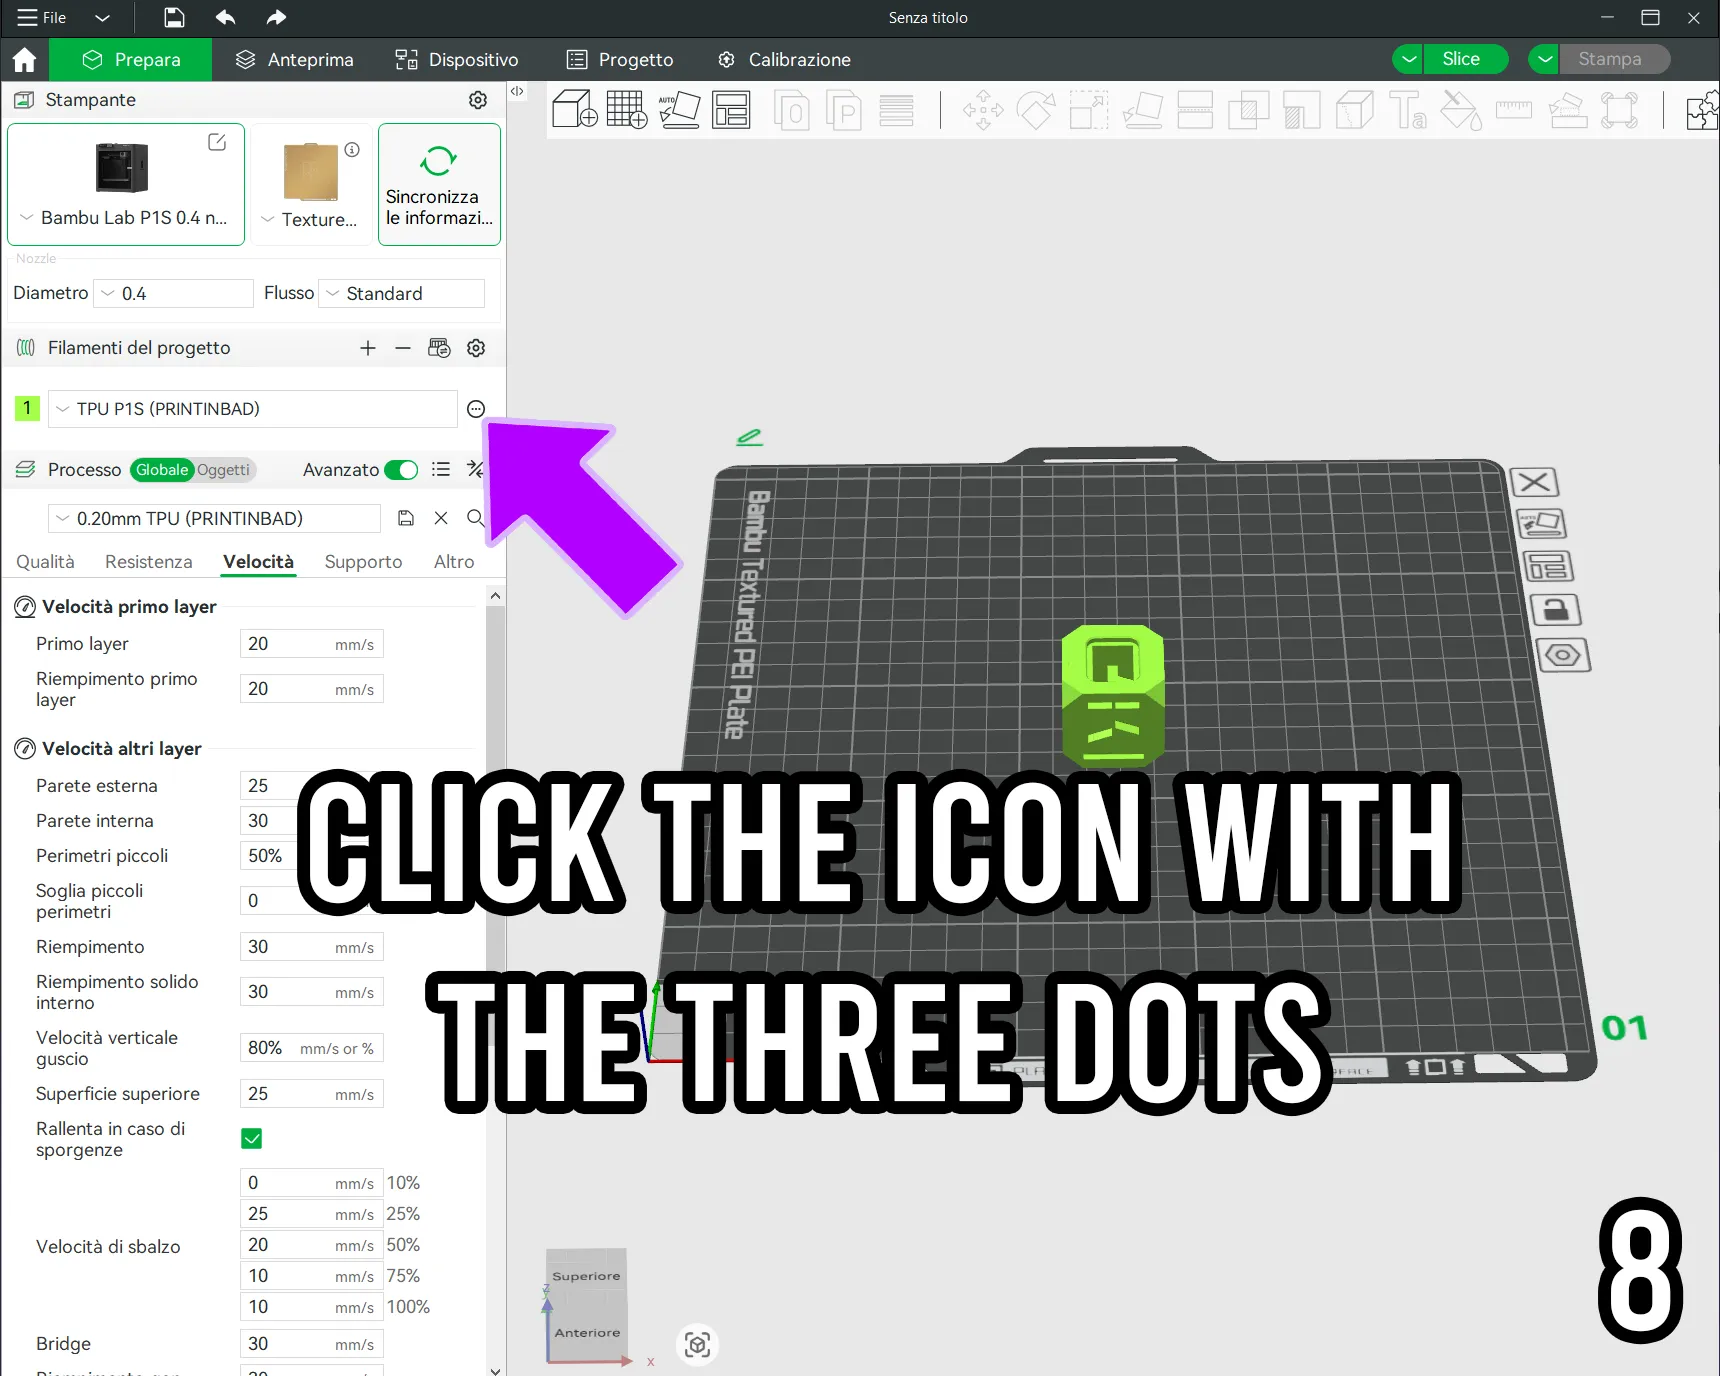
– Open the three-dot menu (photo 8)
– Select Edit (photo 9).
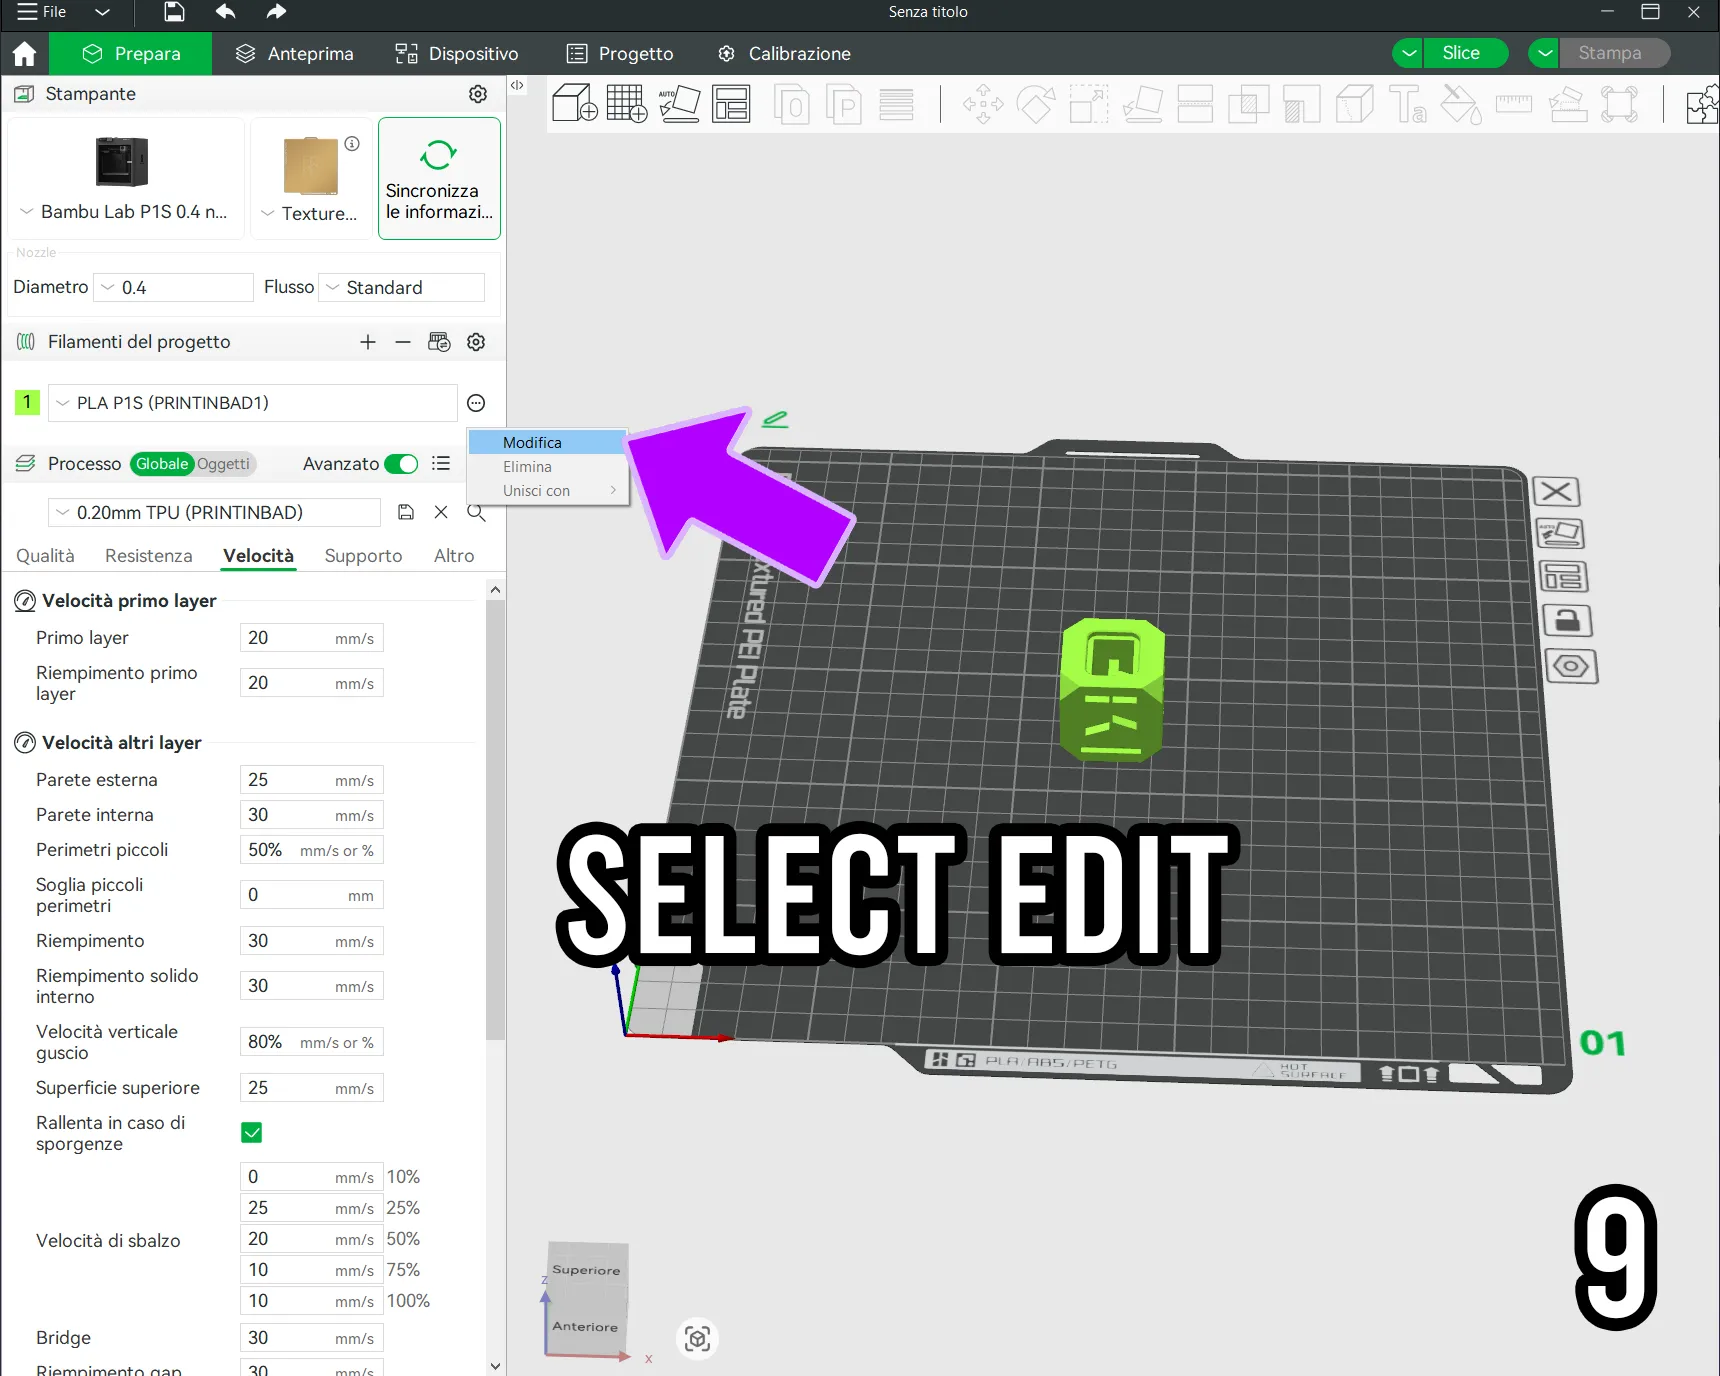
– Press Save preset again (photo 10).
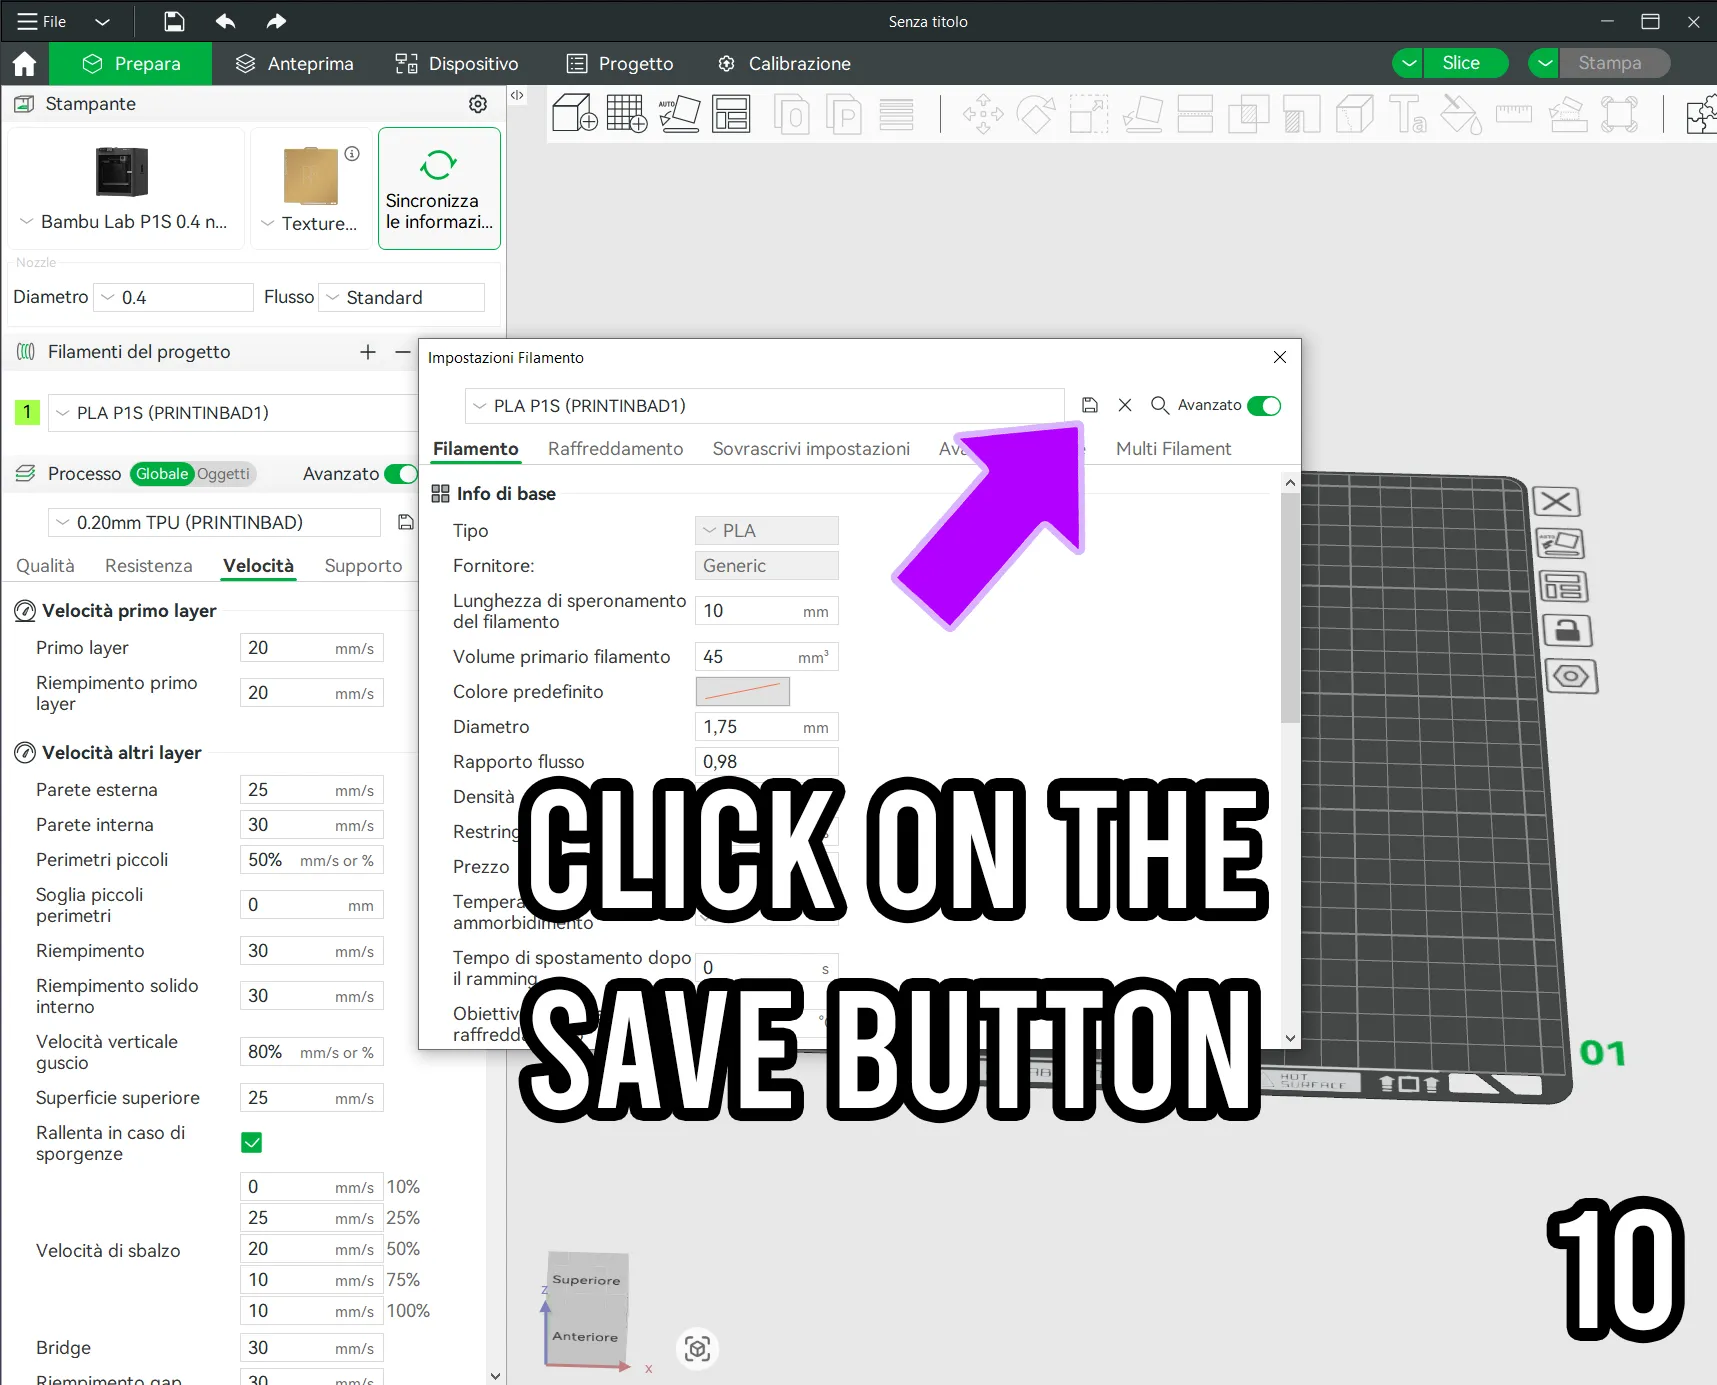
– Add a symbol to the name (photo 11).
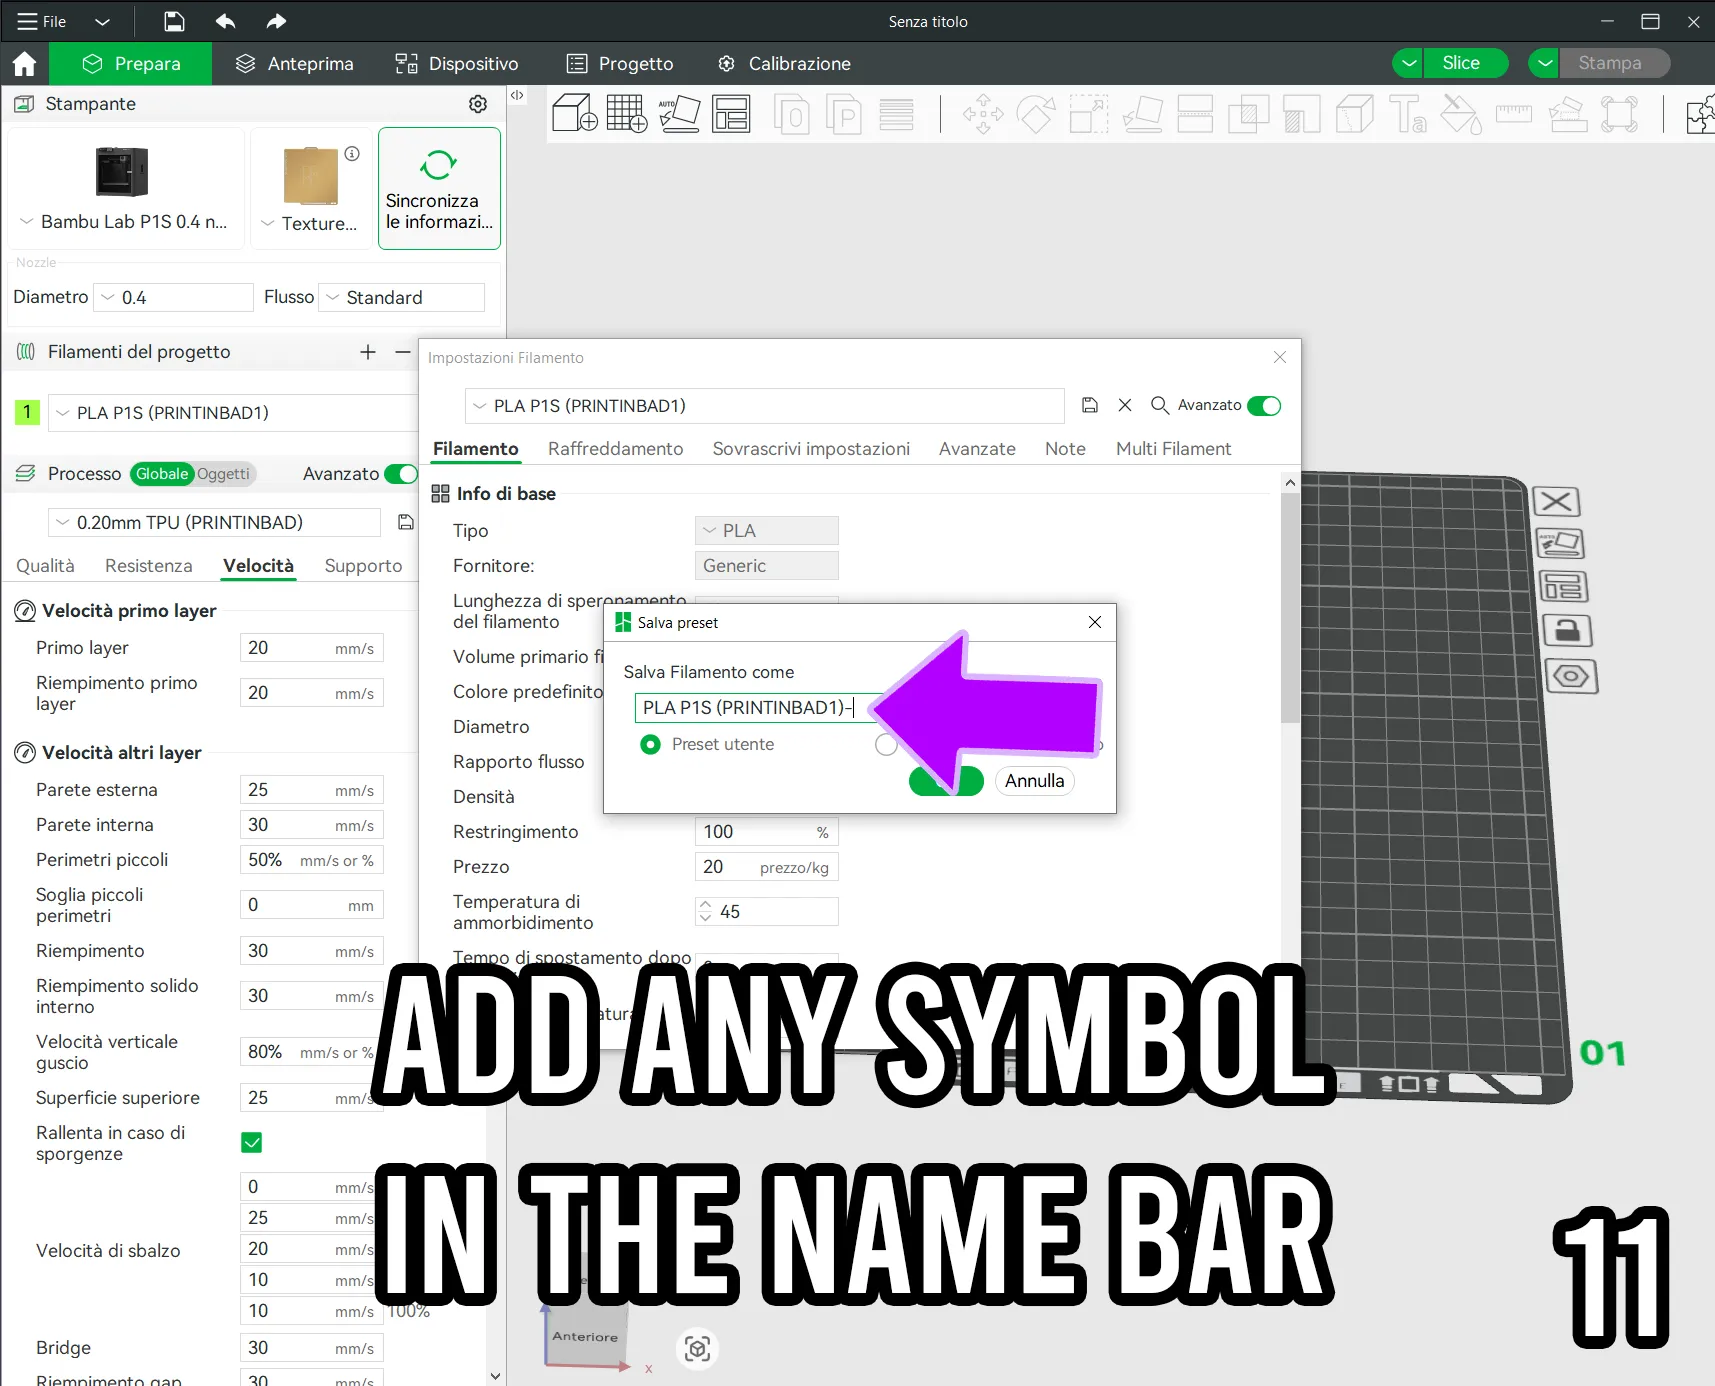
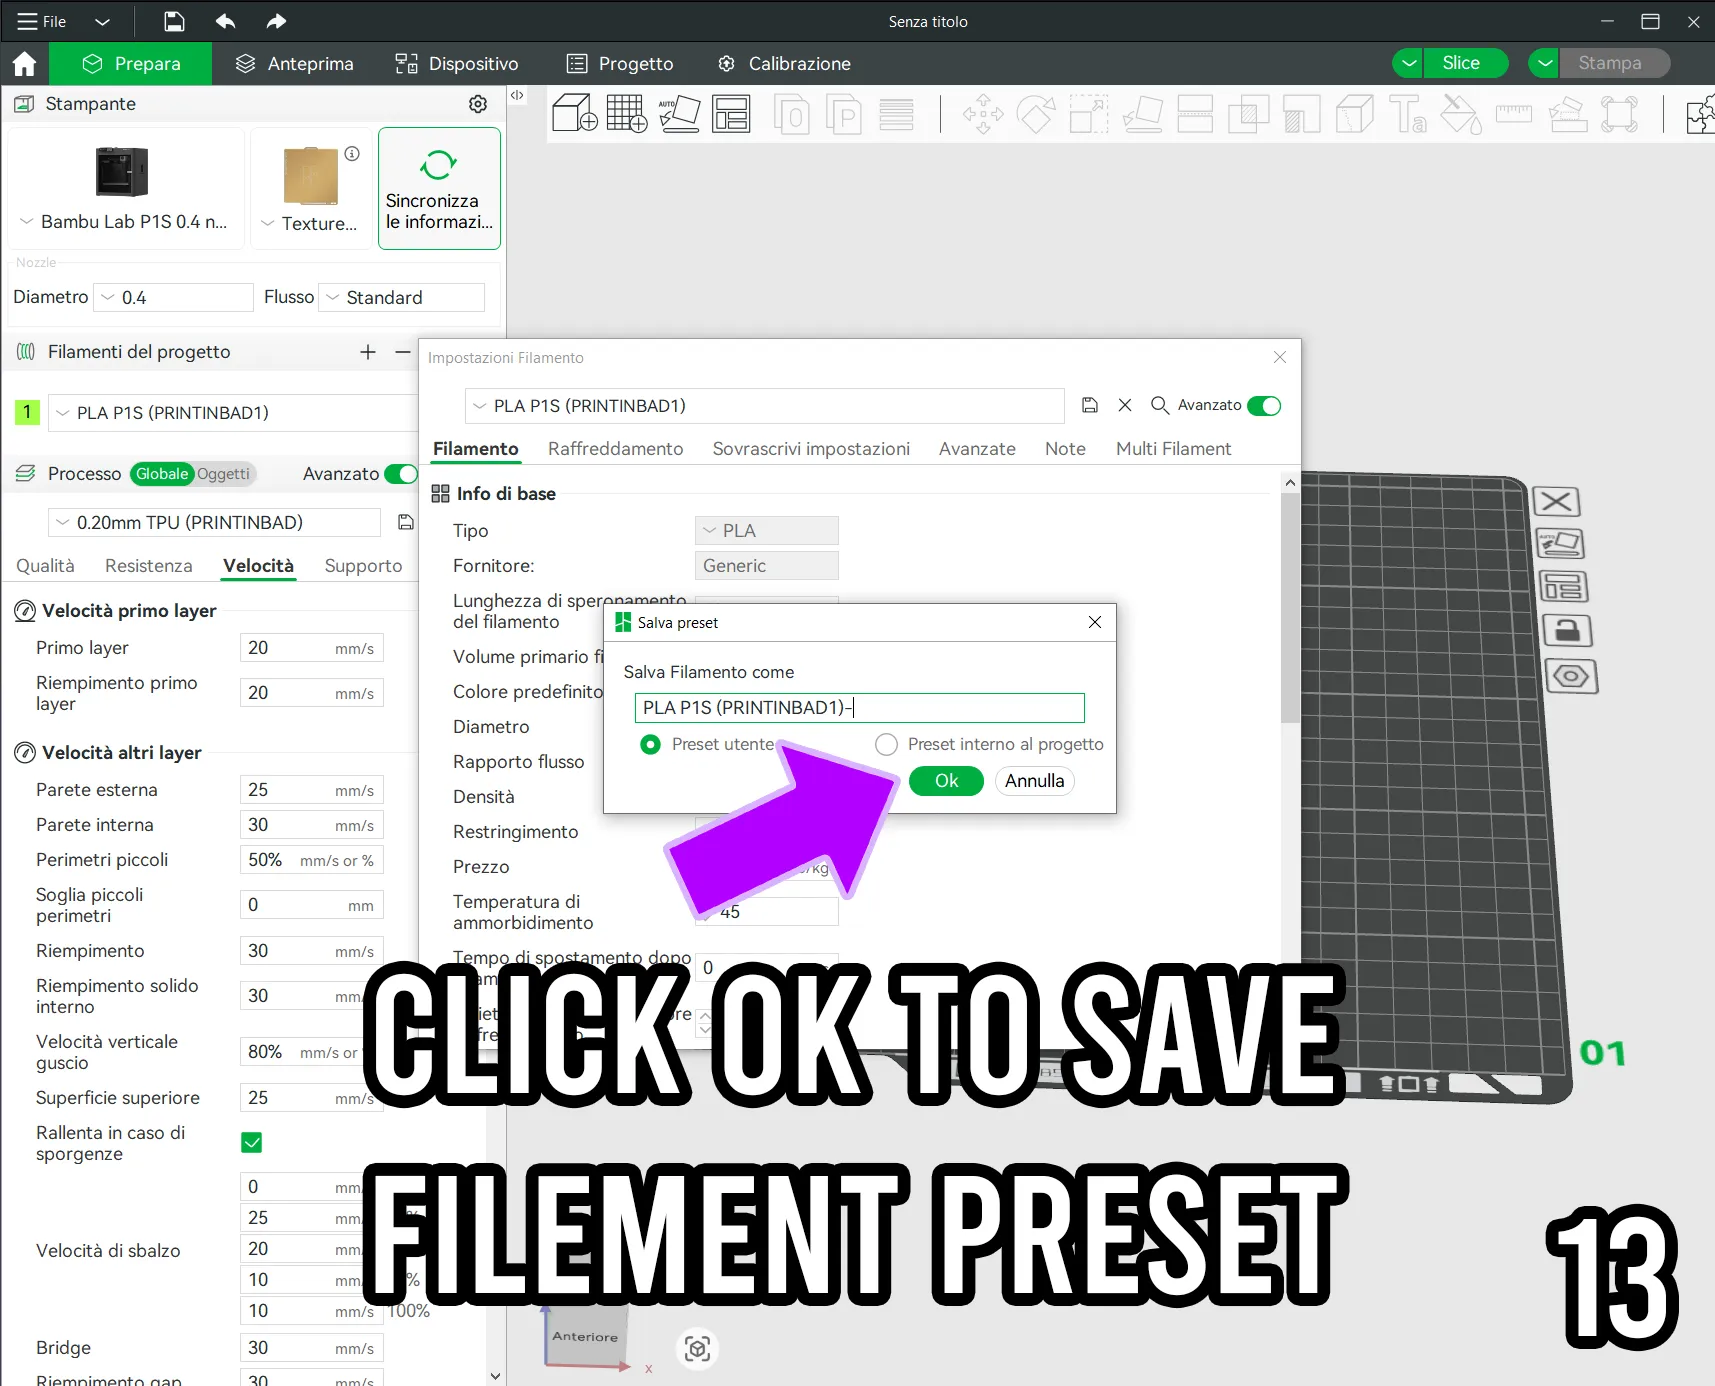
– Check User preset (photo 12)
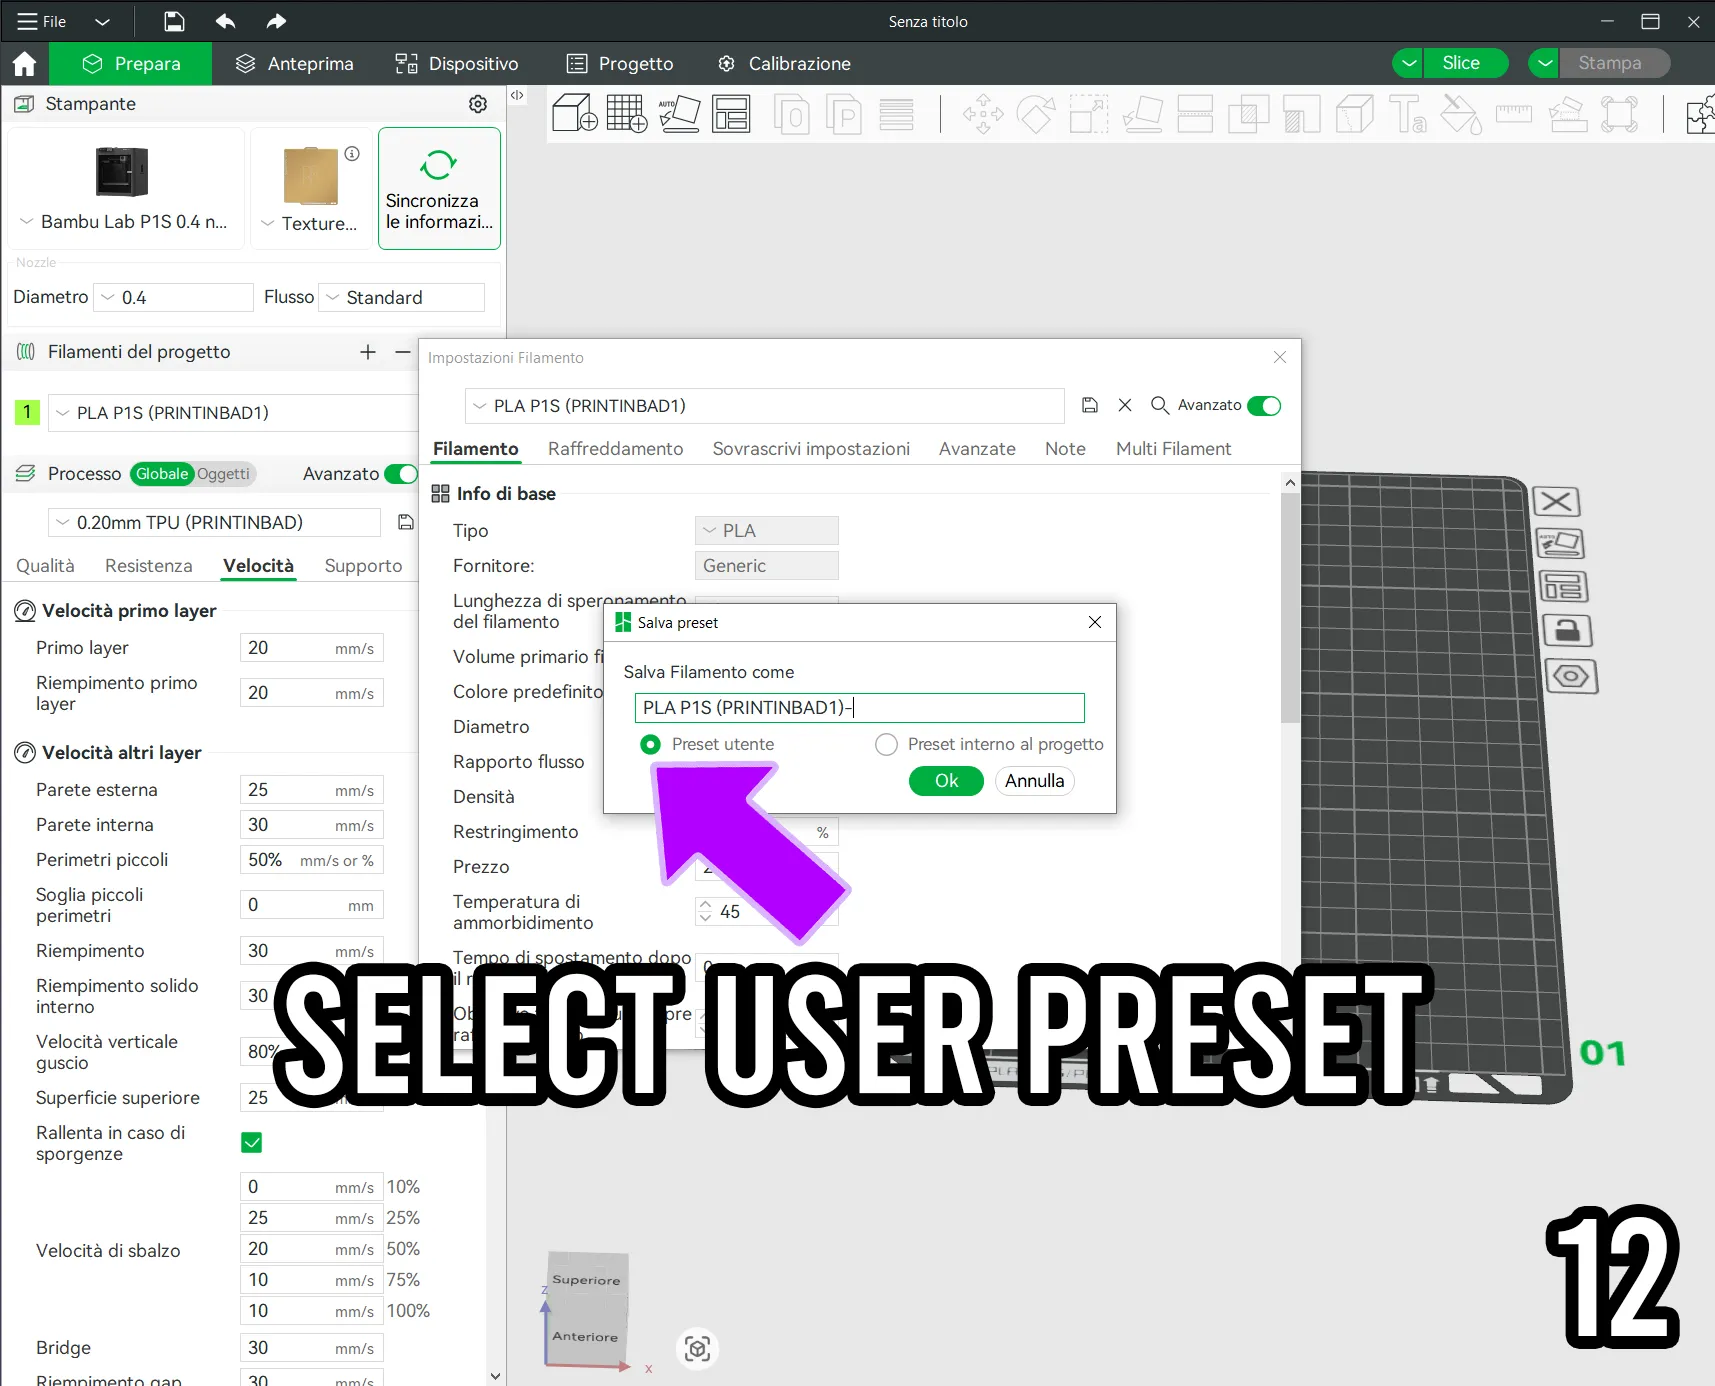
– Save with OK (photo 13).
Repeat the step for PLA, PETG, and TPU.
Finally, save the Process (layer profile):
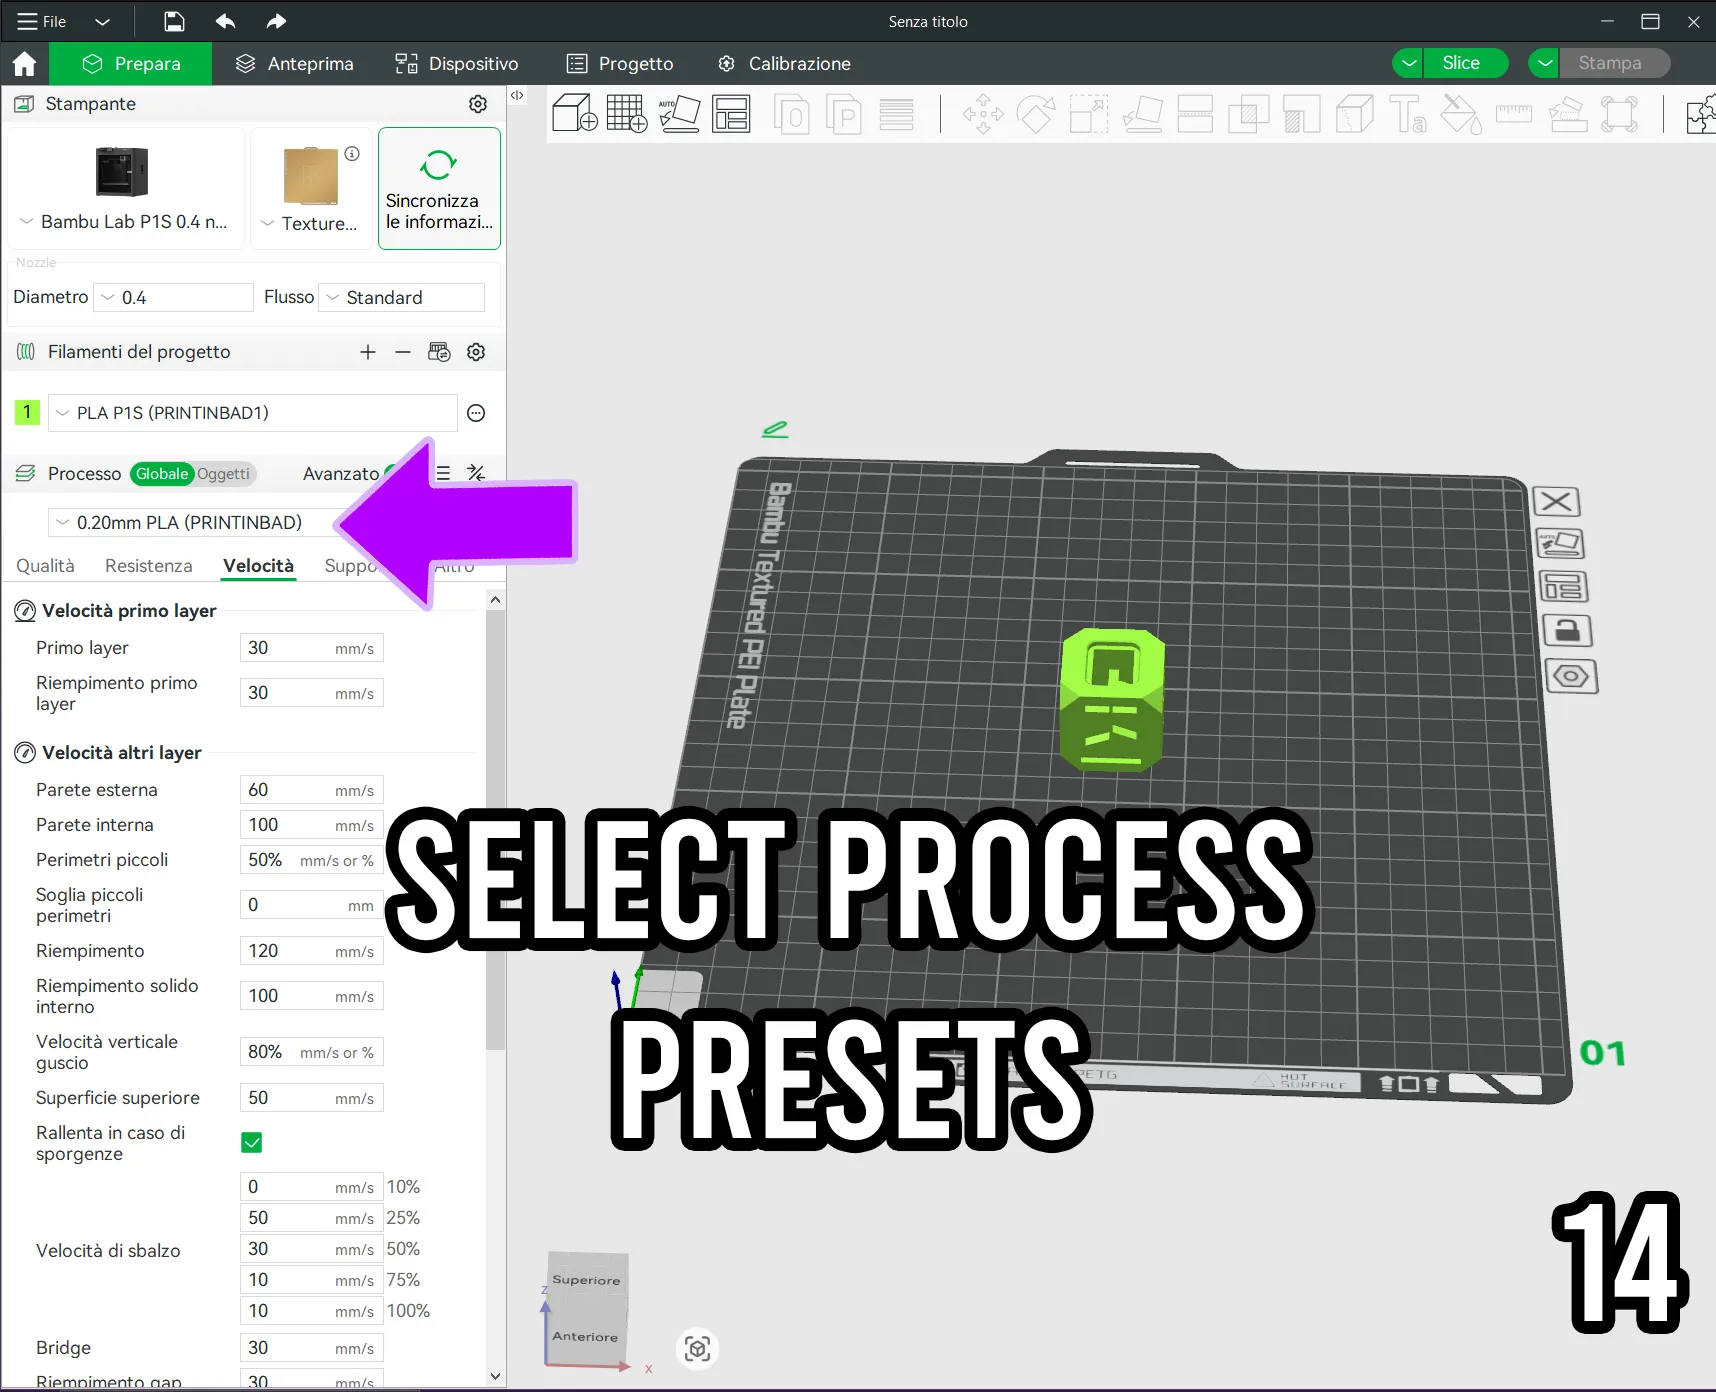
– Select the process presets (photo 14).
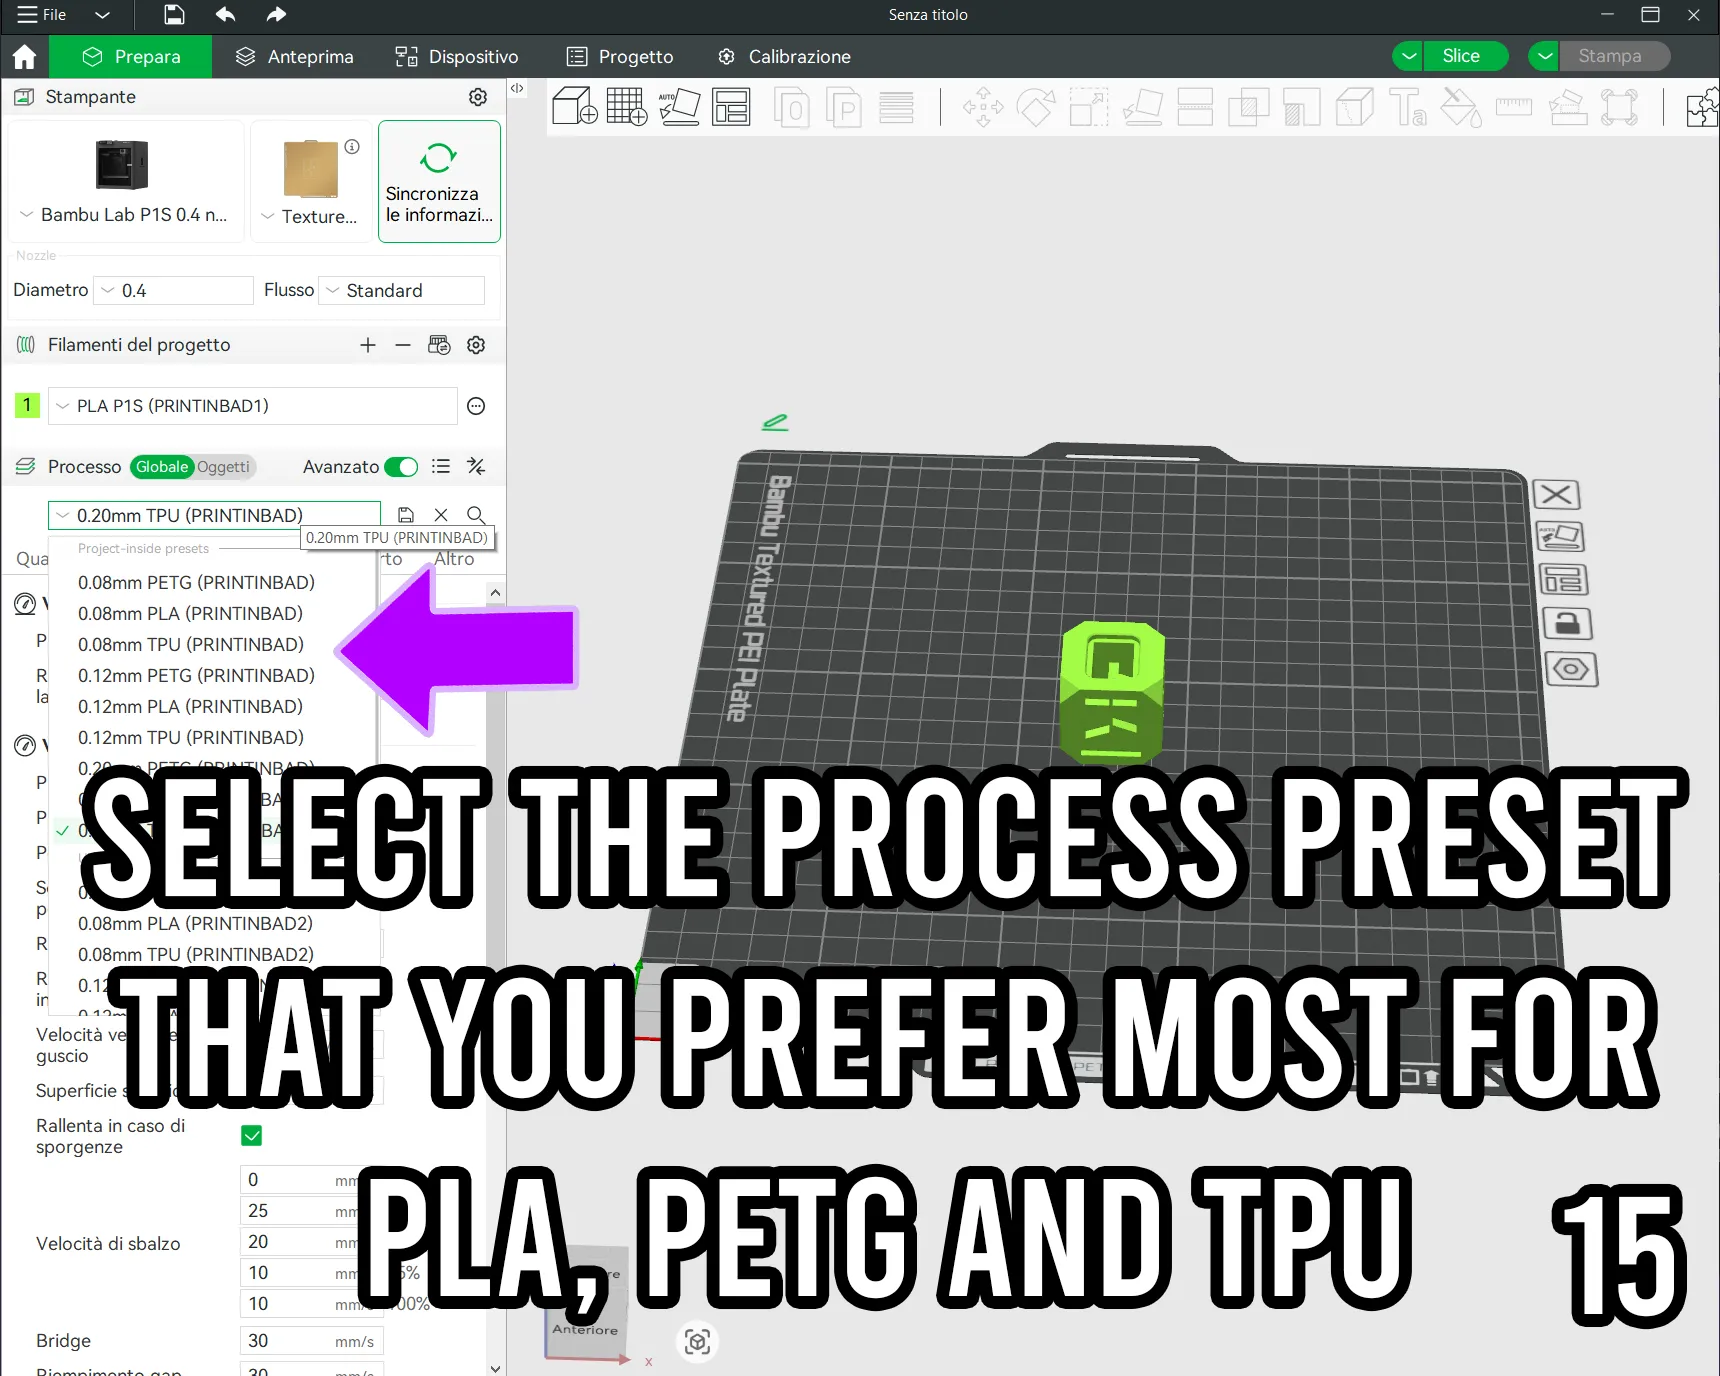
– Choose the one with your preferred layer height (0.08 / 0.12 / 0.20 mm, for PLA – PETG – TPU) (photo 15).
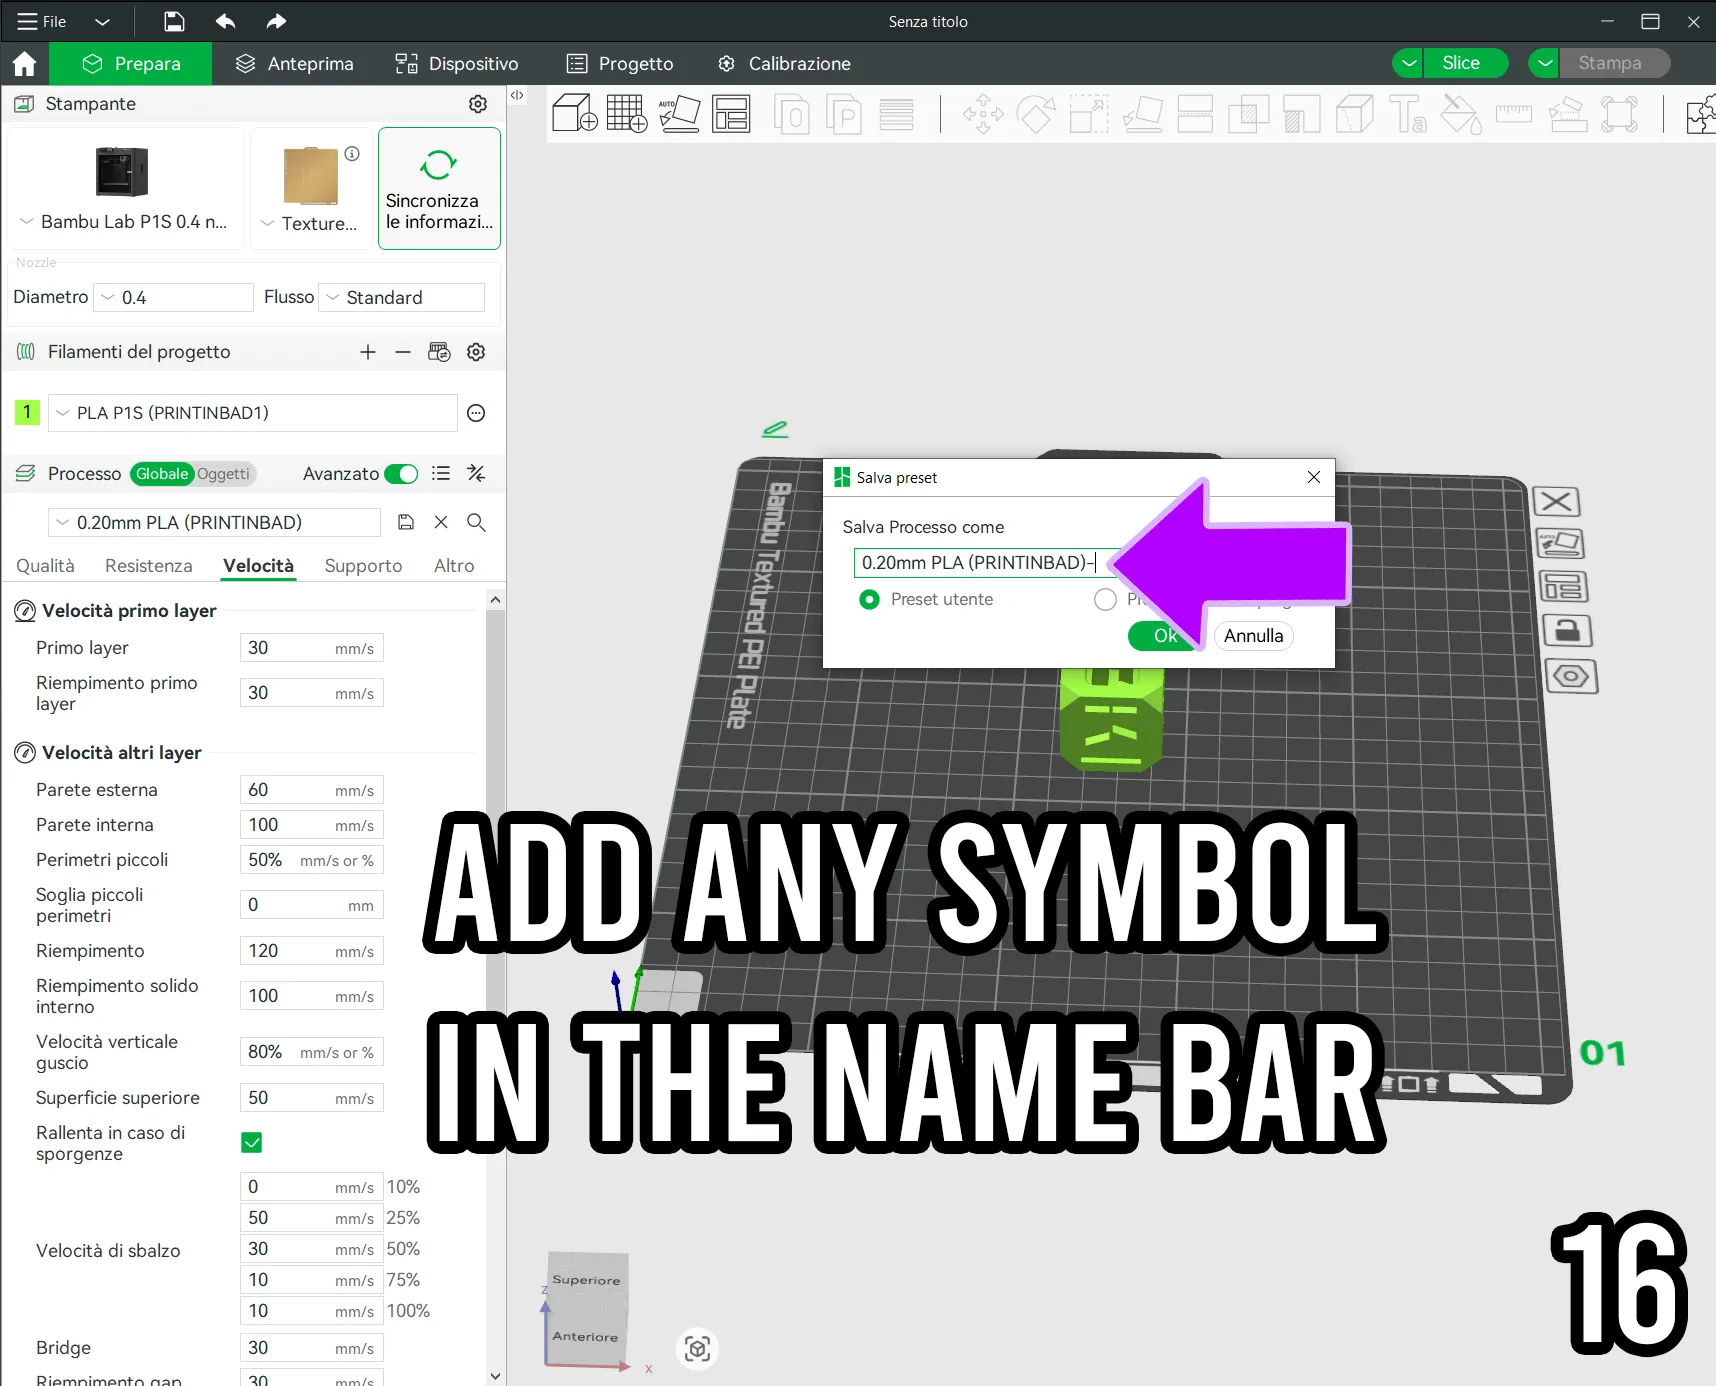
– Add a symbol to the name (photo 16).
– Check User Preset (photo 17).
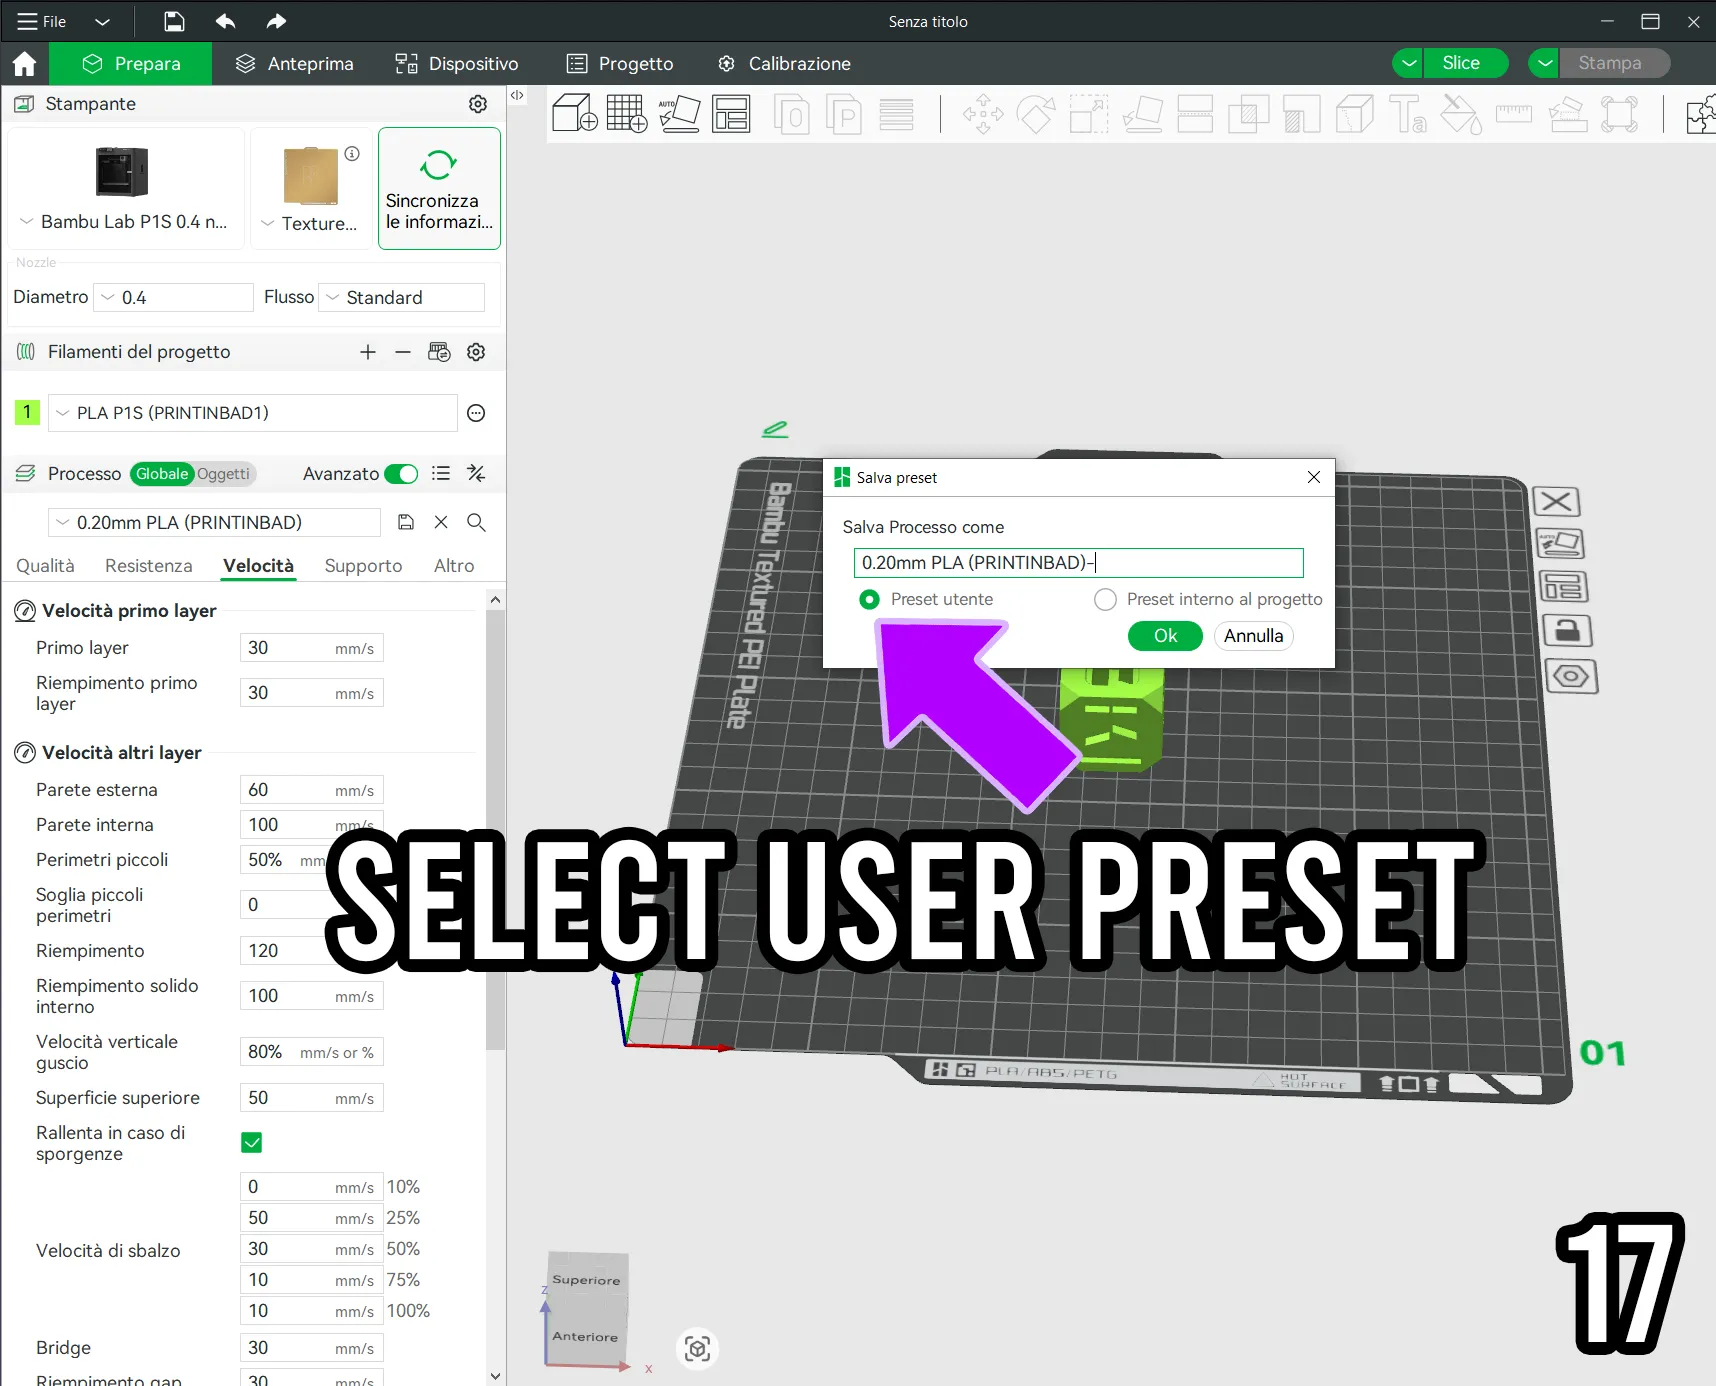
– Confirm with OK (photo 18).
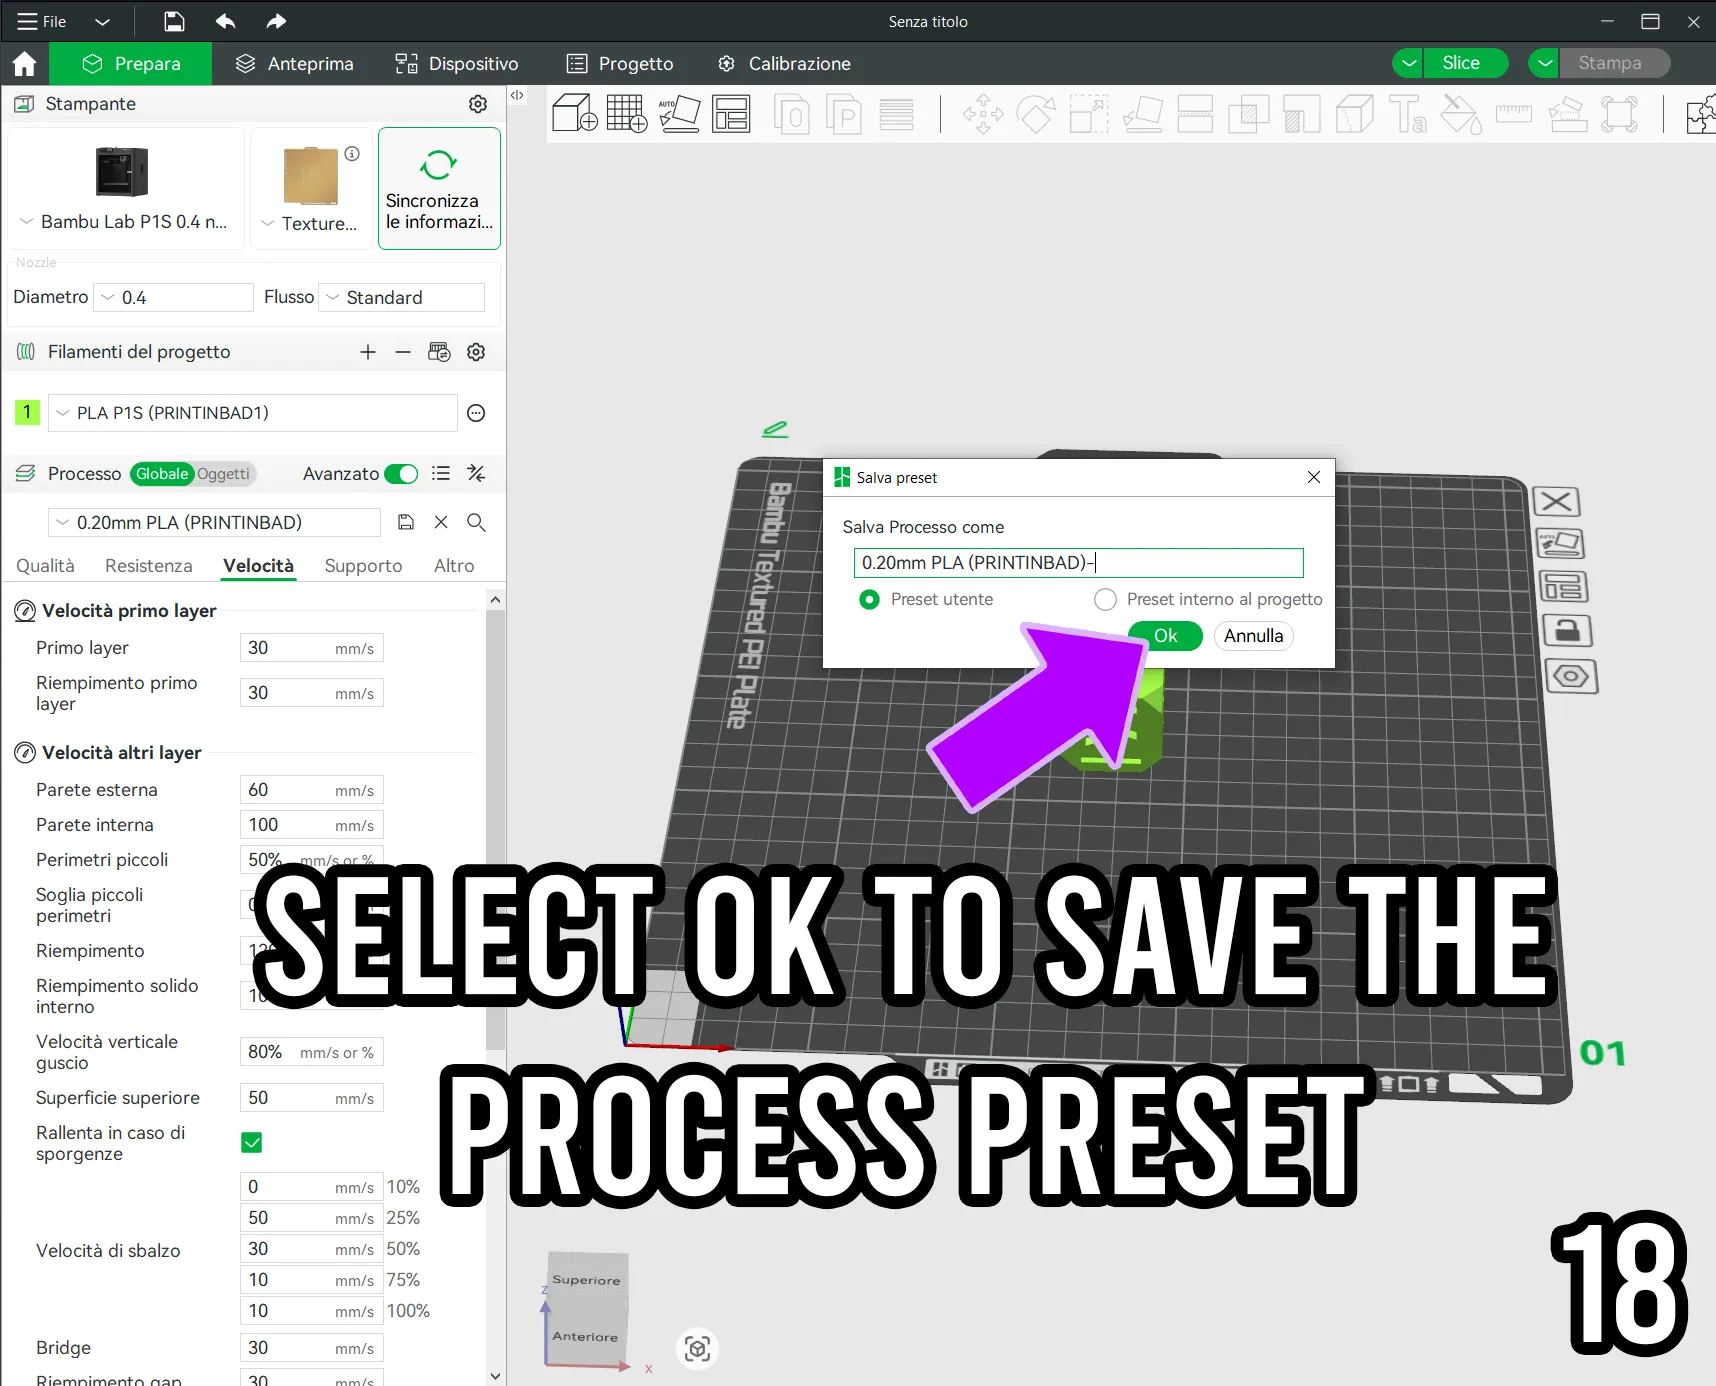
Now your print profiles are always ready, and you won't have to redo everything every time.
🔍 Final check:
Close the .3MF file and open an empty project.
If your presets appear in Printer / Filament / Process in the User Preset section, then you have done everything correctly.
If you do not see them, it means you saved them as Project internal preset → redo the saving by selecting User Preset and adding a symbol to the name.
License

You shall not share, sub-license, sell, rent, host, transfer, or distribute in any way the digital or 3D printed versions of this object, nor any other derivative work of this object in its digital or physical format (including - but not limited to - remixes of this object, and hosting on other digital platforms). The objects may not be used without permission in any way whatsoever in which you charge money, or collect fees.


Comment & Rating (19)