MagKnife² AutoRetracting Utility Knife/Box Cutter


Print Profile(1)

Bill of Materials

Description
Boost Me (for free)
This design required lots of prototyping over many weeks, using up lots of filament and magnets and money. If you like it, I'd really appreciate a boost :)
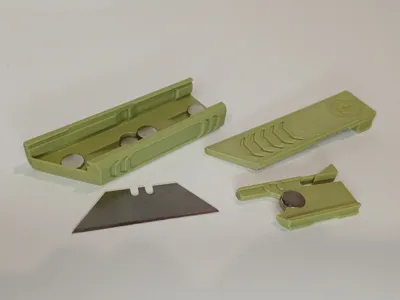
MagKnife², my latest auto retracting utility knife
Simply slide the lid fully forward to click the blade into position, where it will stay firmly in place for cutting, then with a little pull back on the lid the blade will automatically retract with a satisfying click, no springs required :)
Completely redesigned from scratch, this spring-free mechanism is the sequel to my previous design, but this time it's stronger, safer, and more stylish :) This model requires eight 10x2mm neodymium magnets, which can be purchased from Bambu's Maker's Supply, as well as a few tiny drops of super glue/CA glue.
This is designed for the most common blade size, roughly 62mm x 19mm
Instructions
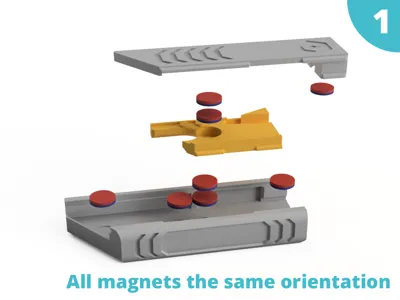
Add a tiny drop of super glue to each magnet hole
Being careful to align the magnets correctly according to the picture above, press all magnets firmly into position. Remember some holes need 1 magnet, some need 2.
There are slots to get a small screwdiver in to pop magnets out if you insert them the wrong way
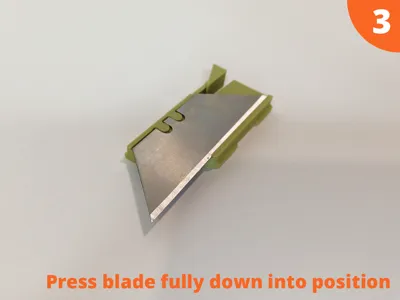
Slot the sharp edge of the blade under the ridge of the blade carriage and press it down fully into position
Insert the blade carriage to the rear of the base and carefully but firmly push until it clicks into place
Test to make sure the blade carriage slides freely, if not then remove the blade, apply pressure to the blade carriage and slide it backwards and forwards to grind it smooth
Press the lid in from the top and it's complete, enjoy :)
Important warning: Always be careful when handling a sharp blade, and check your local laws to ensure this complies before printing
License
You shall not share, sub-license, sell, rent, host, transfer, or distribute in any way the digital or 3D printed versions of this object, nor any other derivative work of this object in its digital or physical format (including - but not limited to - remixes of this object, and hosting on other digital platforms). The objects may not be used without permission in any way whatsoever in which you charge money, or collect fees.
Comment & Rating (183)