Meshtastic All in One 6 watt Solar Enclosure


Print Profile(2)


Description
Boost Me (for free)
Please boost me. It cost nothing and helps offset the cost of filament to test these models and print profiles. It enables me to do this free for the Meshtastic community. I don't charge for my models.
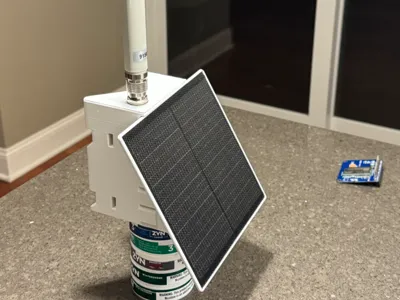
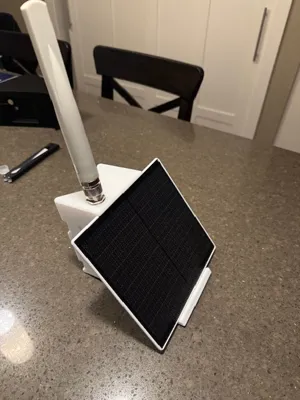
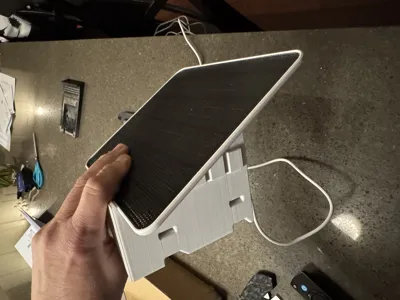
Meshtastic Solar Node 6 Watt Panel Enclosure and mount all on one unit.
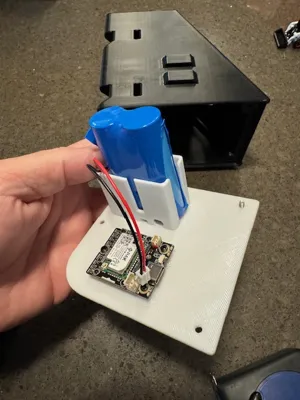
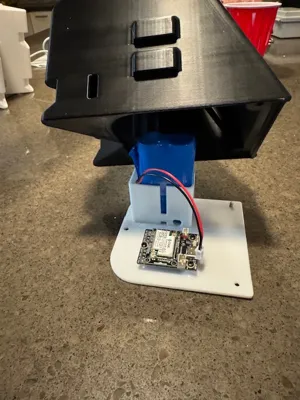
Several people on our svmesh.net Meshtastic Group have been using this $13 solar panel successfully for the past few years. I wanted to design and build an all-in-one enclosure that has in integrated pole mount, can fit at least 2 18650 batteries, is vented for accurate weather telemetry, and has the capability to house multiple types of Meshtastic devices. This fits all of those requirements. Please give me a boost since this cost a lot of time and 3 rolls of filament to create and test the prints. I am not looking to sell the design, but this is not to be sold. I only want to help other Meshtastic users.
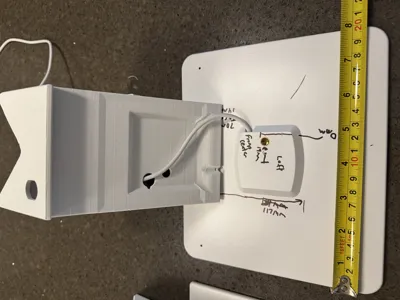
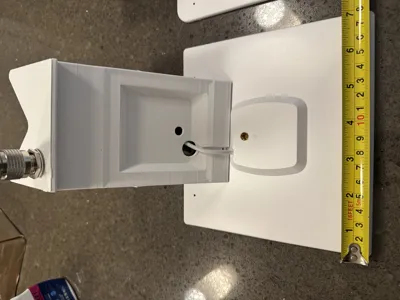
There are several plates on this 3MF for all of these device options. Some plates even include an SMA antenna hole on the battery plate to use external Bluetooth antennas for OTA firmware updates. This is really useful if you mount it on a tower that is our of reach.
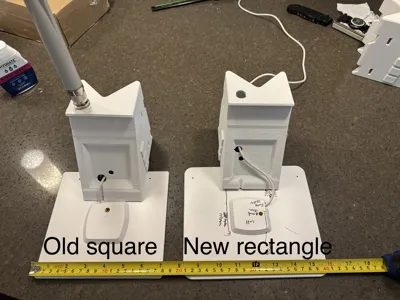
Solar panel used https://a.co/d/63unm1U UPDATE!!! 9/12/26 9pm. Manufacture changed to a new panel design so hole will not line up since new panel is wider! I will be ordering the new design and redesign the model for this new panel. Please verify you panel prior to printing node. I will loop back soon. Update 9.20.25 I uploaded a new model for the new rectangular panel currently shipping from amazon seller. I left the original model on the print profile and models in case you get shipped old inventory that is still out there in parts of the country. Check fitment prior to fitting. New panel is slightly rectangular and ol panel was square. I added protos since the mounting on the back is slightly different.
Long N female connector https://a.co/d/cod1EHD Confirmed a 6" cable will work as well.
Heat Inserts https://a.co/d/icKmHUJ
Hose Clamps https://a.co/d/3uVJmM9 Size depends on pole size. You can also loop a small clamp around the edge for poles smaller than 2 inches.
RAK 19003 https://a.co/d/ilmzBvR
Heat inserts https://a.co/d/3Js44fj
1/4x20 bolt to secure panel to the enclosure. Required it will help lock everything in place while the silicone dries.
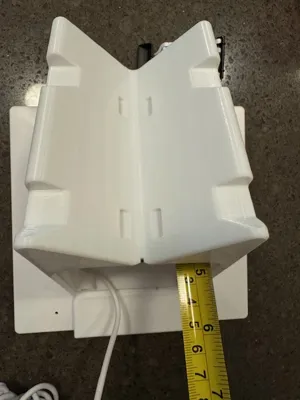
Also note there are water weep channels and holes if water enters behind the panel between the panel and the enclosure. These were added on as a precaution.
The great part is for those who do not know how to solder you can bunch up the solar panel long usb cable and stick it in the top of the enclosure and plug the panel into the RAK USB C port, or option 2 cut the cable and solder a Micro JST connector to use the solar charging circuit.
This is best printed in ASA. I test printed in ABS since it was half the cost of ASA.
It is required to use silicone to seal the node enclosure prior to mounting the panel and screwing in the ¼”x20 screw. The screw will hold everything in place while the silicon sets up and is very rigid when dry.
License
You shall not share, sub-license, sell, rent, host, transfer, or distribute in any way the digital or 3D printed versions of this object, nor any other derivative work of this object in its digital or physical format (including - but not limited to - remixes of this object, and hosting on other digital platforms). The objects may not be used without permission in any way whatsoever in which you charge money, or collect fees.
Comment & Rating (23)