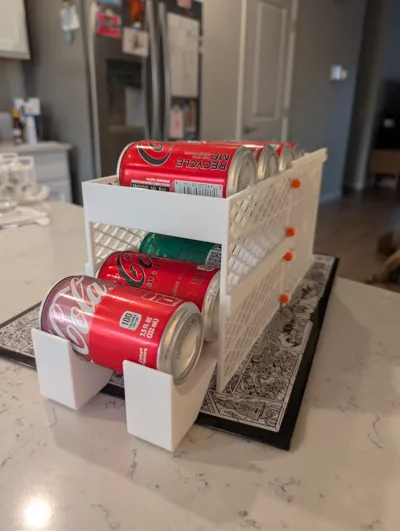
Modular can dispenser


Print Profile(11)


Description
Dispenser for cans and other cylindrical objects. Easy assembly with no glue, welding/soldering, etc. - only printed parts.
Originally designed for mini cans (7.5 oz), but the model is fully parametric, so if you have other cans, leave a comment with the can height and diameter, and I'll post a print profile. Check the print profiles to see if I've got what you need.
NOTE: Print times and filament costs are very exaggerated because every possible module is included. You will NOT need to print every module. I could change up the print profiles to improve the stats, but figured better organization is more important.
Some key features:
- It's extremely easy to assemble, with no glue, welding, etc. It relies only on printed parts.
- It's modular. This means that if a part fails to print, you only need to reprint that part. It also means that you're in control of how big the dispenser is - you print the start and end pieces to form one floor and then each middle module adds an extra floor.
- It's tested extensively so that the dispensed items don't get stuck during normal operation.
Modules
There are three main modules used to assemble dispensers.
- Bottom: This is the part facing the user, from which you will grab your items.
- Top: This part is the furthest from the user, and items will start here before reaching you.
- Middle: To make the dispenser larger and hold more items, you can add middle parts in between.
The simplest assembly would be just a top and a bottom. This will have one floor:

By adding a single middle piece in between, we reach two floors:

We can keep doing that to keep adding floors. For example, here's a four floor model:

NOTE: There are two variants of bottom: bottom_supported and bottom_unsupported. You should only need one of those - bottom supported will be sturdier, but unsupported will look sleeker.
Assembly
First, align the pieces vertically:

And then slide them together:

You will end up with something like this:

Next, take your front and your back parts and align them so that the screw plates face each other:

Insert screws in the screw plates. You can either use the printed ones, or use M4 or M5 screws with matching nuts if you have some lying around:

You can now load your dispenser and start using it!

Boost Me (for free)
Prototyping designs takes a lot of filament; help me out with a boost to let me refine designs more effectively :)
License
You shall not share, sub-license, sell, rent, host, transfer, or distribute in any way the digital or 3D printed versions of this object, nor any other derivative work of this object in its digital or physical format (including - but not limited to - remixes of this object, and hosting on other digital platforms). The objects may not be used without permission in any way whatsoever in which you charge money, or collect fees.
Comment & Rating (154)