Tolino Vision Color / Kobo Libra Colour - Dock


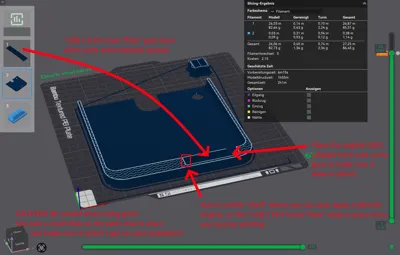

Print Profile(2)


Bill of Materials
- USB C angled Adapter Type FF x 1: https://www.amazon.de/MOGOOD-Adapter-Kompatibilit%C3%A4t-Thunderbolt4-MacBook-Blau/dp/B0FH6P19V6?crid=3HWUUDLK0OXC1&sprefix=mogood%2B90%2Bgrad%2Caps%2C86&sr=8-6&th=1
- optional weights x 1: https://www.amazon.de/dp/B01MG1SDXA?social_share=cm_sw_r_cso_cp_apin_dp_DT7W89JZB2PPFQ23TXGP&starsLeft=1&skipTwisterOG=1
Description
Update 1.2:
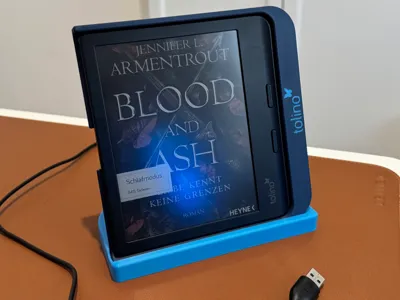
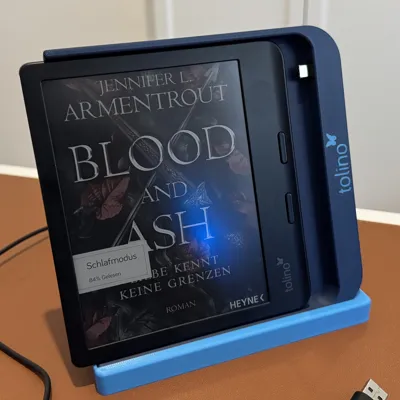
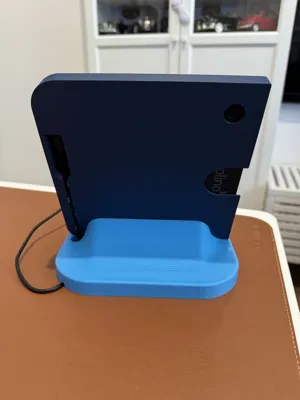
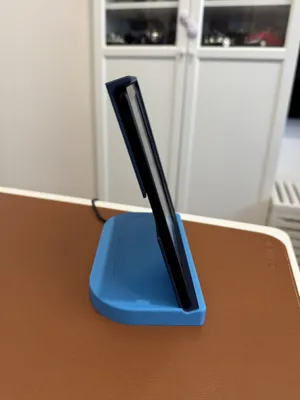
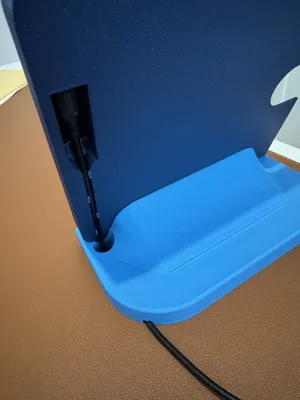
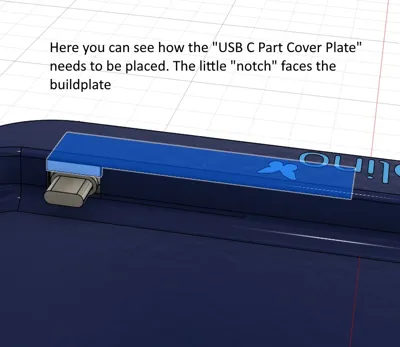
I made this now a complete charging dock! Ideal for your nightstand, desk or just as a stand while reading. The adapter and cable are now completely hidden inside the charging stand (well… You can see the cable from the back, but I made it that way so you can exchange it). While it can still be printed and used just as a charging pad, I now added a base or stand, where you can glue it in and guide through the cable. You can also put some weights in the base, so that it won't fall over easily. The new version also comes as Tolino-branded, Kobo-branded or without a logo at all. All neccessary settings incl. the pause for putting in the angled USB C adapter are already in the print profile! For more information take a look at the provided manual (english and german).
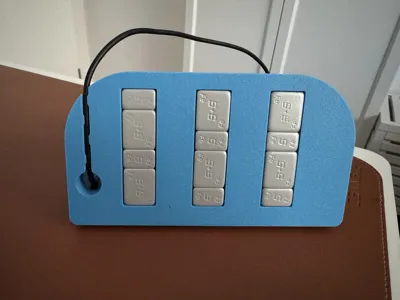
I switched to the Tolino Vision Color recently after owning a kindle for years because of Amazon's decisions on book exports. Since I got the device I quickly realized, that there aren't many 3d-printable accessories for it, so I gave my best to make a sync / charging pad for it, as I wanted to be able to connect it even in the dark without needing to fiddle around with the cable (plus I think it looks cool). The pad is designed to work with the blank device and connect perfectly when sliding in the device.
It was designed around the Tolino Vision Color, but as it is the exact same as the Kobo Libra Colour when it comes to dimensions and port placement, you can use it with both devices (I even added 3 types of pads. One for the Tolino, one for Kobo and one blank version).
This is the USB C adapter I was using (might fit similar ones as well): MOGOOD 90 degree USB C Adapter (Type FF)
Printing instructions (for old version - look at the manual for new version):
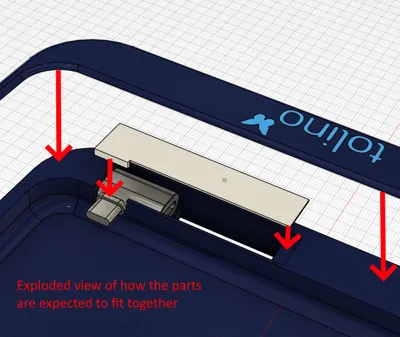
- Print the adapter piece first as you are going to need it when printing the dock
- Start the print of the dock
- Wait till it automatically pauses
- insert the USB C angled adapter (use some glue if you want to be sure)
- add the adapter piece (use a little bit of glue so it stays in place)
- resume print and wait for it to finish
- enjoy :)
Documentation (2)
License
You shall not share, sub-license, sell, rent, host, transfer, or distribute in any way the digital or 3D printed versions of this object, nor any other derivative work of this object in its digital or physical format (including - but not limited to - remixes of this object, and hosting on other digital platforms). The objects may not be used without permission in any way whatsoever in which you charge money, or collect fees.
Comment & Rating (9)