


Print Profile(2)


Description
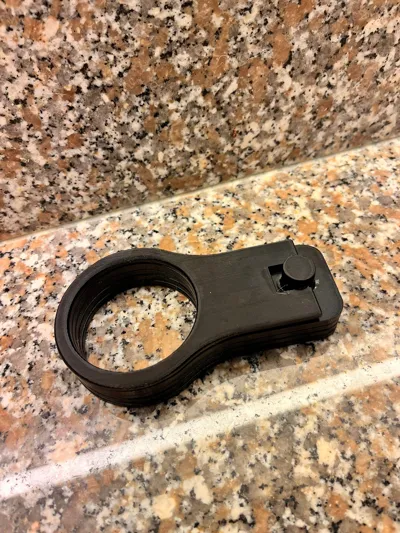
The latest creation from My3D is a print-in-place cup holder.
It is available in two versions: for 4 cups or 6 cups.
I printed the model in PETG Hyper on the Bambu Lab A1.
I also recommend using PETG, as it did not work for me with PLA – the parts stuck too much because two different axes of rotation work within each other here.
Post-print instructions:
- Carefully remove the cup holder from the print plate and remove all supports.
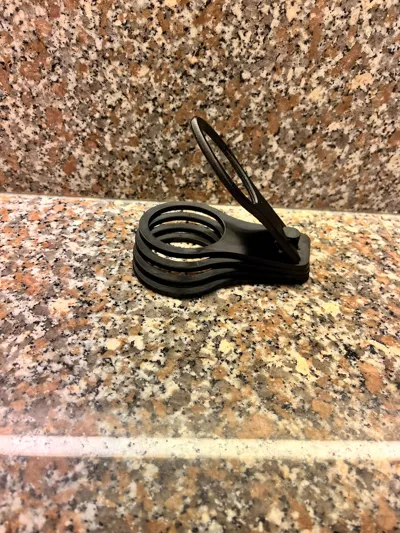
- Before unfolding the top segment, please check if the lower segments can move freely.
- To do this, gently move each segment back and forth until it loosens.
- Depending on the cooling time after printing, a bit more force may be required.
- Important: Do not unfold the top segment first!
- The fastening bolt can break in the process.
- Reason: All segments are printed with a distance of only 0.4 mm from each other, and the top segment is designed to lightly clamp the lower ones later, so that they do not unintentionally twist when carrying the cups.
- Surface finishing: To smooth the surface after removing the supports, you can carefully rework the affected areas with a cutter or fine sandpaper.
Thanks to this clever folding mechanism, the cup holder is particularly compact and practical – perfect for transporting several cups with just one hand.
💡 I am open to feedback and new ideas – feel free to leave a comment!
Description
The latest creation from My3D is a print-in-place cup holder.
It is available in two versions: for 4 cups or 6 cups.
I printed this model in PETG Hyper on the Bambu Lab A1.
I recommend using PETG as well, since PLA did not work for me – the parts fused together because of the two different rotation axes.
Post-print instructions:
- Carefully remove the model from the build plate and take off all supports.
- Before unfolding the top segment, check if the lower segments can move freely.
- Gently move each segment back and forth until it loosens.
- Depending on how long the print has cooled, you may need to apply a bit more force.
- Important: Do not unfold the top segment first!
- Otherwise, the locking pin may break.
- All segments are printed with a clearance of only 0.4 mm, and the top segment is designed to clamp the lower ones slightly so they don’t rotate while carrying cups.
- Surface finishing: To smoothen the surface after removing the supports, you can carefully clean the affected areas with a cutter or fine sandpaper.
Thanks to this clever folding mechanism, the cup holder is compact, practical, and perfect for carrying multiple cups with just one hand.
💡 I’m open to feedback and new ideas – feel free to leave a comment!
License
You may create derivative works based on this object, provided that all such derivative works are published exclusively on the MakerWorld platform and include proper attribution to the original creator. You may not share, upload, host, distribute, or publish this object—or any derivative work of this object—on any other digital platform, marketplace, or distribution channel. Commercial use of this object and any derivative works is strictly prohibited. This includes, but is not limited to, selling, renting, sublicensing, or using the object in any context in which you receive monetary compensation or other financial benefits.
Comment & Rating (52)