Infinity Modular Filament Storage – Stack & Expand


Print Profile(1)

Description
Boost Me (for free)
If you liked the model, consider boosting it! Thank you!
Why?
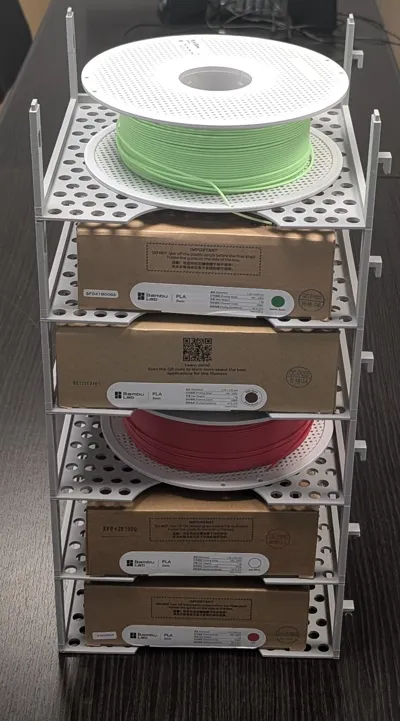
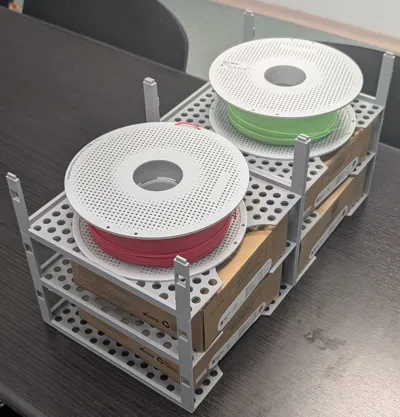
After starting with 3D printing, I ran into a common issue: what to do with all the filament rolls and filament boxes? I like the way they look, but having them disorganized or in cardboard boxes did not look that good and made proper use of space around the printer. So I considered looking into a way to store them properly. I started from my main requirements: stackable, both vertical and horizontal, to make proper use of available space, easy to connect and disconnect (for ease of reconfiguration) and easy to print.
Project:
Print time is around 5 hours, with a modifier added for the vertical arms in order to increase infill for strength, without requiring to much infill for the base, where the weight is distributed on a large surface. Material use is 125g, so with a 1kg roll you can print 8 pieces, which can be stacked 1x8, 2x4 or any combination you need and makes the best use of available space.
Printing:
Materials: I used both PLA and PETG for testing. Don't think PETG is required, as distribution of the weight is balanced and even stacking 8 did not produce any issues with PLA. They are flexible enough to not create any pressure points, in all stacking combinations, but having at least 2 horizontal stacks connected will increase stability and strength exponentially.
Printing: During several scale iterations, I did not find any printing issues, but going full scale (to fit a full size Bambu Filament box) meant having the supports very close to the edge of the plate. In order to ensure adhesion, I have increased the bed temperature with 10 degrees. Did not require any bed glue.
Connecting:
This should be straight forward, vertical connection is done by inserting the top of the legs into the spaces on the bottom of the print, it will make a proper clicky sound when its inserted properly. Side connection is done by lifting the print 1 cm, inserting from the left side to the right in the provided spaces in the 2 left legs, then pushing it down. There is a tight 0.2mm fit, so it should be very stable, but easy to insert and remove.
Supports:
The 4 side supports for the legs are easily removable, never encountered issues. Supports for the connection holes at the bottom are a bit tedious, I used a standard set of small pliers and easily removed them. Don't force too much, just poke the pliers into the support area, grab it and pull it out easily. I added some pictures below of the steps:


If you have any issues, please comment and I will try my best to reply ASAP with a solution. Also, if you have any suggestions, please let me know and I will try to implement them.
Thank you and happy printing!
License
You shall not share, sub-license, sell, rent, host, transfer, or distribute in any way the digital or 3D printed versions of this object, nor any other derivative work of this object in its digital or physical format (including - but not limited to - remixes of this object, and hosting on other digital platforms). The objects may not be used without permission in any way whatsoever in which you charge money, or collect fees.
Comment & Rating (9)