Micropad

Print Profile(1)

Description
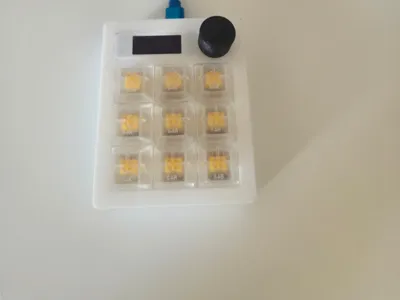
3×3 MicroPad for ESP32-S3 (Waveshare ESP32-S3 Zero)
Compact and fast macropad with 9 keys, volume knob (rotary) and two layers (Numbers & Shortcuts). The device functions as a USB-HID keyboard + Consumer Control (media/volume) – plug-and-play in Windows, macOS, and Linux. A third mode (Applications) is reserved for future features.
Repo (code, schematic, config & optional 3D files):
https://github.com/George3235/Makro_Pad
Highlights
- 9× MX keys (1U) in a classic 3×3 matrix
- Two layers (switched by double-clicking the encoder button)
- Numbers: sends characters 1–9 according to the matrix
Shortcuts (Windows by default):
Copy Paste Cut
Undo Select All New Tab
Screenshot Rename(F2) Play/Pause
- Easy to change for macOS/Linux in the code
- Rotary encoder (KY-040/EC11):
- Turn right/left → Volume + / Volume −
- Click: Mute/Unmute
- Double-click: switch layers (Numbers ↔ Shortcuts)
- Long press: reserved for Applications
- USB-HID & Consumer Control: directly supported by the OS
- Open and modifiable: simple C++/Arduino code with clear folders and comments
- (Optional) OLED display (SSD1306, I²C) and/or NeoPixel underglow – if you want to add it
Bill of Materials (BOM)
Electronics
- 1× Waveshare ESP32-S3 Zero (USB-C, built-in USB-HID support via TinyUSB)
- 9× MX-compatible switches (Cherry-type) + 9× keycaps (1U)
- 9× signal diodes (e.g., 1N4148) for the matrix
- 1× Rotary encoder (KY-040/EC11) + 1× knob (6 mm D-shaft)
- Flat cable/single wire (26–28 AWG), pin header, optional dupont
- USB-C cable
(Optional)
- 1× OLED 0.96" SSD1306 (I²C)
- NeoPixel/WS2812B (e.g., small ring or strip)
- Resistor for LED (if you add your own LEDs)
Mechanics & assembly
- 3D-printed parts: Top plate, Bottom case, Encoder spacer, Knob
– key switch holes 14×14 mm (provides a good fit for MX switches) - Screws & threaded inserts (e.g., M3 heat-set inserts + M3×6–8 mm screws)
3D Printing
- Material: PLA or PETG
- Layer height: 0.2 mm (0.16–0.28 mm works)
- Infill: 15–25 %
- Perimeters: ≥3 for stable top plate
- Supports:
- Top plate: usually without supports
- Bottom case: supports at USB cutout if your chassis has an opening
- Orientation: print the top plate with the top side up; the bottom case with the bottom side down
- Fit: 14×14 mm for MX switches usually provides a good press-fit. Adjust as needed.
Upload STL/STEP to the MakerWorld project: Topplate.stl, CaseBottom.stl, Knob.stl (filename optional).
Connections (overview)
- Encoder (default in code):
- DT → GP6
- CLK → GP7
- SW → GP8 (internal pull-up enabled in code)
- Key matrix: rows/columns are defined in Config.h in the repo.
Connect according to that table (diodes in series per button, all keys in a 3×3 matrix).
Tip: If the encoder “goes backward,” swap DT and CLK.
Firmware
You can build in Arduino IDE or PlatformIO.
Arduino IDE (simple)
- Install ESP32 support (Boards Manager → esp32 by Espressif).
- Select board: ESP32S3 Dev Module or Waveshare ESP32-S3 Zero (if available).
- In Tools:
- Enable USB CDC on boot
- Enable TinyUSB (HID) if the option is available
- Clone/copy the project from the repo and open the main sketch.
- Libraries (only if needed):
- Adafruit NeoPixel (if you use underglow)
- Adafruit SSD1306 + Adafruit GFX (if you use OLED)
- Compile & upload. In case of problems: hold BOOT while pressing RESET to enter the bootloader.
PlatformIO (advanced/consistent)
The repo contains a PlatformIO config. Typically:
[env:esp32s3zero] platform = espressif32 board = esp32-s3-devkitc-1 framework = arduino
Build and flash via pio run -t upload.
Usage
- Connect via USB-C → the device appears as a keyboard (HID).
- Encoder:
- Turn: volume up/down
- Click: mute/unmute
- Double-click: switch layers
- Long press: (future) Applications
Numbers layer: sends 1–9 according to the layout:
7 8 9
4 5 6
1 2 3
Shortcuts layer (default Windows):
Copy Paste Cut
Undo Select All New Tab
Screenshot Rename(F2) Play/Pause
Customize
- Keymaps & layers: open Shortcuts.h / Config.h in the repo and replace combinations (e.g., for macOS Cmd instead of Ctrl).
- Encoder behavior: change functions for onClick, onDoubleClick, onLongPress.
- Third layer (Applications): ready hook in StateMachine – add your app launchers, window management, etc.
- OLED/NeoPixel: activate and connect according to the comments in the code if you want to use these.
Troubleshooting
- No COM port / Port busy: disconnect/reconnect, try another cable/port, close programs that lock the port (serial monitor), try BOOT+RESET sequence.
- Wrong encoder direction: swap DT ↔ CLK.
- Key spams / doesn't work: check diode direction and matrix wiring according to Config.h.
Comment & Rating (1)