PTFE Coupler: New JAW-LOCK Technology


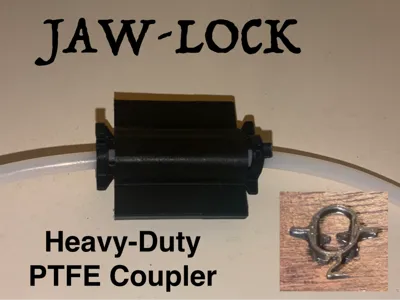

Print Profile(1)

Description
Boost Me (for free)
Boost me so I can afford to work on more over-engineered systems like JAW-LOCK that solve your real-world printer problems!
Notes From The Creator
Random fun fact: PTFE actually stands for polytetrafluoroethylene. Makes you sound a lot smarter than you are when you explain how 3D printers work.
For those of you who don't know me, I've made some embarrassing attempts at joining two slippery PTFE tubes together. I made iteration over reiteration, time and time again, but nothing worked. I eventually posted my best shot and looked for other solutions. They didn't work. I didn't have enough Bambu official connectors to cover up all the holes in my system, and every time there was a chance for my AMS to blow the tube open, it did. I lost filament, I lost time, and I had several meltdowns in my garage upon coming down to see my busted system overflowing with filament before my print even got a chance to start.
But then I realized: you can't pull apart something connected by a hook. But how would I get the hook into a PTFE tube? I would stab something into it and attach my connector to that.
Or rather, I would bite into it.
I used the same tightening system as I did with my previous model where an inserted clasp increased tension on the tube as it rotated and the walls got closer together, except I ditched the idea of being compact and I just went big, sturdy, and wildly unnecessarily powerful. Instead of using a measly wall to try and hold onto the tube using friction, I implemented JAW-LOCK, a first-of-its-kind system which uses teeth that bite into the tube and make small dents that block its exit out, allowing the system to withstand much more force without breaking due to a small ledge ("bite mark") inside the actual PTFE tube that prevents it from flying out of the connector body. More than enough force to handle repeated blows from the AMS for months on end without deforming.
And that, ladies and gentlemen, is how I devised the world's first fully 3D printable heavy-duty bi-directional PTFE tube connector that uses a twisting mechanism to latch jaws onto the tube so you can't pull it out even if you try. (Except humans are actually slightly stronger than an AMS, so it's theoretically possible. That isn't to say that it's an easy task.)
Tension Settings
Because the JAW-LOCK system creates dents in the PTFE tube, it is essential that you use the right jaw for the job. While all PTFE tubes are machined to be basically the same, many are in different stages of wear and tear. Some are too big, and others are too small. Bulges and scratches can cause the jaws to either slip and allow the filament to spill out or crush the tube so far that the filament gets blocked by the implosion and can't pass through. Therefore, I have created 3 pre-made preset tension and depth settings, labeled accordingly:
- Weaker. Intended for PTFE tubes that are bulged or larger in diameter for any reason. Can also perfectly and smoothly accommodate A1 series tubes and possibly Bowden/Creality tubes (untested as of now; please adjust size and tension while this is still in beta). If your system requires less friction (e.g. longer path from the AMS to the toolhead) in order for the filament to make its way to and back from the extruder, then this will also function somewhat well; beware, it may pop open under moderate to high stress or after extended periods of time under high heat.
- Default. Slightly difficult to rotate into place but grips onto most PTFE tubes with minimal friction and allows filament to pass through well while being securely attached to the tube; able to withstand regular AMS function even if mounted inside the chamber/in a hot area.
- Extremely strong. Intended for exceptionally worn-out or abnormally small tubes. Very difficult to rotate and may rotate itself into tho idle position, block the filament path, or break if used with PTFE tubes that would be better accommodated with Level 1 or 2 jaws. However, if it does work with a normal tube… well, let's just say it's not breaking for a while.
(NOTE: Before determining a lower tension setting, try pushing a piece of filament all the way through manually to “break in” the tubing which may be crushed. If you feel a little bit of resistance or “snappiness,” that is perfectly fine. If you have extreme trouble jamming the filament in and it still has resistance after moving the filament in and out of the tube repeatedly, consider trying a different tension setting.)
For your convenience, I have included a Build Your Own (BYO) jaw to accommodate any extreme situations or tubes. Just go to the BYO plate and click on the square in the middle of the jaw (Claw Grip Opening in object settings). That will determine the tension of the jaw on the PTFE tube. Default is 4.8mm (level 1 is 4.6mm; level 3 is 5mm). Adjust the width on the X and Y axes (Z axis does not matter much; you can use uniform scale if you like as long as your side lengths are within reason) to change the tension; decreasing the width makes it tighter and increasing the width makes it looser. Adjust and reprint until the jaw is snug and filament can pass through.
EDIT: I have also added a second locking position inside the tube so that you can twist the jaw past its normal tightness in case it deforms and releases the tube, thus allowing you to tighten and secure the system with the current configuration instead of printing a new jaw. However, if that second emergency position releases, please print a new tighter jaw or replace it with another jaw of the same tightness.
Assembly (see GIF)
After removing the parts from the plate, insert the two jaws into the main tube.
If they do not slot in, try different angles until they do. If no angles work, there may be some filament that caved in during the first layer depending on the quality and durability of your build plate (SuperTack is good for this application). Scratch from the inside outward until the residue is gone and then insert.
- Push your first PTFE tube into the middle of one end until it slightly snaps into place in the center. It is not intended to go very deep.
- Rotate the jaw clockwise (from the perspective of the opening) using the grips until it cleanly snaps into place and aligns roughly with the grips on either side of the main body (or if the PTFE tube is exceptionally tight/printed on an A1 series printer, just being snug will do; it will not come loose very easily as long as it is tight) .
- Push a piece of filament through the open end and push through the resistance until it goes all the way through to the PTFE tube. Try different angles until you can easily push the filament through. This forces the PTFE tube to be in its correct place for alignment and loading.
- Repeat steps 2 through 4 with the other side.
- Sit back and never have to worry about the system busting open again! (That is, unless it was installed incorrectly or the tension setting needs to be changed.)
License
You shall not share, sub-license, sell, rent, host, transfer, or distribute in any way the digital or 3D printed versions of this object, nor any other derivative work of this object in its digital or physical format (including - but not limited to - remixes of this object, and hosting on other digital platforms). The objects may not be used without permission in any way whatsoever in which you charge money, or collect fees.
Comment & Rating (2)