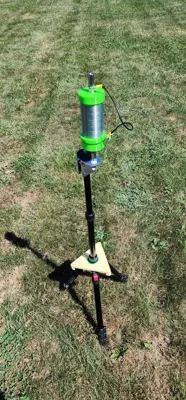
40m / 80m Coil for POTA Performer


Print Profile(1)

Description
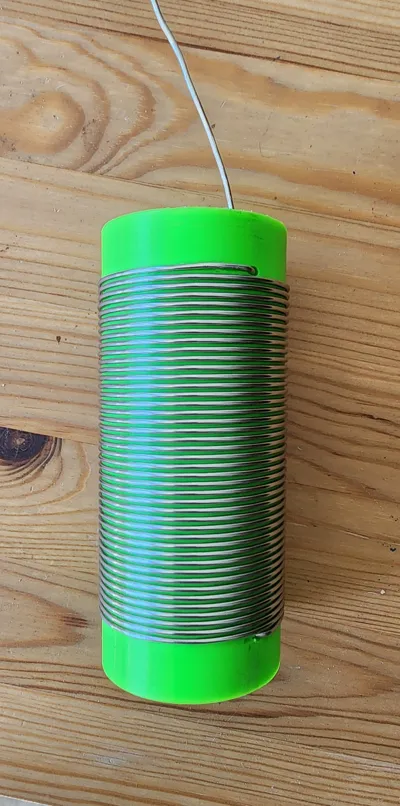
This is an ongoing project at this point. This is version 2 of the coil. The first version easily tuned a POTA Performer to 80m voice, but couldn't get it to 80m FT8/CW. This rev increases the inductance for 80 meters to be able to tune to the data portion of the band. For this version, I added 8 turns in the same length coil and it about tripled the inductance. The theoretical inductance is 48.3 uH.
I used PETG since it's used outside. I printed with 75% infill for strength. It makes it heavy and solid. I successfully tested rev 1 without gluing the parts.
No failures in use yet, but I only use it on a tripod - I've not used it in a stationary installation where it could be subject to high winds.
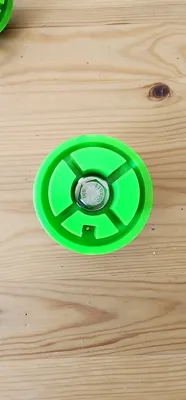
The coil uses 16 gauge stainless steel wire (https://www.amazon.com/dp/B0DQ5FFHTT?ref_=ppx_hzsearch_conn_dt_b_fed_asin_title_7&th=1). To fit the standard mounts, it also uses 3/8" x 24 bolts. While 1 ¾" are called for, I got 1 ½" to work.
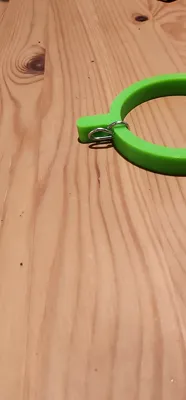
The coil collar allows tuning both up and down for coarse adjustment as well as rotating for finer adjustment. (When bending the contact wire for the collar, the more of a point you can get in the middle, the easier it will be to feel when you've moved the coil.)
The bottom cap is the one with the hole in it to allow the wire to feed through and attach to the bolt. The top cap is solid since you use a jumper to connect the antenna to the coil.
I glued the top and bottom caps with epoxy.
CAUTION: don't dry fit the bottom cap WITH the wire going through the cap. It's extremely difficult to remove it. It's fine to dry fit w/o the wire.
You can find a number of videos on YouTube that show construction techniques for coils. Those should provide enough guidance to help with building this one. (That's how I came up with this design.)
If you have questions please feel free to post them or message me.
73s
Boost Me (for free)
I make models for myself. It takes time and filament to refine them for posting. So, if you print it - please rate and/or provide feedback. And, I'd appreciate a boost if you find this model useful.
License
You shall not share, sub-license, sell, rent, host, transfer, or distribute in any way the digital or 3D printed versions of this object, nor any other derivative work of this object in its digital or physical format (including - but not limited to - remixes of this object, and hosting on other digital platforms). The objects may not be used without permission in any way whatsoever in which you charge money, or collect fees.
Comment & Rating (8)