Functional V Engine Section– TT Motor Powered


Print Profile(4)


Description
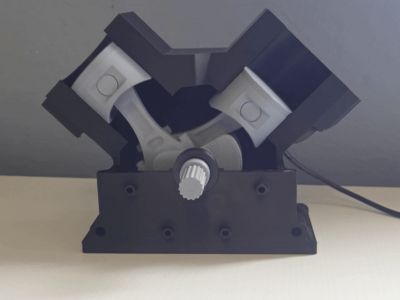
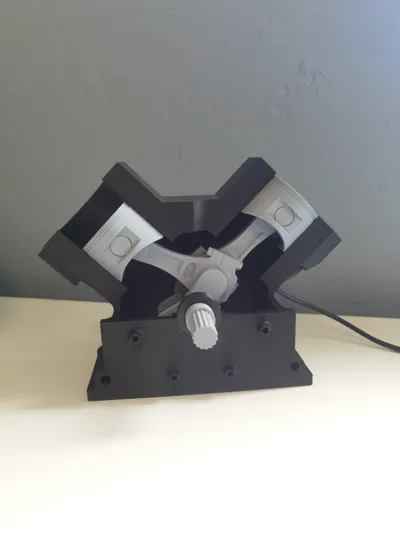
Working V8 Engine Cutaway – See Pistons in Action!
Experience the motion of a real V8 engine in this simplified cutaway model! With 2 pistons powered by a TT motor, watch the crankshaft and pistons move realistically. Perfect for learning, demonstrations, or display.
Bearings Info:
This model uses 6803 ball bearings with 0.1 mm tolerance, generated using this parametric bearing generator. With this tighter tolerance, bearings may feel slightly tight and can be difficult to start rotating. For smoother operation, printing with the default 0.15 mm tolerance is recommended.
For the A1 mini version the bearings must be scaled to 87%. Slightly larger tolerances should be used (0.15mm or greater).
Assembly Instructions:
- Insert the TT motor into its slot in the engine block and secure it with the fixing piece.
- Place the rear bearing and attach the crankshaft component that connects to the TT motor shaft.
- Assemble the pistons to their connecting rods (glue optional) and insert them from the top into their respective paths in the engine block.
- Join the remaining two crankshaft components (glue optional) and attach the piston assemblies to them.
- Carefully insert the two joined crankshaft components (with pistons) into the crankshaft component already attached to the motor (glue optional). Tip: This step can be tricky. To make it easier, rotate the motor so that the crankshaft component aligns with one of the piston paths.
- Insert the front bearing and cover, gluing it to the engine block is recommended for stability.
Highlights:
- Realistic piston and crankshaft motion
- Easy-to-print, simplified V8 section
- Educational and visually striking
- Compatible with TT motor drive
- Realistic piston and crankshaft motion
License
You may create derivative works based on this object, provided that all such derivative works are published exclusively on the MakerWorld platform and include proper attribution to the original creator. You may not share, upload, host, distribute, or publish this object—or any derivative work of this object—on any other digital platform, marketplace, or distribution channel. Commercial use of this object and any derivative works is strictly prohibited. This includes, but is not limited to, selling, renting, sublicensing, or using the object in any context in which you receive monetary compensation or other financial benefits.
Comment & Rating (32)