
Nomad tracker attachment for scope and laser
Print Profile(1)

Description
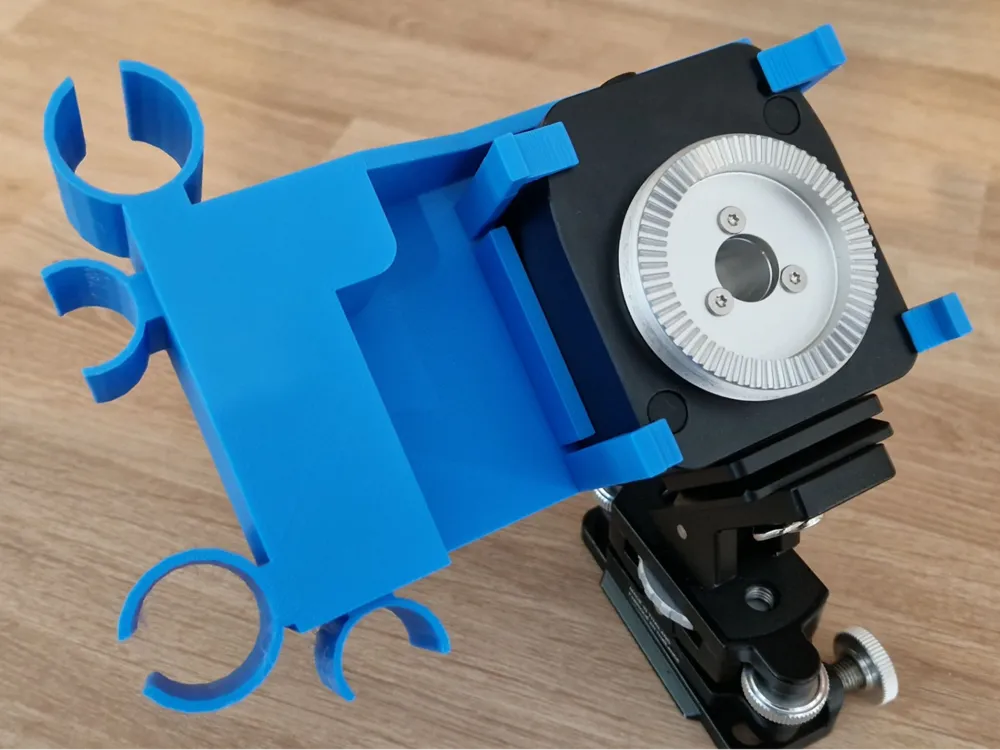
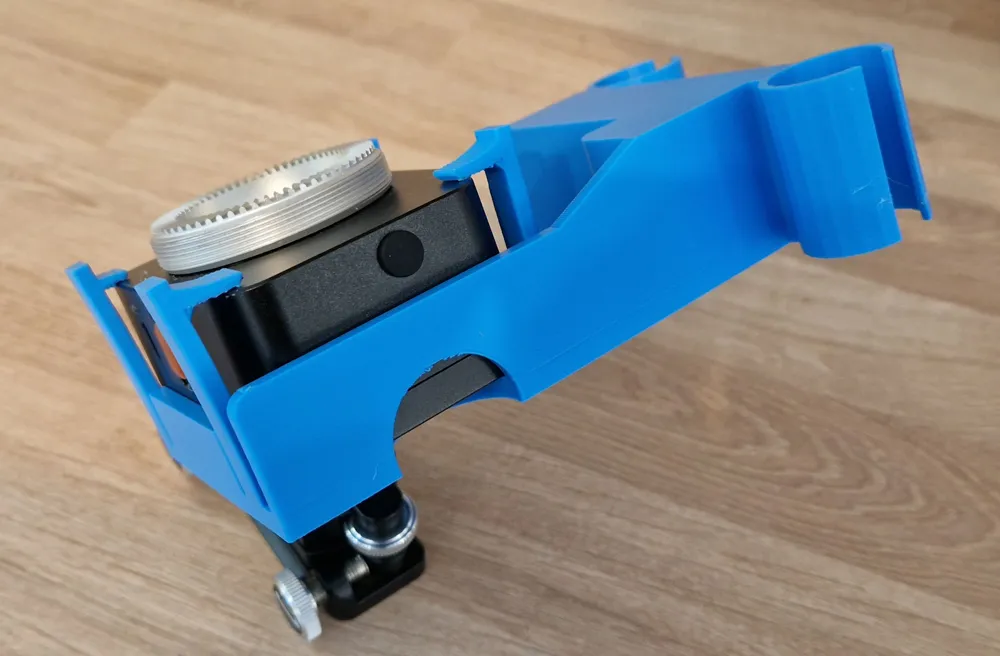
An attachment that fits over the MSM Nomad tracker, to hold the laser and scope.
UPDATE: The current version (uploaded 27/9/25) has more robust clips, a second position for the scope and laser, and an inspection window to check that the back of the Nomad is pushed against the back plate of the model.
The problem. I prefer to have the camera in place, even pointing in approximately the correct direction, before aligning the Nomad tracker. However, the laser, and often the scope, are blocked by a part of the camera, lens or V/Z-plate.
A solution. This attachment holds both the laser and scope out at a distance from their original positions, increasing the chance of unobscured views when aligning when the camera is in position.
A bonus. This attachment may make it easier to calibrate the direction of the laser. With the laser in its holder, when it is ‘log rolled’, the laser dot (perhaps as seen through the scope if present) should not orbit on the surface it hits. If it does, adjusting the screws etc on the laser until the orbiting stops will ensure that the laser is pointing in the correct direction. And similarly for the scope.
Note that the laser and the scope axes are about 3.5cm apart, so don't expect them to coincide anywhere close. As I recall, parallel lines only meet at infinity! If one trusts that they are parallel, if neither ‘orbit’ when rotate in their holders, that's good enough.
Notes.
- The printing settings seen in the print profile have not been tested to ensure they are optimal. More experienced 3D printer users than me (ie everyone) will likely see ways to improve on these settings.
- The attachment slides over the Nomad, with the ‘lamp post’ grips holding it against the back plane. These grips will likely be bent outwards (see pic), which is fine. However, one may need to file/sand the lamp bit of the ‘lamp post’ grip to suit; I was finding that different filaments contract differently, so I left the model on the tight side for the user to fine tune. They key thing is that the back plane is held against the back of the Nomad, ensuring that the laser and the scope are parallel to the Nomad's axis of rotation.
- Two of the grips have smaller ‘lamps’, to allow the Nomad to be slid into place with the Nomad's red screw ring in place. Depending on the filament used, these grips may react differently to the flexing required.
- The scope can simply be slid into its holder. For the laser, unless the battery cap is removed, it needs to be pushed into its holder, but the grip should hold it in place.
License

You shall not share, sub-license, sell, rent, host, transfer, or distribute in any way the digital or 3D printed versions of this object, nor any other derivative work of this object in its digital or physical format (including - but not limited to - remixes of this object, and hosting on other digital platforms). The objects may not be used without permission in any way whatsoever in which you charge money, or collect fees.


Comment & Rating (3)