Search models, users, collections, and posts
Dragon Burner v8 to Chaoticlab CNC Tap adapter
IP Report


Print Profile(1)
Voron Spec ABS 0.2mm layer, 4 walls, 40% infill
Designer
2.3 h
2 plates
Open in Bambu Studio
Boost
4
10
0
1
22
1
Released
Description
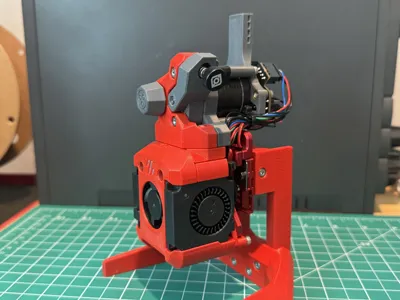
Adapter to securely mount the v8 Dragon Burner to the Chaoticlab CNC Tap for Voron 2.4/Trident.
The CNC tap is fairly tall compared to the Dragon Burner. You may need a taller extruder to clear it. I'm using a modified Wristwatch G2 that's been extended by 5mm.
I also tested it with the Sherpa Mini which fits well without any modification.
Printing:
- Prints as oriented. No supports needed.
- Use Voron standard print profile.
Assembly:
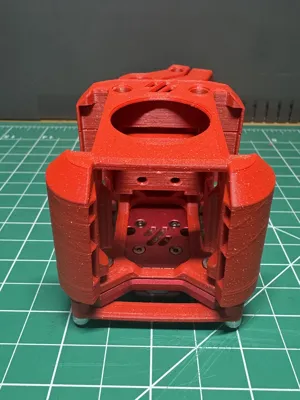
- Be sure to fully insert the 2 heat set inserts from the back. They should be recessed into the part a few mm before bottoming out.
- Attach to CL Tap with 4 screws (12mm on top, 6mm on bottom)
- Attach Dragon Burner to mount with 2x35mm screws
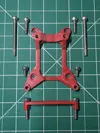
- Add brace to bottom and attach with 2x 16mm screws. (you may need to slightly flex the back of the Dragon Burner to hit these two screws while clearing the CL Tap frame.)
BOM (all m3 socket head cap screws)
- 2x 12mm (top of mount to Tap)
- 2x 6mm (bottom of mount to Tap)
- 2x 35mm (Dragon Burner top screws)
- 2x 16mm (Dragon Burner bottom screws)
- 2x heat set inserts
Update: 6/14/25
- Added a bit more clearance for hotend wires
- Improved clearances for setting heatsets to the correct depth
Update: 7/13/25
- Added a ‘wide mount cowl’ option that spaces the bottom mounting holes slightly further apart. Allows mounting to this plate without needing to flex the bottom/rear of the stock cowl.
Update: 7/14/25
- Fixed a geometry error that would make the toolhead sit at a slight backwards lean. Thanks to @ElementW for pointing it out!
License
This user content is licensed under a
Creative Commons Attribution-Noncommercial
Comment & Rating (0)