Revolver | 2-Speed Screwdriver


Print Profile(1)

Description
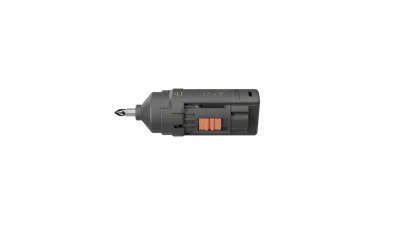
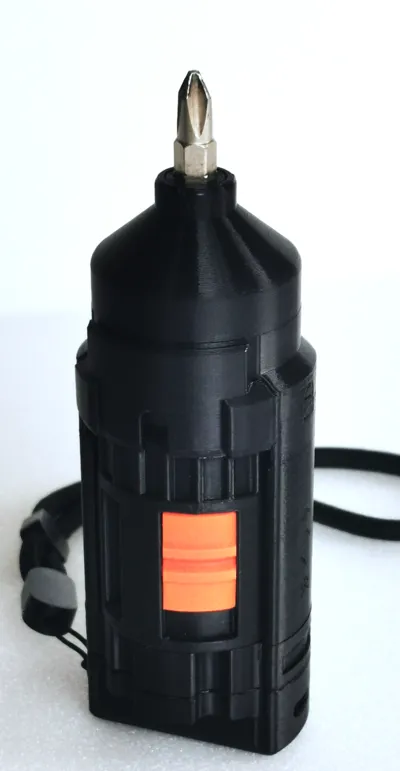
The Revolver
Born from a particularly frustrating weekend of printer maintenance, tinkering and DIY I bring you “The Revolver”. A fully 3d printed tool for makers.
What started out as a fun weekend, slowly spiralled into headache after headache as things kept going wrong, so pretty normal in that respect actually. But as any good workman does, I blamed my tools instead of myself and set out to fix them.
The main gripes I had with my screwdriver were
- Struggling to rotate it in awkwards spaces
- Dropping the screwdriver, again in awkward spaces
- Accidentally stripping bolts
- Taking ages to remove bolts ( my impatience is really the problem here)
I came up with the idea for a screwdriver that might solve these issues with a revolving midsection much like precision screwdrivers, but big enough for general use and with a built in gearbox for both precision work and removing bolts fast. The additional space for a wrist strap is particularly helpful for those like me that can be a bit clumsy 😅.
If you enjoy this print please consider donating to my paypal, me and the mrs have a little one on the way and we're saving for baby stuff 😁. Thought this might do better than a gofundme.
https://www.paypal.com/donate/?hosted_button_id=FWZNBTYKYP2Z2
If you have any issues, please let me know and I'll be on hand to help out or make changes if necessary.
Assembly Guide
This download includes a complete assembly guide with detailed instructions and diagrams.

Assembly Tips
- Planetary gears may need post processing to ensure they rotate smoothly on carrier. If so just take a small file and clean up the bore hole.
- Make sure you use plenty of grease on parts which require it, especially the selector gear and sun gear in step 6, to ensure smooth operation.
- I recommend using a silicone grease as your lubricant as it's least likely to damage the plastic.
- As for glue, any typical super glue should be fine. I prefer the gel types which do not set immediately and allow for adjustment.
- Some parts are designed to be push fit, but If they're not fitting tight enough. You can also glue the sun clutch to the carrier (step 5) and the carrier to the clutch case for extra security (step 9)
- 4x2mm Magnets can be found on amazon or ebay https://amzn.eu/d/aHha5eZ
Usage tips

- This screwdriver is intended for use on simple DIY projects, electronics and any other light work. So far I've tested on door frames, cupboards, bike frames and taking apart my 3d printer and it works well. I wouldn't try to use on any really heavy work as plastic parts do have their limits.
- Sometimes switching modes requires you jiggle the switch a bit or backing off and trying again. This happens when the selector gear doesn't quite mesh with desired output gear. Grease helps to make this meshing smooth.
- Depending on your hand size and preference, you may find it odd using this style of screwdriver. Here are some tips that might help
- The end is rectangular so it can sit in your palm without slipping
- Rest outer body on ring finger and twist with middle finger and thumb
- Thread wrist strap between 2 fingers so it holds outer body in place as your fingers turn the mid section.
- Experiment with different grip positions in hand.
Printing Tips
- A 3mf file is included with suggested printing orientations.
- I used eSun PLA+ on my builds but feel free to experiment
- I printed at .16 layer height
- As stated in the guide, if you're having trouble freeing up selector gear you may want to try the 0.2mm clearance model and use randomised seam position.
- You may need to use pliers to twist and free up selector gear.
- I'd highly recommend using brims on parts with small contact area on plate to stopp them falling over.
- Some people have had trouble with 0.6mm nozzles, I recommend using a 0.4 nozzle.
- Print Input shaft at 90% infill
Accessories
I also created this slightly over engineered storage box/stand which acts as a workstation for your revolver. It helps you organise bits, measure and gauge fastening sizes, as well as including a tray to put removed fastenings in. Whether it's a gift or just something cool to have on your desk, check it out !

Documentation (1)
License
You shall not share, sub-license, sell, rent, host, transfer, or distribute in any way the digital or 3D printed versions of this object, nor any other derivative work of this object in its digital or physical format (including - but not limited to - remixes of this object, and hosting on other digital platforms). The objects may not be used without permission in any way whatsoever in which you charge money, or collect fees.
Comment & Rating (32)