Search models, users, collections, and posts

D&D Inspired Drink Coasters and Holder

IP Report

Print Profile(1)

All
X1 Carbon
P1S
P1P
X1
X1E
A1
H2D
H2D Pro
H2S
P2S
H2C
X2D
A2L

0.2mm layer, 3 walls, 10% infill
Designer
4.7 h
3 plates
4.8(25)

Open in Bambu Studio
Boost
136
380
66
12
233
198
Released 

Description

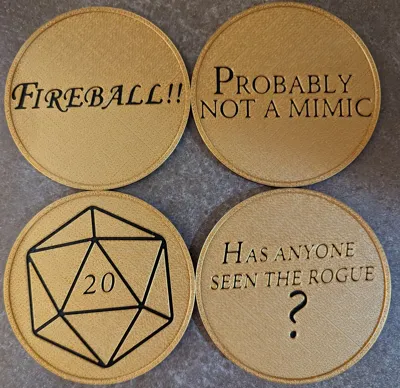
Designed and printed these by request of a friend. Liked the result and wanted to share. Inspired by online search of similar items.

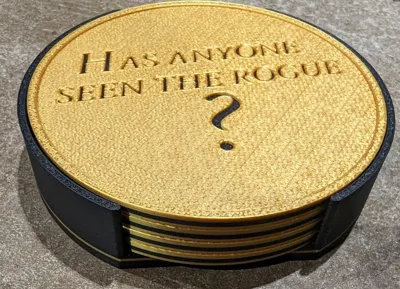
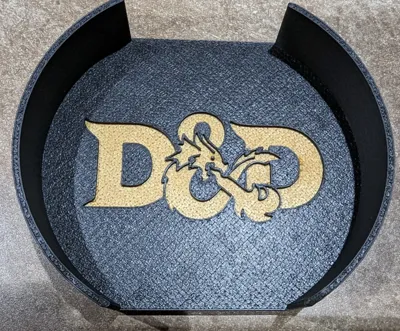
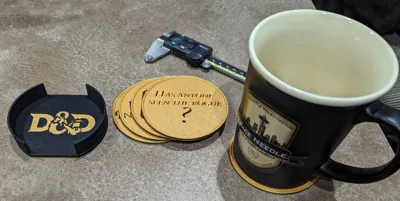
Drink coasters that will fit 88mm dia. bottomed glasses with a holder for 4 coasters.

May be printed without colour change (text is recessed), but can be easily printed on any printer using filament swapping.

My Print Settings

  • Layer Height 0.2mm
  • Arachne wall generator (set line widths to 0 for Slicer to decide)
  • 0.4 nozzle (0.2 may work better, but text lines aren't printed; they're recessed)
  • Hilbert Curve on top layer (really hides print lines with this texture)
  • 1 wall on top layers (puts 1 wall around text features, nicer than the 3)
  • 3 wall loops (perimeters)
  • 3 top/bottom layers
  • 10% gyroid sparse infill

My materials

  • iBOSS PLA Plus(PLA+) - Gold
  • JAYO PLA+ - Black

My Printer: Bambu Lab X1C

I've included STEP and STL files, but recommend STEP for best results. The STLs are in the “other” files as a zip.

NOTE: for the STEP files, after import, it's best to “Split” each object into Parts (keep assembled). That way, the text colour layer can be assigned a different colour without painting. I don't know how to make the files automatically do this, so the Split to Parts is the only way.


For manual painting or pause at layer:

I don't have the exact numbers as I'm away from my PC, but the colour changes is meant to happen 1mm below the bottom of the text. This gives a a good 1mm thick of the colour and the recess is another 1mm above that


I'd love to see any makes and get feedback!

Comment & Rating (66)

(0/1000)

Any chance of having one were we can edit the layer for custom text?
The designer has replied
0
Reply
Or any possible guide on how to make these ourselves?
0
Reply
Replying to @SuperSteve88 :
I have included the STEP file and that will work in most CAD software as a clean import. I used SolidWorks, myself for this design, but the STEP can be brought into Fusion 360, TinkerCAD or something like that. you'd then have to fill in the current text with a solid extrusion and then cut new text that you'd want. the top surface where the text is is 1mm thick, so cutting through that will expose the colour disk layer. do you have something specific in mind?.if it's D&D related, I could try to add it to this collection.
(Edited)
1
Reply
Replying to @SuperSteve88 :
if you want to start from scratch: 1. extruder a disk 3mm thick by the diameter you want 2 extrude another disc of the same diameter on top 1mm thick, but don't merge with the first. this is the text colour layer 3 extrude a 3rd disc on that, 1mm thick and don't merge. This is the top coaster colour. 4. add a ring about 5mm wide on that for the outside ridge 5. cut the 3rd disc through to the 2nd disc for your text. if you take it step by step in your CAD software, you'll begin to see how easy it is overall. the text is the hardest part to size a d get a good font. best of luck! send me a link to anything you upload!
1
Reply
Print Profile
0.2mm layer, 3 walls, 10% infill
looks great, no issues with print
The profile uploader has replied
profile
2
Reply
looks nice in red! thanks for sharing your pictures and the review!
0
Reply
Print Profile
0.2mm layer, 3 walls, 10% infill
Printed perfectly first time on my P1S.
The profile uploader has replied
profile
1
Reply
nice! came out great! thanks for the review and pictures!
0
Reply
Print Profile
0.2mm layer, 3 walls, 10% infill
excellent
The profile uploader has replied
profile
1
Reply
nice colours! thanks for the review and pictures!
0
Reply
Print Profile
0.2mm layer, 3 walls, 10% infill
Very cool - 0.20mm standard / P1S , Bambu PLA Red and Orange. picture doesn’t do them justice, the orange is a little hard to read behind the red but it’s what I had - I think gold and black are next !
The profile uploader has replied
profile
1
Reply
Thanks for the share! I like how you used the text colour for the full back to save a colour change!
0
Reply
Print Profile
0.2mm layer, 3 walls, 10% infill
Increased number of bottom layers to 5 and the scale by 20%.
(Edited)
The profile uploader has replied
profile
1
Reply
thanks for the review! any feedback to improve it?
0
Reply
I had to adjust the thickness and calibrate some things for your file. I don't think it is terrible. Let me think about it to give some better feedback, and I'll edit my comment once I can articulate what exactly you can improve in the default file. There are a couple of things I can think of off the top, but I like to be thorough and thoroughly explain my thoughts.
(Edited)
profile
1
Reply
Replying to @jp.potter :
the issue I ran into was the durability so I increased the infill and used gyroid. It turned out perfect for me.
0
Reply
Print Profile
0.2mm layer, 3 walls, 10% infill
Love these! Printed great =)
The profile uploader has replied
profile
1
Reply
I'm glad you like them! And thanks for the review!
0
Reply
Print Profile
0.2mm layer, 3 walls, 10% infill
Successful prints that turned out nice. I did try to invert colors on one, but it didn't work out well.
The profile uploader has replied
profile
1
Reply
thanks for the review! for changing the color you can select the parts under each object and redefine the filament to use. no need to paint.
(Edited)
0
Reply
Boosted
Great model! My players loved them!
The designer has replied
designer
1
Reply
nice! my wife's groups love them also! made for one specific group that has a rouge that's always off doing his own thing :)
0
Reply
Boosted
Print Profile
0.2mm layer, 3 walls, 10% infill
Everything printed great!
The profile uploader has replied
profile
1
Reply
awesome! thanks for the review and the Boost!
0
Reply