Water level gauge for garden ponds


Print Profile(1)


Description
Water level gauge for garden ponds or other small bodies of water

This is a water level indicator for garden ponds with two adjustable sliders to set the minimum and maximum water levels.
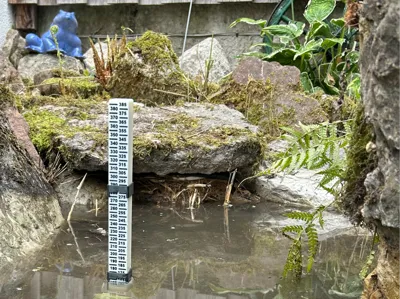
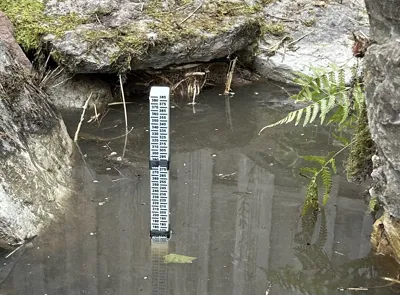
I designed and implemented it to always be able to easily check the water level and to prevent the fountain pump from running dry. In my case, this is the minimum water level.
After a rain shower, you can easily see by how many mm the water level has risen. My garden pond is fed by a downpipe from a roof area. I can therefore adjust the height of the garden pond's overflow and fine-tune it precisely.
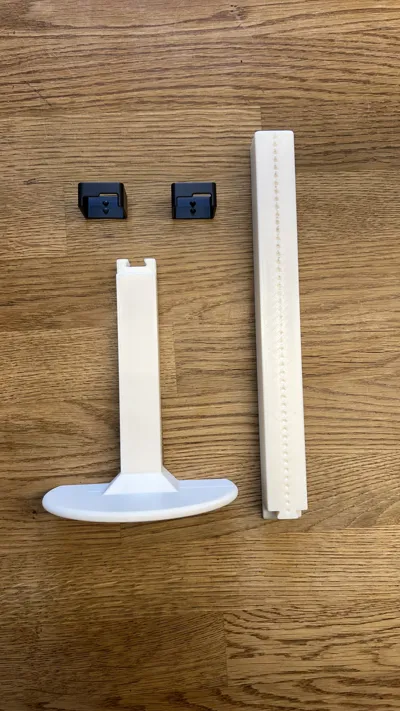
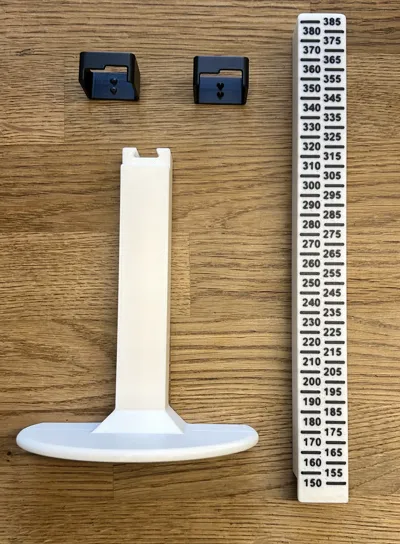
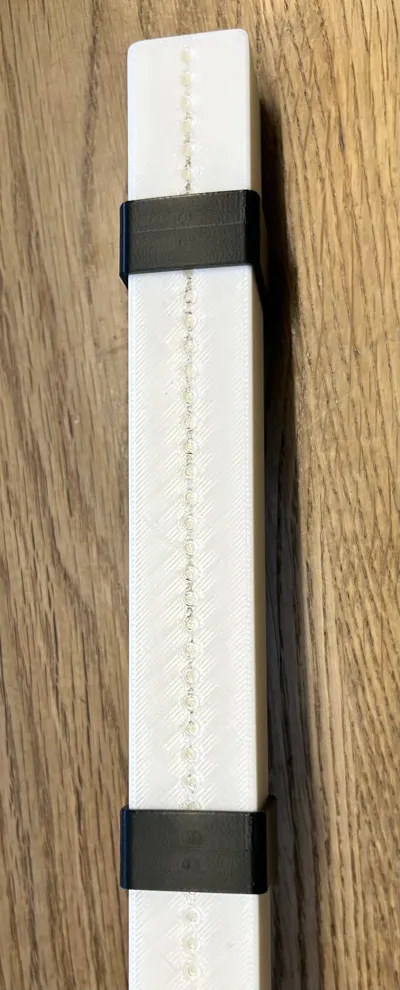
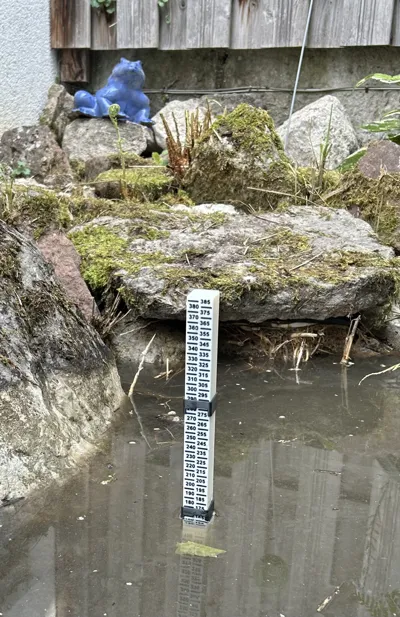
The dimensions are 120 mm x 80 mm x 390 mm. The column has a cross-section of 25 mm x 25 mm.
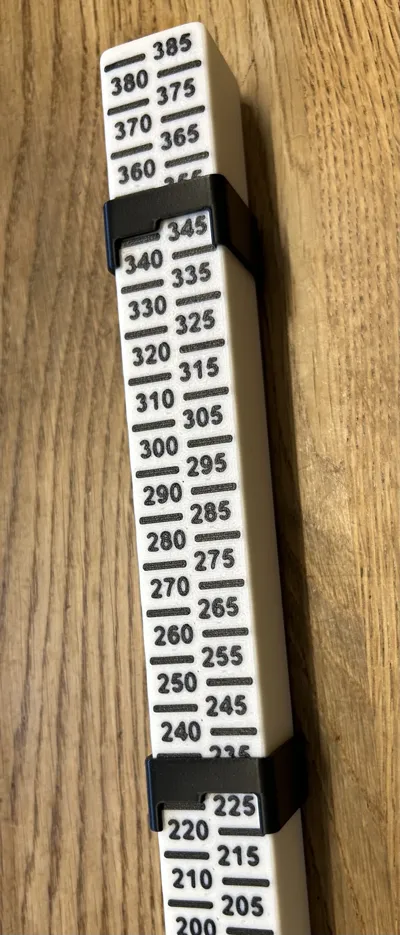
The scale has a graduation of 5 mm from measuring point to measuring point, and the zero point starts at the base plate, flush with the bottom.
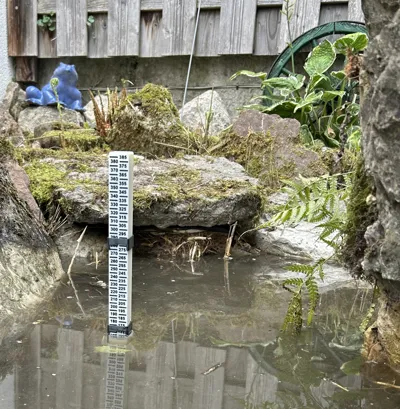
The model consists of three parts. The base, the top part with the scale, and two slider elements.

Assembly instructions:
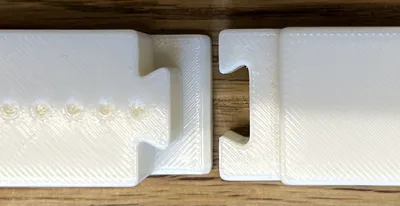
The top part with the scale and the base are pushed into each other using the dovetail guide.
No adhesive is necessary, as the tolerances of the two parts are designed so that they are form-fittingly connected and hold sufficiently.
In the model, I have specifically cut out the connection points of both elements, which serve for tolerance checking.
It is recommended to print these two parts first and to check the fit. Especially if you want to use a different filament!
Top part and bottom part are connected with a dovetail joint.

Note: In this picture, the dovetail joint is shown so that it can be clearly seen! The left part must be rotated by 180° before assembly!
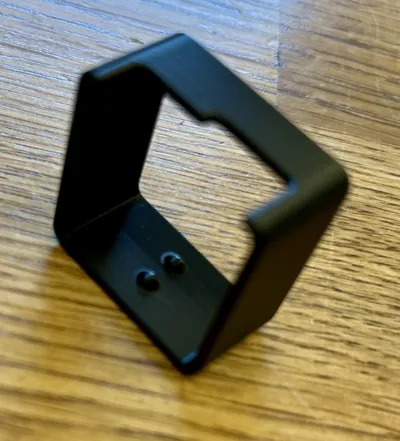
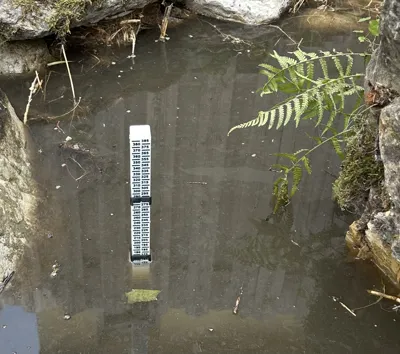
The slider for adjusting the water level:

The sliders have two detent lugs in the form of a hemisphere on the back.
The top part with the scale accordingly has the grid points at a distance of 5 mm.
This means that moving the slider by one grid point results in a displacement of 5 mm.

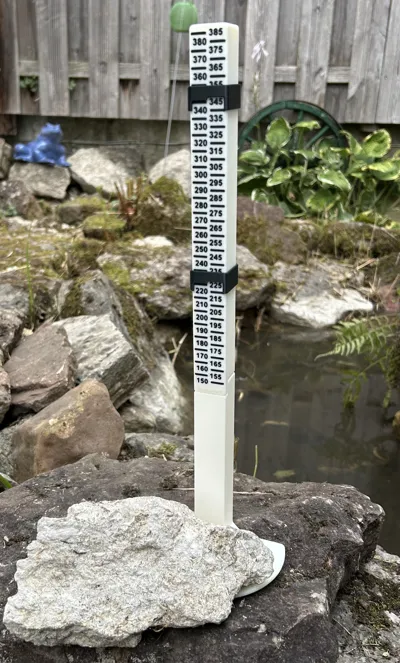
Installation in the garden pond:
Find a suitable place in the water and weigh down the base plate with a stone.
Move the two sleeves to the corresponding positions, Min and Max water level.


Print Information - Material and Build Plates:
For the models, I used ASA from Bambu Lab. PETG is also a good choice!
- Build plate: SMOOTH PEI - Plate or also called, the High Temperature Plate
- The STL - files are also available.
Print settings with ASA:
Applicable to all 3 components:
Wall lines: 3
Detect thin walls: Yes
Layer height: 0.2mm
Infill / Infill pattern: 30% / Gyroid
Smoothing type: NO SMOOTHING
Seam position: ALIGNED
Wall generator: Classic
Support type: NONE
All other values remain at default.
Happy printing!!!
Documentation (1)
License
You shall not share, sub-license, sell, rent, host, transfer, or distribute in any way the digital or 3D printed versions of this object, nor any other derivative work of this object in its digital or physical format (including - but not limited to - remixes of this object, and hosting on other digital platforms). The objects may not be used without permission in any way whatsoever in which you charge money, or collect fees.
Comment & Rating (1)