Fully Printable Working Carburetor


Print Profile(1)

Description
Boost Me (for free)
If you like this project and would like to see more, consider boosting me! Thanks
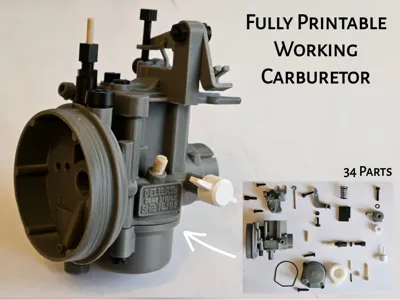
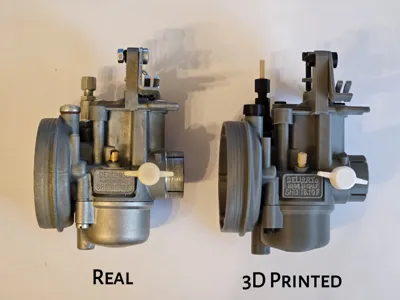
Fully Printable Working Carburetor - Dellorto SHB 16-10
This model is a (almost) 1:1 replica of a motorcycle carburetor, mainly used on Vespa 50cc two stroke models from the 80s, designed and optimized to be fully 3D printable with a normal 0.4mm nozzle and also by those who do not happen to have an AMS; it requires no additional screws or other components. Every detail has been carefully crafted by hand using photos, caliper measurements and a ton of spare time, since I don't have access to a 3D scanner.
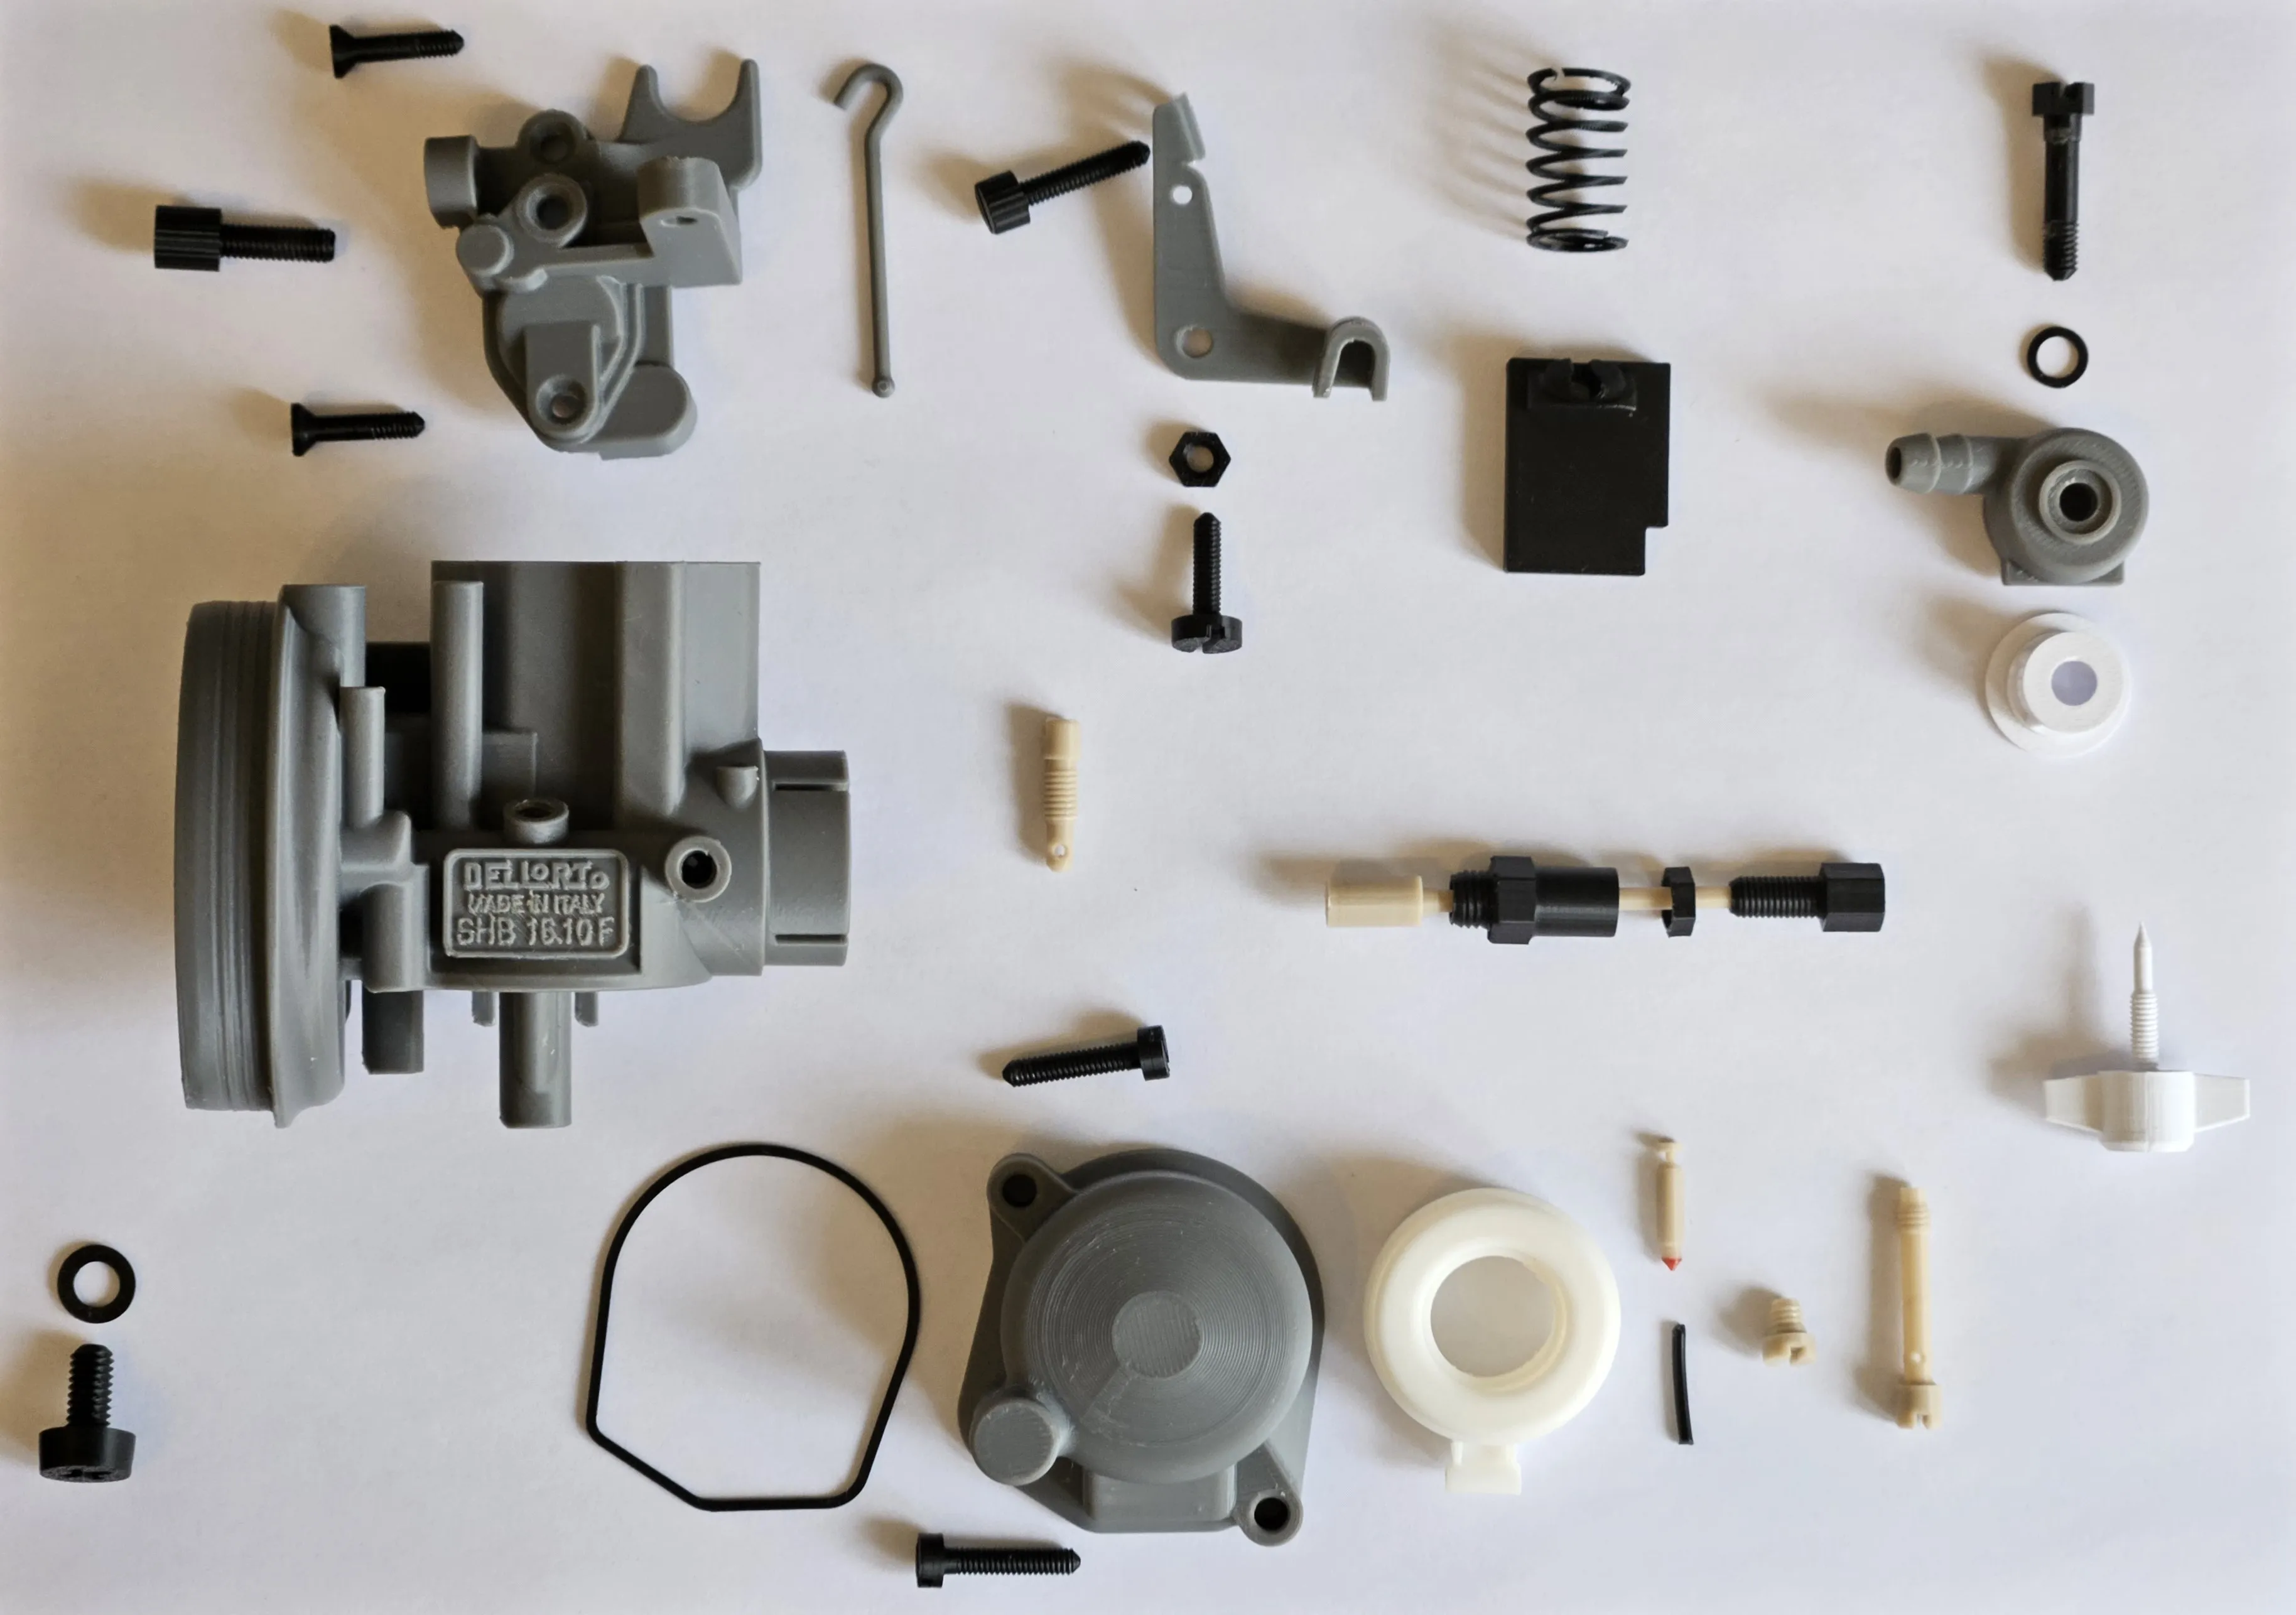 |  |
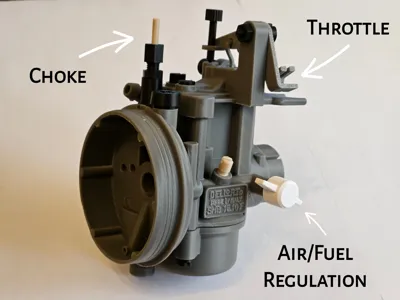
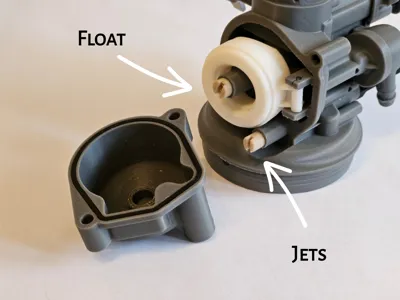
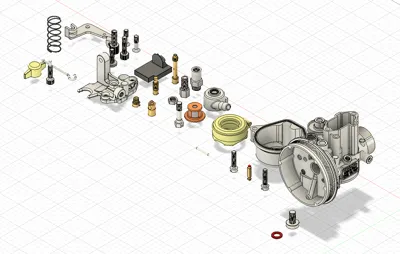
It includes all the features of the real carburetor (down to the accuracy that the caliper allowed me), such as internal circuits, throttle slide, float, needle valve, jets, fuel inlet and filter, ecc..., so it can be used as a fun educational tool or as a cool gift for a mechanics enthusiast.
 |  |  |
To help you with the building process, I created a simple step by step assembly guide that you can follow. No special tools are required other than a large flat head screwdriver, a pair of scissors, pliers and, optionally, a set of hand taps.
I made this project out of fun and passion for mechanics and 3D printing, but I would like to point out that I am by no means an expert in this field, so I am sorry for any inaccuracy or mistake that you might find (and also for spelling/part naming errors, as english is not my native language); also, although you might be tempted to, I advise against using this carburetor on a real engine as the parts are not designed for that application and, in doing so, pieces might break or detatch and enter the engine, causing lots of damage to it.
Enjoy!
IMPORTANT NOTES:
- Make sure to properly clean you build plate before attempting to print the parts, as a lot of them have either a small contact area or have delicate support structures (especially for bed-slinger printers such as A1 and A1 mini)
- Calibrate your filaments before printing (flow dynamics and flow rate) to ensure an optimal fit between the parts
- I chose to be conservative with printing speeds, as all the parts are tiny, have intricate details and overhangs and need the right tolerances to fit together nicely. Since I printed them using a core-xy printer, I don't know how they will behave on a bed-slinger, so I tried my best to mitigate any potential problem related to the bed movement
- Many parts have custom painted supports, which are necessary to print them at an angle that minimizes large overhang areas, so please don't touch them unless you know what you're doing
- Since all the screws and the threads are 3D printed, some may be tighter than others, depending on the filament and the printer itself; I tried to make them as consistent as possible, but some might require some tapping to ensure a proper fit (the thread sizes and locations are marked in the assembly guide)
Documentation (1)
License
You shall not share, sub-license, sell, rent, host, transfer, or distribute in any way the digital or 3D printed versions of this object, nor any other derivative work of this object in its digital or physical format (including - but not limited to - remixes of this object, and hosting on other digital platforms). The objects may not be used without permission in any way whatsoever in which you charge money, or collect fees.
Comment & Rating (98)