AYN Odin 2 Case - AirTag Support


Print Profile(1)

Bill of Materials
- Kleber oder doppelseitiges Klebeband x 1:
Description
You might already know my previous models of a box for the AYN Odin 2 (example). I was still not entirely satisfied, even though the box has already served me well on several trips. So I sat down again and completely reworked the design, and you can see the result here now
Who is this box for (purpose)?
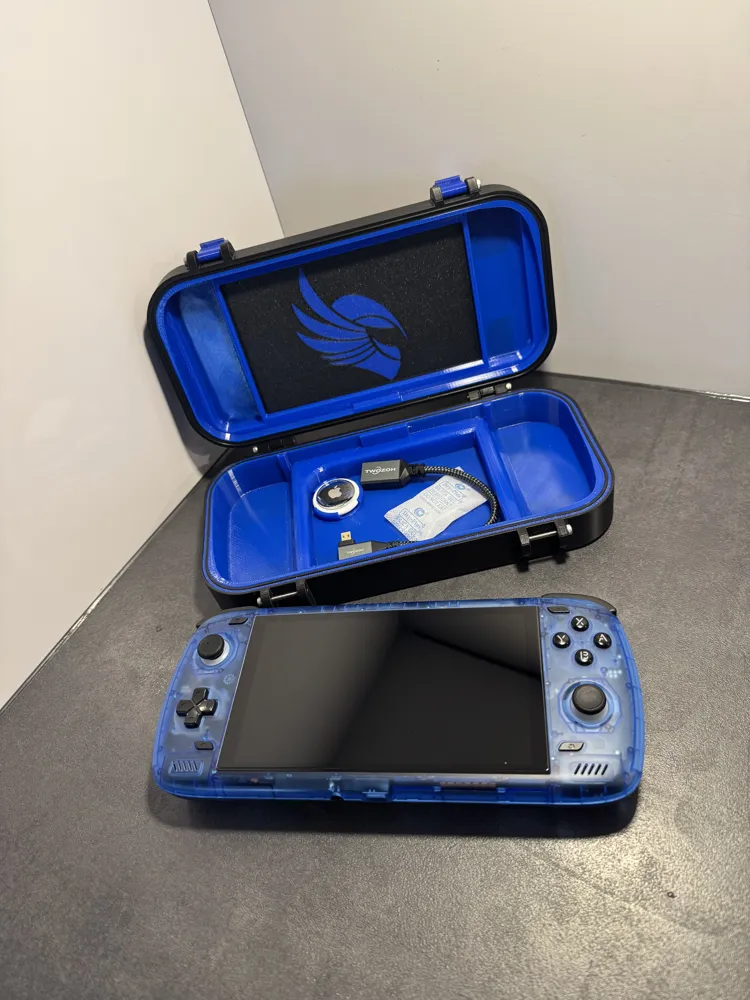
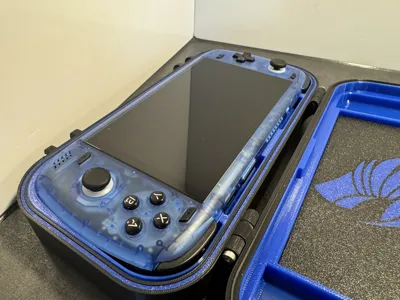
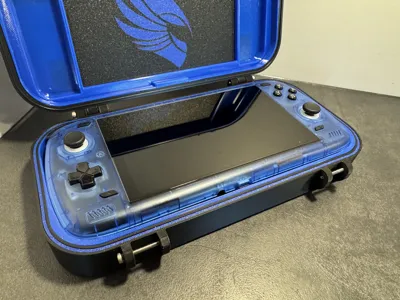
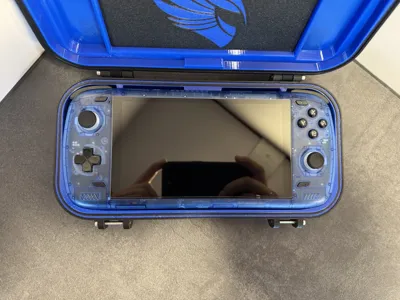
If you are someone who guards their devices like the apple of their eye, then this box is exactly right for you. But anyone else who wants their Odin to always be well protected, whether on the go, at home, from small children, or simply from falls, will find a great solution here
Features:
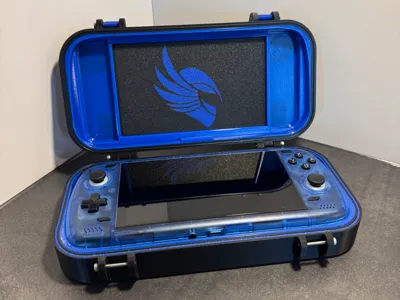
- hard outer shell with soft TPU inlay
- assembly using M3 screws (upper and lower parts can be replaced if damaged, without reprinting the entire box
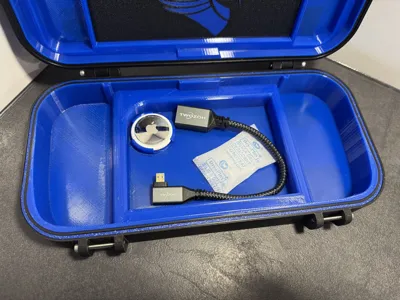
- AirTag holder (so the Odin is never lost)
- space for smaller accessories (there is enough room for an adapter cable, a short charging cable (without power adapter), or even a small Swiss Army knife
- perfect fit (the Odin fits perfectly in the box, no buttons or joysticks are pressed when the box is closed)
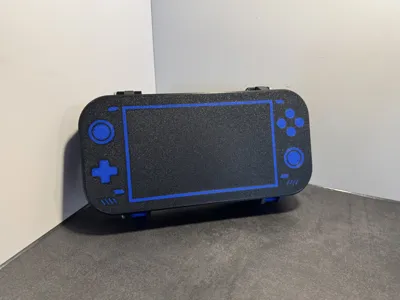
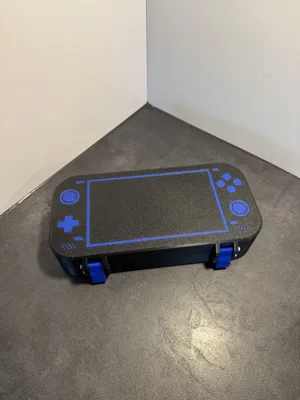
- display protection (hard shell outside, soft TPU inside, but another hard cover over the display, optionally with a logo or lettering, but without touching the display. More protection is hardly possible)
- as few contact points with the device as possible, but without wobbling! Yes, that's possible :) I designed the box to touch only the strongest parts of the casing as much as possible, and otherwise, the Odin floats in the box. That is, between the display and buttons, on the back next to the grips, at the top between the buttons, and at the bottom on the edges of the grips
I already have the previous model, is it worth reprinting? What has changed?
It will probably bring you few advantages. Little has changed in terms of protection. Only the fit has been completely redesigned, which also allowed me to make the box a little smaller overall and still gain some more storage space for accessories. The closure tabs have also been revised so that the box no longer "jams" when closing, and the shape is now more adapted to the Odin. In addition, I have slightly adjusted the logos and lettering. Thus, the Odin itself now adorns the lid, and the Odin helmet logo can now be admired inside (or the lettering, depending on what you prefer). I have also removed the additional M3 screws - legacies from older designs that I had retained as design elements - so that the Odin is now even better protected against the ingress of liquids or dust (ATTENTION!! I cannot guarantee water resistance!)
How is it printed?
Use the provided profile and print the individual print plates one after another. Choose one of the optional inner display protection plates (Odin-Head-Logo or Odin2-Lettering) or omit it entirely, as you wish. For the inserts and the seal, use TPU for optimal protection of your Odin. Of course, these can also be printed from, for example, PLA, but I cannot guarantee that the Odin will not be scratched by harder materials or still suffer damage from falls
How do I assemble it? What do I need for it?
You will need 6 M3 screws with a length of 25mm and some adhesive (either normal craft glue or thin double-sided adhesive tape)
Once all parts are printed, assembly is very simple:
- Glue the inserts into the lid or bottom (ATTENTION! They must be glued in the right way up. It's best to refer to my photos or simply put it together with the Odin inside without glue)
- Then screw the M3 screws into the corresponding holes so that the hinge and clasp work
- optional: If you have printed the inner display protector with a logo or lettering, glue it in
Boost Me (for free)
If you like my model and want to encourage me to create more, feel free to give the model a boost! I also always appreciate comments and photos of your printed makes :)
License
You shall not share, sub-license, sell, rent, host, transfer, or distribute in any way the digital or 3D printed versions of this object, nor any other derivative work of this object in its digital or physical format (including - but not limited to - remixes of this object, and hosting on other digital platforms). The objects may not be used without permission in any way whatsoever in which you charge money, or collect fees.
Comment & Rating (2)