PJSM Wheelchair Joystick Toggle


Print Profile(1)

Description
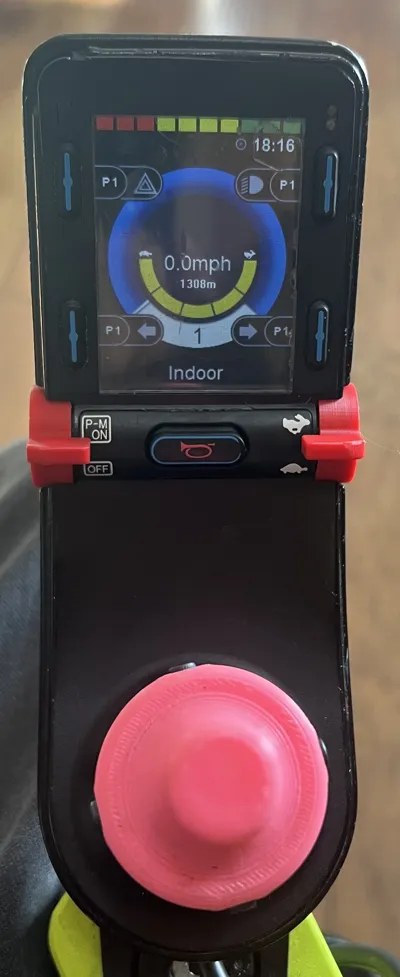
A replacement for the power and speed toggles found on some Permobil and Quickie wheelchairs. I have found that the stock units occasionally break inside of the joystick module causing the toggle fall off. In my experience, the toggles seem to break at the groove for the retaining clip where plastic is the thinest. The replacement design I’ve uploaded utilizes an M2 x 14mm screw which makes for a stronger toggle.
This replacement is for the PJSM joystick - single horn button between toggles (see photos). It will not work on the larger CJSM2 - single horn button button between toggles AND Mode & Profile buttons below screen.
Replacing a toggle is not terribly difficult but requires care to not cause damage to the joystick module. I’ve put together an instructional PDF detailing how to replace the toggle.
I‘ve uploaded 3 versions of the replacement toggle (along with a step file for each version in case you’d like to make any changes).
- Version 1 uses a M2 x 14mm flat head screw. This is my preference as it allows the outside face of the toggle to be completely flat.
- Version 2 can be used with an M2 x 14 screw with a cap head, button head, etc.
- No screw. I really don’t recommend this version because the toggle will break like the original (and likely much sooner due to the natural weakness between the layers).
The versions 1 & 2 are sized so that the screw will smoothly cut its own threads into the plastic. In addition to the screw it’s possible you may require additional parts if you’ve lost any of the pieces from the original toggle.
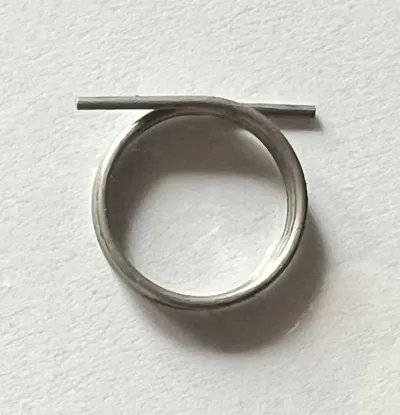
- There is a small torsion spring that goes between the toggle and the outside of the joystick module housing (see photo). I have not found a direct replacement for this spring. However, a similar one can be d purchased here. You will have to cut some off of each leg to approximately match the one in the photo.
- On the backside of the toggle is a small cylindrical magnet which measures 3mm in diameter by 4mm in height. This magnet must be present or the toggle will not function.
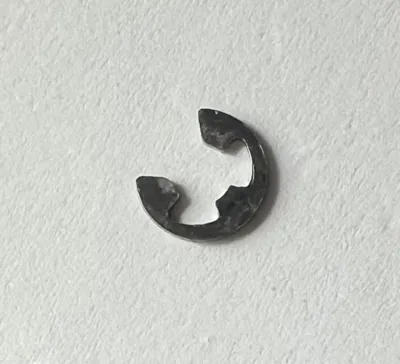
- Inside the joystick module there is an e-clip that keeps the toggle in place. You’ll likely find this inside the joystick module still attached to a piece of the old toggle.
The toggle can be printed without supports. I use 0.12 layer height which makes for a cleaner groove where the e-clip is attached. Most of the time I use PETG but have also used PLA and ABS - all have worked just fine.
I‘ve been using these toggles on my chair for many months with no issues. Hopefully they work for you as well!
- Live long and prosper.
Comment & Rating (0)