Search models, users, collections, and posts

3244_Kitchen cabinet organizer ikea uppdattera

Print Profile(1)

All
P1S
P1P
X1
X1 Carbon
X1E
A1
H2D
H2D Pro
H2S
P2S
H2C
X2D
A2L

0.2mm layer, 2 walls, 15% infill
7.3 h
4 plates
4.6(23)

Open in Bambu Studio
Boost
282
1106
40
18
826
367
Released 

Description

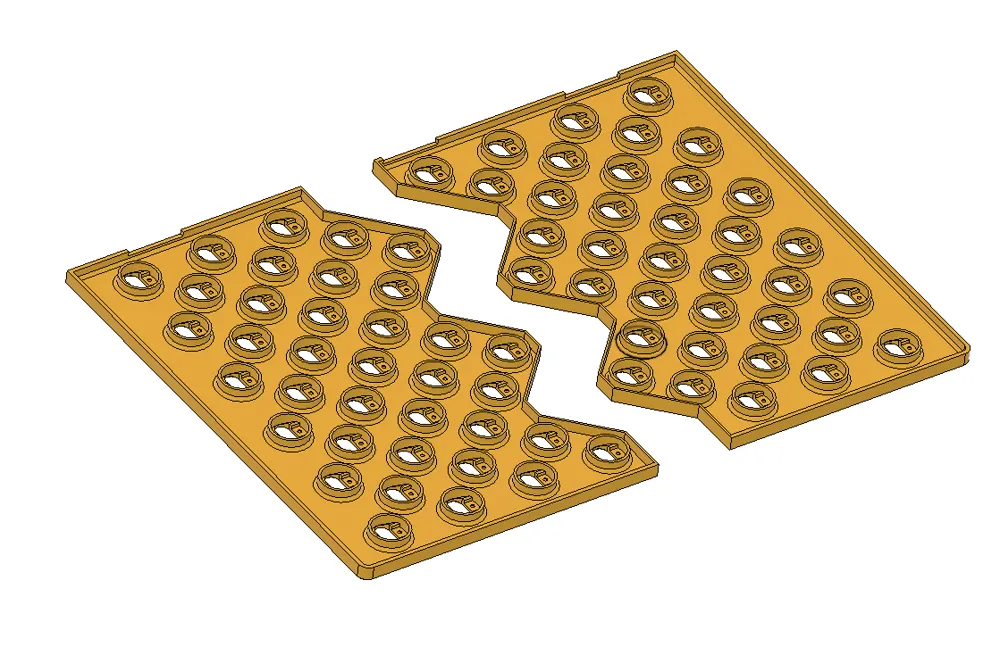
Division piezes in Base 1 to 2,  and Base 2 to 2  for print dimension bambu x1


Print two nestable 296 x 238 plates total 296x476 , to get a practical plate with holes every 20x20 mm, and make your own distribution of the drawers, compatible with the ikea uppdatera model
The tall poles, it is necessary to set raft or skirt to 0 to achieve stability when printing, you print , and you can print as many as you need.

Print 3 union models to be able to join the two plates.

Add model in stp for modification


Add original f3d for modification.  


Comment & Rating (40)

(0/1000)

Small tip: I only needed the width for two prints. Since the connecting parts did not adhere, I simply glued them together. The parts fit so incredibly precisely that it worked excellently! Thank you for this perfection 🤌🏽🤌🏽🧡🧡🧡🧡
The designer has replied
Show original
0
Reply
Thanks, well the glue has always worked
Show original
0
Reply
Print Profile
0.2mm layer, 2 walls, 15% infill
Works excellent
0
Reply
how are your rods doing? all of mine broke after a short time, snapping under the slightest stress
(Edited)
Show original
2
Reply
Hi! Love this design 🙏 I'm printing this in PETG on a Bambu P1S, but I'm running into an issue: every time I remove the support, the pin at the top snaps off. It seems quite fragile at that connection point. Do you have any advice? For example regarding support settings, orientation, or maybe wall count? Would really appreciate it! 😊
0
Reply
Hello! Thank you so much for sharing this great model. Could you please share the original CAD file (FreeCAD, Fusion 360, SolidWorks, or any other format), so it would be possible to change only the base size without changing the holes? When using STEP, the holes scale together with the base, but I want to keep their size the same. Thank you in advance!
The designer has replied
2
Reply
Hello, no problem, I'll upload it right now. Keep in mind that it was one of the first models I made with Fusion. I was working with Powershape, so some of the functions may not be entirely correct. Best regards
0
Reply
Replying to @ljhtom :
Thanks a lot!
0
Reply
Should I glue the base 1 and 2 together?
The designer has replied
0
Reply
no, there is a small connecting piece to hold them
Show original
0
Reply
This
Show original
0
Reply
Replying to @ljhtom :
isnt this for connecting the plates? A plate = base 1 + base 2
1
Reply
Print Profile
0.2mm layer, 2 walls, 15% infill
Support Issue:Unfortunately, the support material does not come off 50% of the rods... basically, in a two-pack, it's always the front one that doesn't detach and is fused. It can be removed unsightly with a hobby knife, but the bigger problem is the stability of the knobs, 80% of them all broke off and the rest will surely follow in everyday use
Show original
0
Reply
Print Profile
0.2mm layer, 2 walls, 15% infill
Support Issue:Terrible
0
Reply
Hey, I’d love for to make some edits to this to better fit my drawers. would you be willing to upload step files for the split parts as well? Thanks!
2
Reply
Great model. for everyone that is having trouble removing the supports from the dividers, i recommend flipping the model 180 degrees. this way it's uses less support and is easier to remove from the model. But probs to the designer for making a great model it is well designed
(Edited)
The designer has replied
0
Reply
thank you, I made it a while ago and don't remember, 👍👍
Show original
0
Reply
Very well designed!
0
Reply