Search models, users, collections, and posts


Print Profile(1)

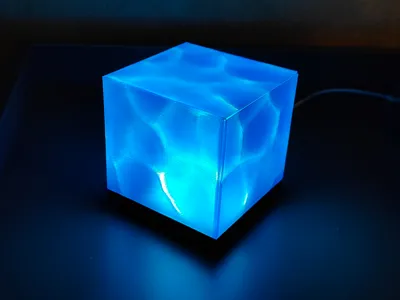
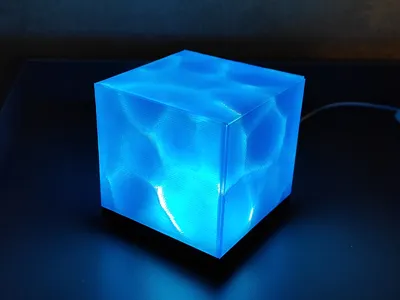
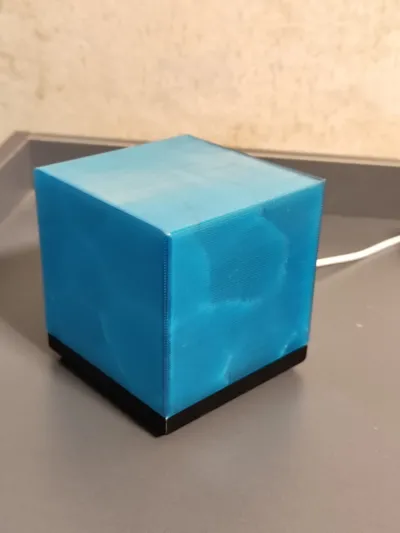
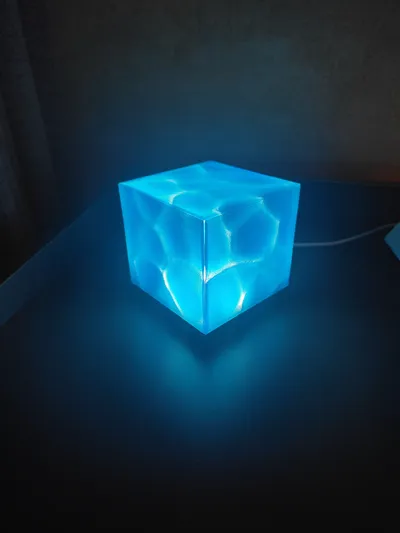
Water Cube
Designer
11.1 h
2 plates
Open in Bambu Studio
Boost
1101
2784
54
40
979
257
Released
Description
Content has been automatically translated.
\u003cp\u003e\u003cspan style=\"color: #E14747\"\u003eExtremely simple lamp, only requires the Bambu Lab Basic LED light MH001, without any complex parts!\u003c/span\u003e\u003c/p\u003e\u003cp\u003eFor better printing results, it is recommended to turn off the cooling fan in your printing filament print profile and use a smooth PEI build plate. After printing, clean off the glue from the model's contact surface (the default textured plate also works, and not cleaning off the glue is also fine, depending on your convenience)\u003c/p\u003e\u003cp\u003e\u003cstrong\u003eAssembly Required:\u003c/strong\u003e\u003c/p\u003e\u003cp\u003eSuper glue (not strictly necessary, double-sided tape can also be used)\u003c/p\u003e\u003cp\u003eMH001 LED light\u003c/p\u003e\u003cp\u003ePETG Translucent filament\u003c/p\u003e\u003cp\u0026nbsp;\u003c/p\u003e\u003cp\u003e\u003cstrong\u003eInstallation Steps:\u003c/strong\u003e\u003c/p\u003e\u003cp\u003eAfter placing the LED light in the base, insert the four side lamp panels into the base one by one, then apply glue to the angled surfaces of the lamp panels to secure them\u003c/p\u003e\u003cfigure class=\"image image_resized\" style=\"width: 54.05%\"\u003e\u003cimg src=\"https://makerworld.bblmw.com/makerworld/model/DSM00000001689905/design/2025-08-11_228f0c3ef2b27.png\"\u003e\u003c/figure\u003e\u003cp\u003eAfter the side panels are installed, apply glue to the angled edges of the top surface, then attach it to complete the installation!\u003c/p\u003e\u003cfigure class=\"image\"\u003e\u003cimg src=\"https://makerworld.bblmw.com/makerworld/model/DSM00000001689905/design/2025-08-11_34ce882e06c8b8.png\"\u003e\u003c/figure\u003e\u003cp\u0026nbsp;\u003c/p\u003e
License
This user content is licensed under a Standard Digital File License.
You shall not share, sub-license, sell, rent, host, transfer, or distribute in any way the digital or 3D printed versions of this object, nor any other derivative work of this object in its digital or physical format (including - but not limited to - remixes of this object, and hosting on other digital platforms). The objects may not be used without permission in any way whatsoever in which you charge money, or collect fees.
Comment & Rating (54)