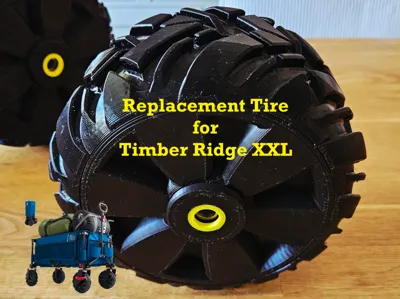
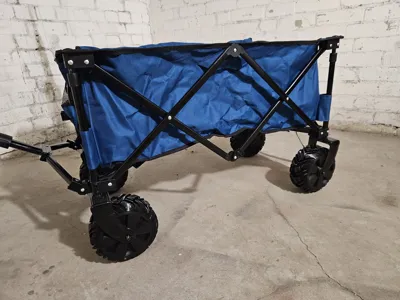
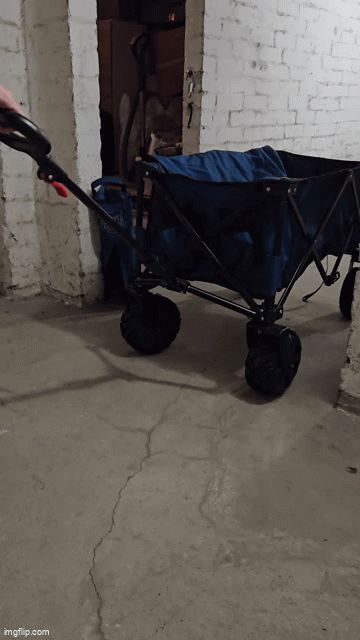
Replacement tire for Timber Ridge XXL beach wagon


Print Profile(1)

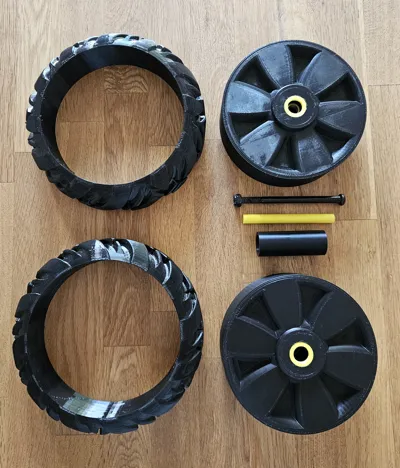
Bill of Materials


Description
We never liked the original tires of the Timber Ridge XXL beach wagon. Cause they are mostly hollow, they are very noisy on hard streets. The little rubber sleeve doesn´t really help and is too flat. And when you finally get to the beach and have to drive through the sand, the wheels don't turn properly anymore.
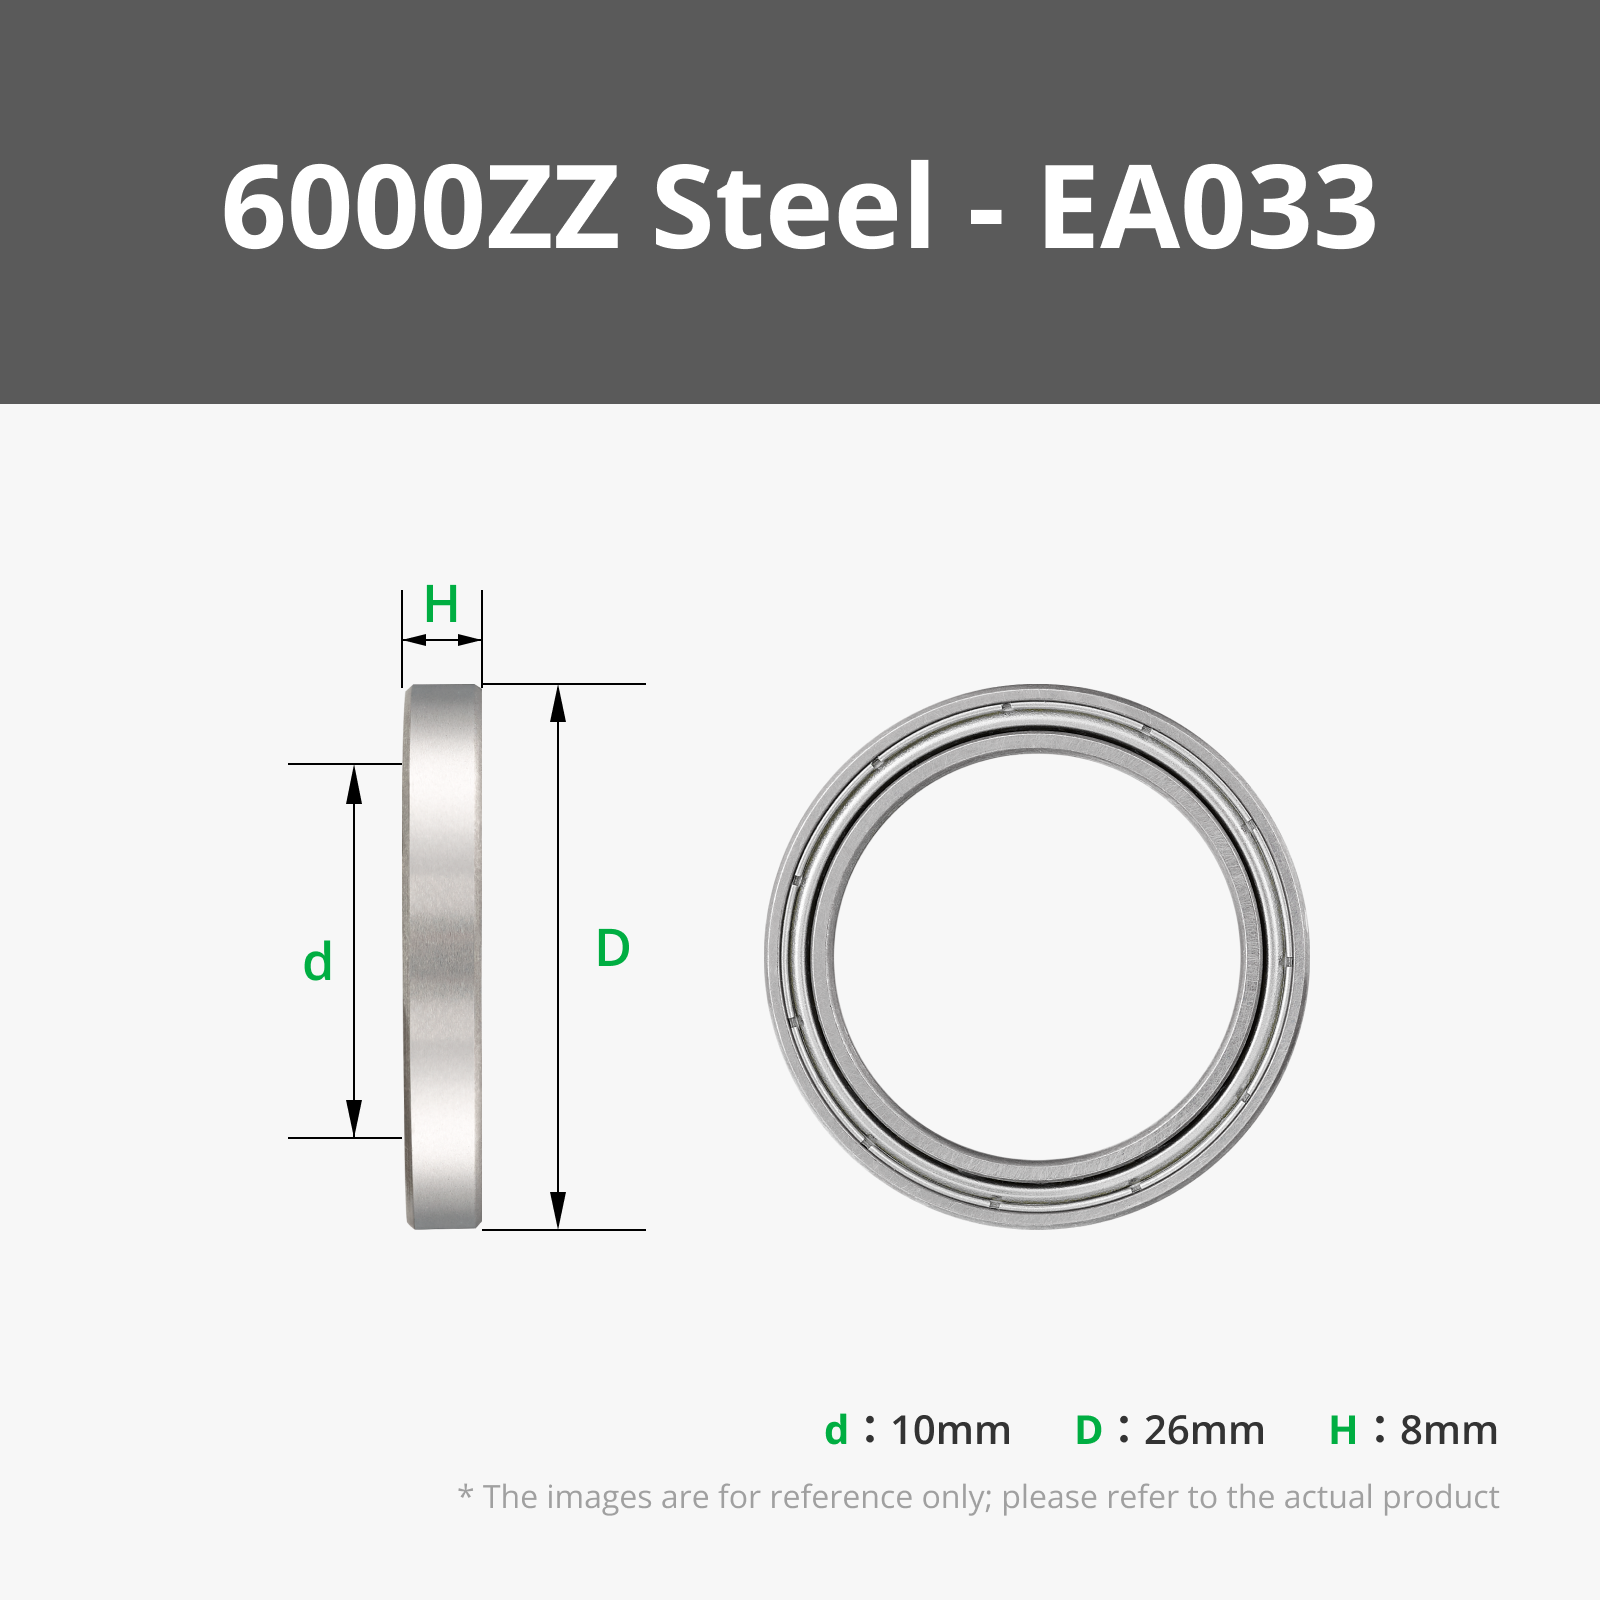
So I designed complete new wheels for the Timber Ridge XXL. The tire printed in TPU 95A and the rest parts in PLA. I also added for each wheel two 6000-2RS bearings. With these tire replacements the wagon is now very quiet and they turn much better in the sand.
Printing tips and infos:
- You can choose between two different tire profiles. I printed two from the same profile for the front and two of the other tire profile for the back. Both are very good - the choice is up to you 😉
- In the print profile you find the two tire profiles splitted in half - because you need 4 new tires, you have to print 4x v1 a+b or 4x v2 a+b (or mix them up).
- The rim is also splitted in half. You find one half in the print profile - for each tire you have to print two rims. So print 8x the rims.
- You need 4x “spacers between the bearings” - there are already 4 on the print plate.
- You need also 4x “axle cover & bearing contact” - 4 are already on one print plate.
- And optional are the “bearing cover”. These will be glued from the outside on the bearings and will give them some additional cover and more important some color 😀. If you want them, you just need to print the 8 on the plate.
Boost Me (for free)
You can boost me for free to support my model makings. Designing takes a lot of time and I would appreciate it very much 🫶
Assembling:
- first demount the original wheels from the Timber Ridge. For the replacement tire you only need the long black axles and screws.
- remove the supports from the rims and the tires. Also the brims from the rest of the parts.
- insert in each rim one of the bearings from the inside. Push them till the end.
- take two rim halfes and insert the spacer into one half and apply some glue to the inside of the rims. Then insert the other rim onto the spacer and the other rim and let the glue work. Repeat that for the other rims.
- take one tire half (a) and the corresponding other half (b). Apply some glue on the undersides which will get in contact with the rim. Then slide them on the rims and and “quickly” align them according to the tire profile. Let the glue work.
- Optional part: if you printed the “bearing cover”, glue each of them from the outside of the rim. Just some glue on the ring outside and push them on the bearing (apply no glue on the bearings!!!).
- insert in each wheel one of the “axle cover & bearing contact”. Simply push them from one side through till they reached the other side and they are symmetrically aligned.
- now take one assembled wheel and mount it to the Timber Ridge. Hold one wheel between the mounting positions and slide the long black axle through - maybe you have to push a little bit harder. Then fix the axle from the other side with the screw, but don´t apply too much force, the wheel needs some space to turn. Repeat that for the remaining 3 wheels and you´re ready to roll 🫶😉
License
You shall not share, sub-license, sell, rent, host, transfer, or distribute in any way the digital or 3D printed versions of this object, nor any other derivative work of this object in its digital or physical format (including - but not limited to - remixes of this object, and hosting on other digital platforms). The objects may not be used without permission in any way whatsoever in which you charge money, or collect fees.
Comment & Rating (11)