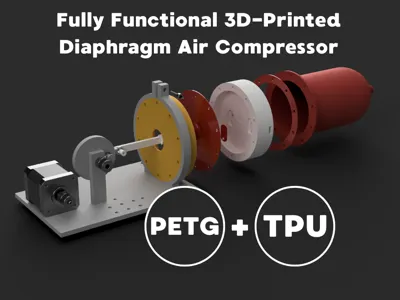
Functional 3D-Printed Diaphragm Air Compressor


Print Profile(1)

Description
A true testament to the capabilities of desktop 3D printing! This is a fully functional diaphragm air compressor, designed and built from the ground up. This project is not just a model, but a working device that showcases a unique combination of rigid and flexible materials.
Key Engineering Features:
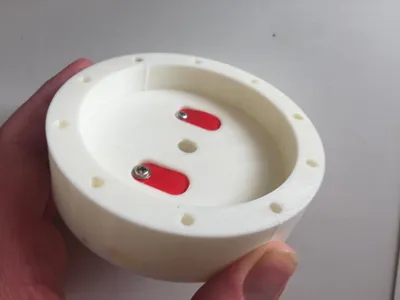
- TPU at its Core: The most critical parts—the diaphragm, three valves (2 intake, 1 exhaust), and sealing gaskets—are printed from flexible TPU, ensuring an airtight seal and durability.
- Rigid PETG Skeleton: The housing, stand, and crank-slider mechanism are made from durable PETG.
- Pulse Smoothing: A pulse dampener-receiver is integrated into the design to provide a smooth, consistent airflow at the outlet.
- Proven Performance: During testing, a working pressure of 2.5 atmospheres (approx. 37 PSI) was successfully achieved. The design has the potential for even higher pressure with a more powerful motor.
This compressor will be the crown jewel of your functional 3D prints collection and an excellent educational tool for mechanics and material science.
A challenging yet incredibly rewarding project for experienced makers. Assemble your very own working diaphragm air compressor!
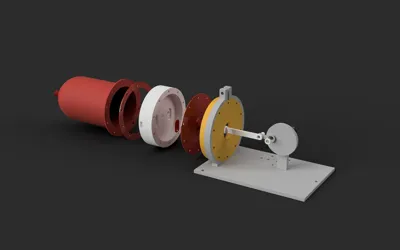
How it Works: A motor-driven crank-slider mechanism causes a flexible TPU diaphragm to oscillate. A three-valve system (also made of TPU) handles air intake and compression, which is then passed through a pulse dampener to stabilize the flow.
BILL OF MATERIALS AND INSTRUCTIONS:
- 3D Printing:
- PETG: Housing parts, stand, crank, connecting rod, pulse dampener.
- TPU: Diaphragm, 3 valves, gaskets. Slow printing is recommended for the best quality.
- Non-Printed Components:
- Bolts, studs, and nuts for assembling the housing.
- An electric motor with a gearbox (or a powerful solenoid).
- Spray can lacquer/sealant.
- ASSEMBLY AND SEALING (CRITICAL STEP):
- Before assembly, you MUST coat all PETG parts with several (3-4) heavy layers of spray lacquer. Let each layer dry completely. This is essential for making the housing airtight.
- Install the TPU gaskets and diaphragm.
- Assemble the housing, tightening the bolts and studs evenly.
- Mount the crank mechanism and connect the motor.
The pressure potential with a powerful motor can exceed the 2.5 atm achieved on the test prototype with a solenoid. Good luck with your build!
Thought TPU was only good for phone cases and flexible toys? Think again! This project completely redefines what's possible with flexible filaments.
Here, TPU is not an auxiliary material, but the key functional element. The following parts are printed from it:
- The working diaphragm: Oscillates thousands of times to compress air.
- Intake and exhaust valves: Their flexibility ensures a perfect seal at precisely the right moment.
- Gaskets: Guarantee that precious pressure is not lost.
The rigid PETG housing serves merely as the skeleton, while the "muscles" and "heart valves" of this compressor are created from TPU. The achieved pressure of 2.5 atm is direct proof of the strength, durability, and incredible potential of a properly printed flexible filament.
License
You shall not share, sub-license, sell, rent, host, transfer, or distribute in any way the digital or 3D printed versions of this object, nor any other derivative work of this object in its digital or physical format (including - but not limited to - remixes of this object, and hosting on other digital platforms). The objects may not be used without permission in any way whatsoever in which you charge money, or collect fees.
Comment & Rating (1)