Search models, users, collections, and posts

Bambu Spool and Refill Extractor

Print Profile(2)

All
A1 mini
P2S
X1 Carbon
H2C
A1
H2S
P1P
H2D Pro
P1S
X1
H2D
X1E
X2D
A2L

Only 54 minute total time and 27 gr
Designer
54 min
2 plates
4.9(197)

Vacuum Bag Compatible Version
Designer
52 min
2 plates
5.0(19)

Open in Bambu Studio
Boost
970
3713
267
110
2.1 k
1.7 k
Released 

Description

I used to hate seeing my Bambu Lab spools sitting on the shelf, half full of filament I rarely use anymore just collecting dust. And what frustrated me even more was spending 7+ hours printing new spools just to load refills. It felt like such a waste of time and filament. That’s why I designed this Spool Extractor to quickly free up those OEM spools and put them back to work.

Reclaim your spools 


This tool makes it quick and safe to remove filament from OEM Bambu Lab spools, so you can reuse the spools with your favorite refill coils, perfect for high-volume materials you use all the time.


Features:

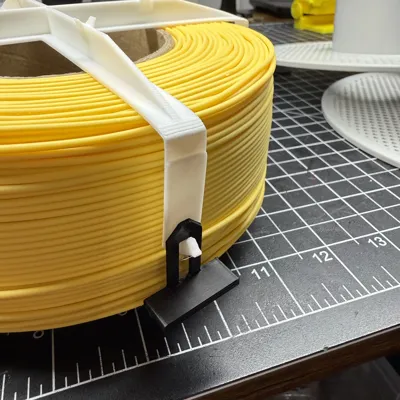
  • Snap-fit extractor for easy spool separation
  • Keeps filament neatly coiled for storage or future use
  • Designed for all standard Bambu Lab refills
  • Can be printed with PLA or other stiff durable materials


UPDATES:

Apr 3 2026

Version without pointy edges compatible with vacuum bags is now avalable


Instructions (please do not skip steps)


Step ONE:


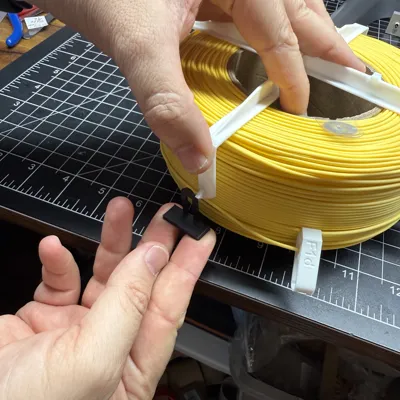
Print this model together with my filament clip that holds the filament to itself and not to the spool edge.   https://makerworld.com/en/models/378548-filament-clip#profileId-278517


Steo TWO:


Unwind a little over one turn of filament and rewind it in the middle of the spool, and then attach the filament clip. This step is important because if the last loop of the filament is close to the spool wall or touching it, the filament might unwind a little when the the spool is removedand affect the next steps.


Step THREE:


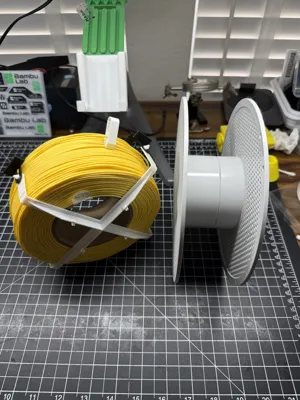
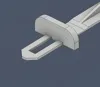
Remove the top half of the spool and place the bottom extractor part (the one with vertical tabs) on top of the carbord core and filament.  


Step FOUR:


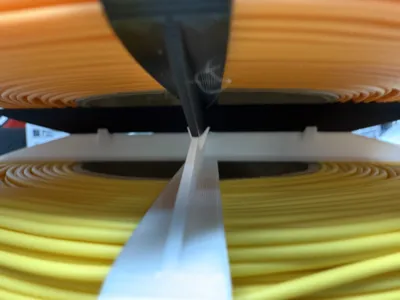
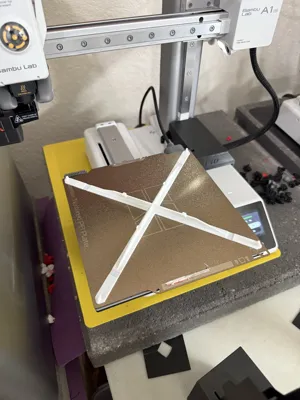
The most important step! Slide the spool to the edge of the table and hold the extractor cross and spool as pictured below. Flip both together 180 degrees, place it on the table and then slowly remove your hands to let the extractor cross touch the surface. Make sure the cross never separates from the cardboard core during this step.
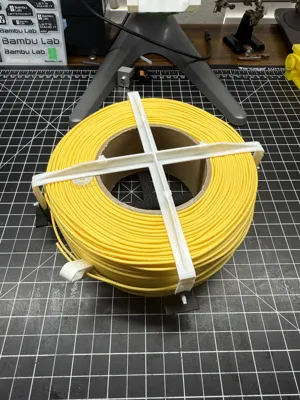
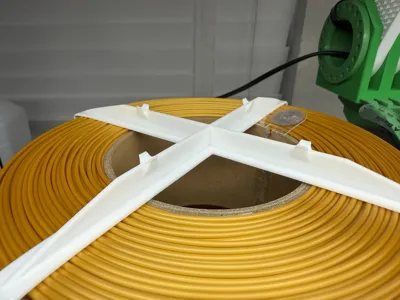


LAST step:


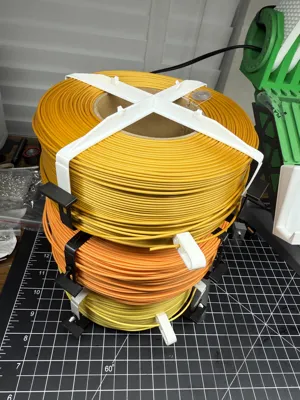
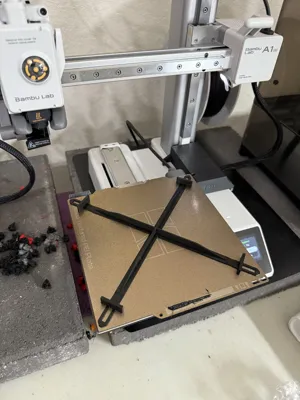
Gently remove the other half, lifting vertically. Place the top cross on top of the refill.  Grab one of the bottom cross ends from its tab and insert it into a top cross end hook. Repeat on the opposite side and then do the last two hooks.


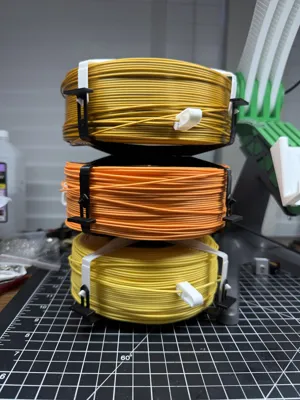
And thats it!   the refills  can also be stacked…


Thanks for printing

Comment & Rating (267)

(0/1000)

Pinned by Designer
Print Profile
Only 54 minute total time and 27 gr
printed very well. seems to be a very good idea. I have to test it. working perfectly!
(Edited)
profile
2
Reply
What material did you use
Show original
0
Reply
Replying to @goodman123455 :
Bambu Basic PLA - black color
0
Reply
Replying to @small_design :
Good, I have it too thanks
(Edited)
Show original
2
Reply
Fantastic print. I’m a newbie and ordered mostly refills, so having an easy (and filament-friendly) way to store the extra spools is a life / money saver. They also fit perfectly in the reusable FoodSaver bags, so I can store them longer-term.
The designer has replied
3
Reply
Thank you!
1
Reply
Replying to @f1dude :
Hi! I've just uploaded a friendlier vacuum bag version.
0
Reply
Boosted
This is a really good model idea. I really appreciate that your model is optimized for filament quantity. I would have liked a version that uses more filament and brings 2 modifications: - Have a place where we can stick the label of the filament type from the spool from which we extracted the filament. (I stuck it on the RFID tag, but it didn't fill the entire adhesive part) - Something to hold the spool in the center of the cross If I had had a boost, I would have given it to you without hesitation
Show original
2
Reply
my support for PLA that came with the printer ended up as spaghetti 😂 what a shame I didn't see this design before you
Show original
0
Reply
Print Profile
Vacuum Bag Compatible Version
This is the essential tool I was desperately trying to find. Works well!
The profile uploader has replied
profile
1
Reply
Thanks you!
0
Reply
Love the idea, but would love to see an integrated filament clip. For long term storage I also vacuume seal and the v shaped feet puncture my bags. Would be awesome if these two issues could be addressed.
7
Reply
Print Profile
Only 54 minute total time and 27 gr
great design. these are useful when no spools are available
profile
2
Reply
Boosted
Print Profile
Only 54 minute total time and 27 gr
thanks for sharing. Fresh off the printer! As soon as my new spool arrives, I’ll update my review. exactly what I was looking for!
profile
1
Reply
Print Profile
Only 54 minute total time and 27 gr
This worked as stated. What a spool saver.
profile
1
Reply
Boosted
I printed the construction with PLA white/red for testing. Super good result, super good idea! Will definitely recommend it!
Show original
1
Reply
works well, I’ve been looking for something like this for weeks ! thanks
1
Reply
Print Profile
Only 54 minute total time and 27 gr
Works as advertised.
profile
1
Reply

License

This user content is licensed under a Standard Digital File License.

You shall not share, sub-license, sell, rent, host, transfer, or distribute in any way the digital or 3D printed versions of this object, nor any other derivative work of this object in its digital or physical format (including - but not limited to - remixes of this object, and hosting on other digital platforms). The objects may not be used without permission in any way whatsoever in which you charge money, or collect fees.