Search models, users, collections, and posts
Checkbox Journal Stencils
IP Report


Print Profile(1)
0.16mm layer, 2 walls, 15% infill
Designer
37 min
2 plates
Open in Bambu Studio
Boost
69
306
3
0
63
39
Released
Description
Journal Checkbox Stencil
A wonderful new friend my wife made has been thrilled with all the bullet journal stencil designs on MakerWorld. I'm still journaling (list making) myself, and was inspired to make my own. This stencil helps to make checkboxes down a page and along the spine.
The brand of the lined journal I’m using says its name is Eccolo™. The stencil measurements are based on this and the height of the header and footers of the pages.
Overall, the journal/notebook is 8" and 1/4" (209mm) by 5" and 7/16" (138.1mm). Pretty specific, but maybe it will work for someone else out there. There may be some feature ideas for your own designs as well.
Two Stencil Versions:
- Plate 1: All Rows - Checkbox Per Line (shown in the pictures)
- Plate 2: 3x 6 (Weekdays) – Skipping 2 rows followed by a set of 6 checkboxes. This is my preference; where the skipped rows, I start day-of-the-week title and subtitle lines. Below is my template of how I'm using this stencil version.
Plate 2 Stencil - Journal Template:

Stencil features:
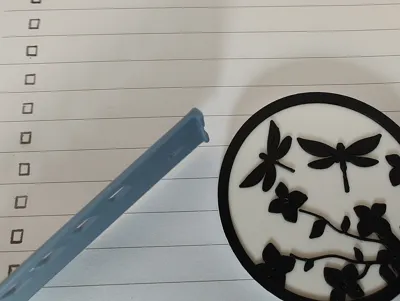
- Page Aligner: There is a slight overhang on the top of the template. This is to help align the template with the page. This overhang or elbow, is intended to short so that it doesn’t break easily.
- Top Indicator: A triangle to at the top indicates which way the stencil should be oriented towards the header of the page.
- Elastic Band Notch: Each end of the stencil has a notch so that a journal with an elastic band can hold onto the stencil securely. This is preferable to keeping the stencil inside the journal like a bookmark. The stencil is 1mm thick and could be used as a bookmark less ideally. For the same approach using the elastic band, the stencil is as long as the journal.
Print/Profile Settings:
- No supports are needed
- The stencil is oriented on its side to print vertically for layer line esthetic. Please be sure you have a clean build plate and you should not need adhesive or a brim while using a textured build plate.
This post is now a ☑️, go me! 😊
Have a very productive day!
MJDD
License
This user content is licensed under a
Creative Commons Attribution-Noncommercial-Share Alike
Comment & Rating (3)