Revolutionary Army One Piece TCG Deckbox


Print Profile(1)

Description
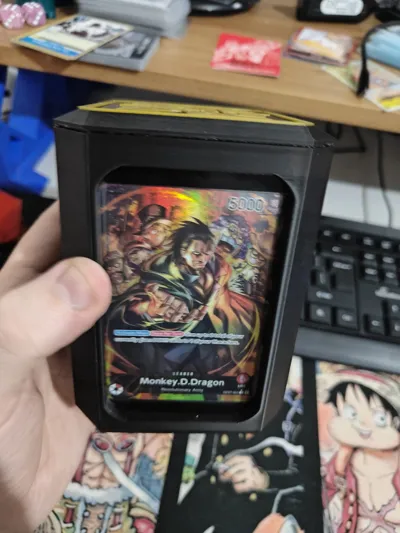
"There are things that humans cannot stop...a human's will, dream, and the change of an era"
- Monkey D. Dragon
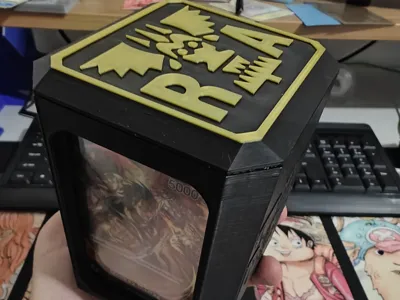
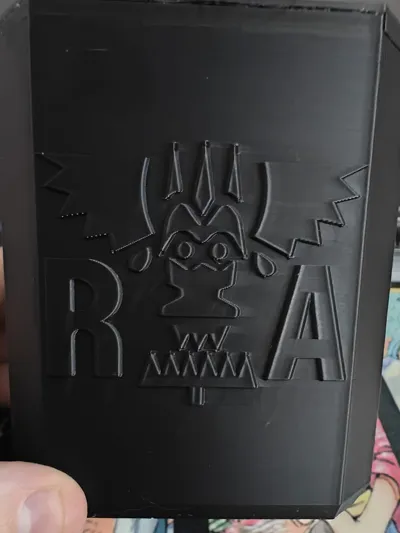
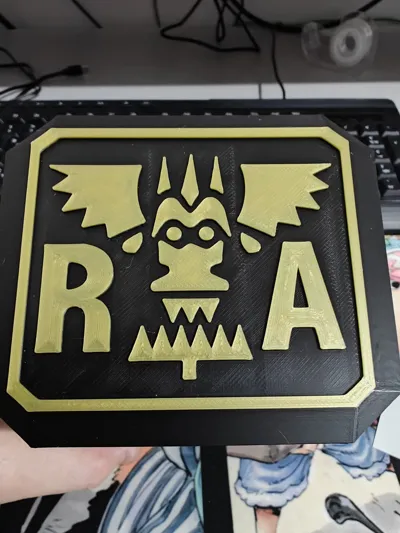
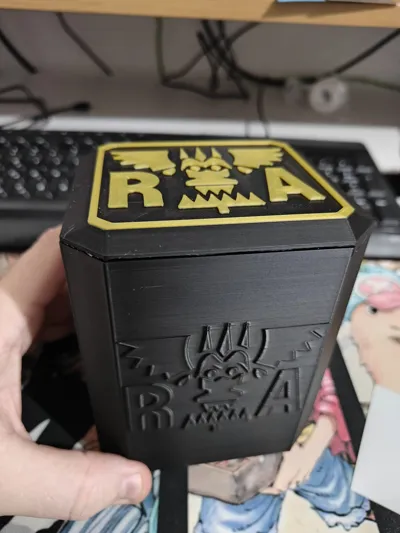
Revolutionary Army is coming in with OP12~! We already had Dragon and Sabo in his 2 versions, but Koala seems to be a damn annoying deck to play, lol. And we just needed a deckbox to go along with that! :D
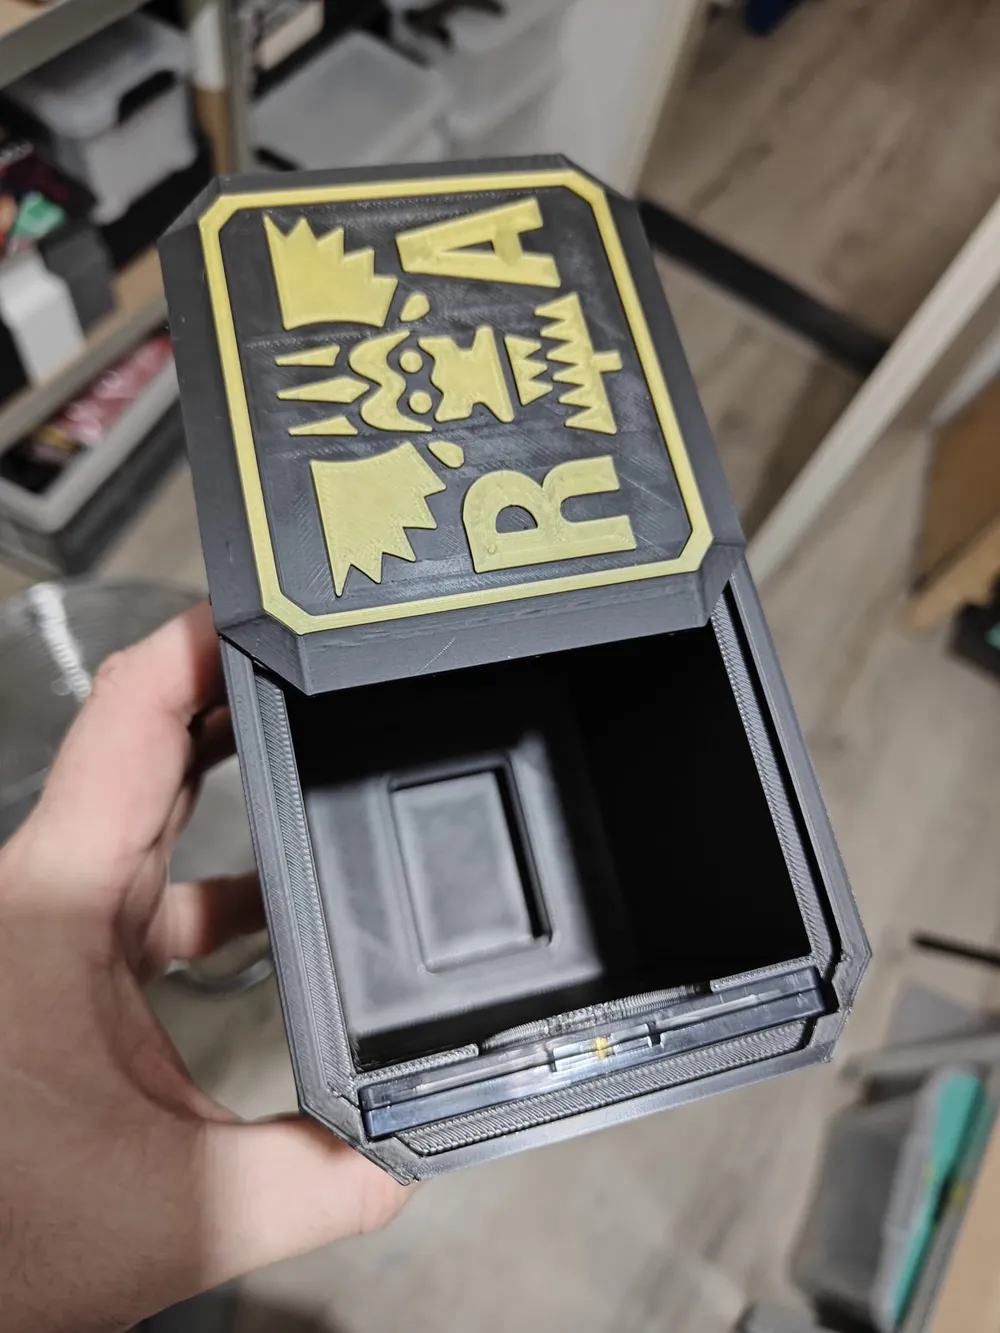
These deckboxes are made for:
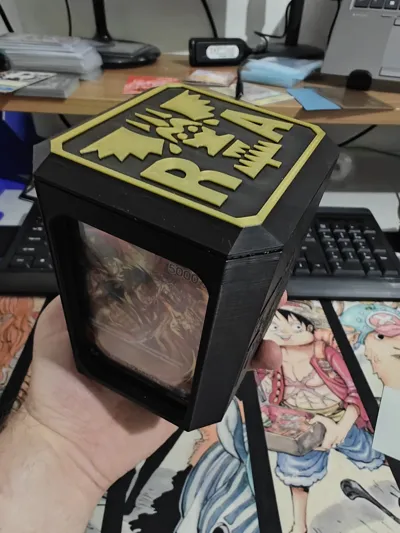
-UltraPro magnetic 23pt or 35pt hard card case in front (I'd advice using a black border if you copy the use of colors I did)
- Use of full One Piece deck + DON!! cards, both double sleeved, whether it's with inner or outer sleeves.
- An extra hole for smaller dice or tokens in the main deck area on the bottom.
So, I included both the STL of the lid and the deckbox with their respective user presets saved in the .3mf file.
Those user presets worked the best result for me, but if you have the bambulab support material or use PETG for support top interface it'll work far better with less of a hassle to clear the support away from the lid.
Settings:
On the deckbox preset there is topmost surface ironing, with the preset added to it, whereas the lid preset has different settings turned on and topmost surfaces as well.
KEEP IN MIND that those presets are with S- PLA+, they might differ for Bambulab or other materials, so you might have to adjust those accordingly!
I used S- PLA+ Gold and Black
Keep in mind that the tolerances are pretty spot-on, so you might have to slide it a few times before it slides smoothly!
Printed with 0.2 layer height for the deckbox.
3 walls, 10% gyroid infill.
Printed with 0.12 layer height for the sliding lid.
Again, 3 walls and 10% gyroid infill.
Deckbox has a bit more top layers for a better looking top.
Ironing settings that I used for PLA+ from S-:
Ironing speed 60mms
Ironing flow 38%
Ironing line spacing 0.11mm
Ironing inset on 0.21mm
License
You shall not share, sub-license, sell, rent, host, transfer, or distribute in any way the digital or 3D printed versions of this object, nor any other derivative work of this object in its digital or physical format (including - but not limited to - remixes of this object, and hosting on other digital platforms). The objects may not be used without permission in any way whatsoever in which you charge money, or collect fees.
Comment & Rating (3)