Constant Velocity Joint for TestDrive


Print Profile(1)

Bill of Materials

Description
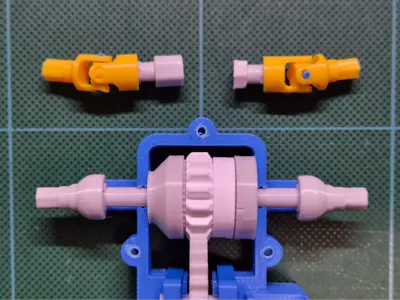
The 3D-printed universal joint worked well on the TestDrive. However, it wouldn't meet the shorter joint requirements for my new model.
I'm considering using a 3mm-to-3mm metal universal joint (FC004) from Bambulab or a Constant Velocity Joint based on the Rzeppa design.
I tested my simplified Rzeppa joint (using only 4x 3mm steel balls) on my TestDrive model and it worked quite well. It ran smoother than my universal joint.
I wanted to share this here for TestDrive users who would like to experience another mechanism.
Installation Procedure
 |
|
  |
|
License
You shall not share, sub-license, sell, rent, host, transfer, or distribute in any way the digital or 3D printed versions of this object, nor any other derivative work of this object in its digital or physical format (including - but not limited to - remixes of this object, and hosting on other digital platforms). The objects may not be used without permission in any way whatsoever in which you charge money, or collect fees.
Comment & Rating (1)