GRIDPAC.ONE - Systainer Compatible Gridfinity Case


Print Profile(6)


Bill of Materials
Description
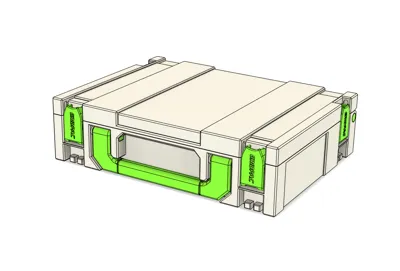
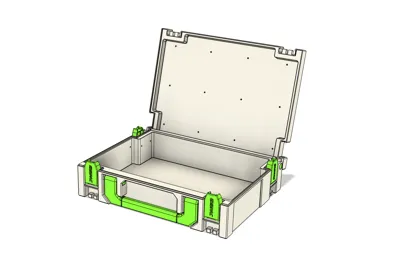
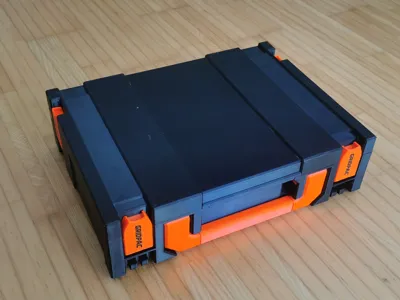
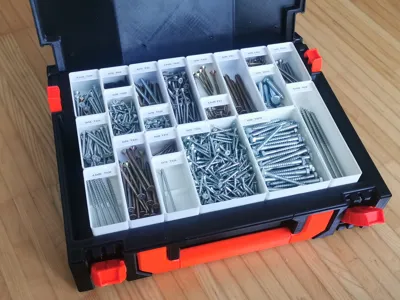
GRIDPAC.ONE is the all-in-one printable storage case designed to unify your workspace whether you're deep in the Gridfinity ecosystem or using your own custom inserts.
It matches the outer dimensions of Systainer Classic (compatible with Makita MAKPAC, HiKOKI, Festool and Tanos) and is 3D Printer Friendly.
- Designed to be fully 3D printable, even on beds as small as 180×180 mm
- Seamless lid printing on 220×220 mm beds
- Seamless base printing on 300×300 mm beds
- One-piece print possible on 300×400 mm printers


Why “One”?
One box – designed for both Gridfinity inserts and non-Gridfinity storage (foam, custom compartments, tools)
One design – optimized to print on nearly any 3D printer starting from 180×180 mm bed and up.
One system – compatible form factor with Makita Makpac, Tanos and Festool Systainers for tool shop integration
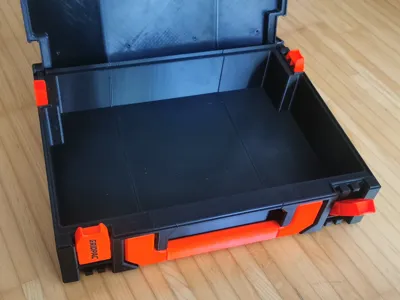
Dimensions
Internal
- Footprint: approx. 380 × 250 mm (excluding corners)
- Size 1 Internal Height: approx. 91 mm
Gridfinity
- Inner Height (Size 1): fits up to 12 Gridfinity Units
- 48 – 52 standard bins, depending on layout
- 210 half-grid bins
- Lid Supports a half-grid pattern or a 3 mm foam insert


Printing
Bambu Lab Users
Pre-tuned print profiles are available on the MakerWorld page. These are optimized for Bambu Lab printers and work out of the box.
Other Printers
If you're using a different printer, follow the guidelines below:
General Infos
Depending on the size of your printer, you can print the base and the lid in either 1, 3, or 6 pieces. The 3- and 6-piece variants are compatible. Each left, middle, and right section from the 3-piece variant can be combined with a front and rear combination from the 6-piece variant.
Try to fit the largest possible parts on the bed. On common printers with a bed size of 220×220 mm, you can at least fit the 3-piece lid parts upright and diagonally on the bed.
It is not recommended to print the bottom pieces in an upright position, as the glue joints might be a weak point due to poor layer adhesion.
General Settings
- Material: ABS or PETG recommended
- Nozzle: 0.4 mm
- Layer Height: 0.2 mm
- Walls: 2 to 3
- Infill: 15–25%, Gyroid or Cross Hatch
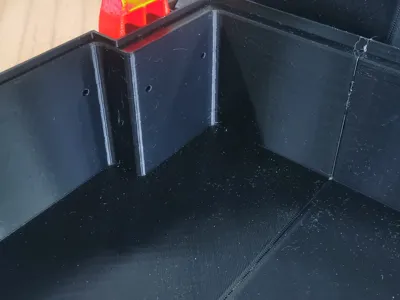
Multipart Files & Reinforcement Bodies
The design includes bodies labeled “reinforce”. These should be printed with an extra wall, especially if you’re using only 2 perimeters. This ensures critical areas like the latch mechanism won’t break under stress.

Supports & Bridging
If available, use a support interface material for a cleaner finish. If not, follow these suggestions:
Set bridge direction to 90° to the print orientation for a smoother surface
Increase support interface spacing to 1 mm for easier removal and improved texture
Pins & Hinge Pieces
- Use extra walls and concentric patterns for added strength
- All pin and hinge parts come in three tolerance variants
- Start with 0.1 mm clearance
- If friction is too high, try the next looser variant
- If too loose, try enabling random seam alignment to add friction
- Note: Handle pins are not symmetric—be sure to mirror them
M3x30 Alignment Pins
- These pins are used for alignment only and provide no structural function. You may substitute them with:
- M3x30 threaded rods (metal or nylon)
- 3×30 mm wooden dowels
- Printed pins (recommended in a contrasting color to help inspect glue joints during assembly)
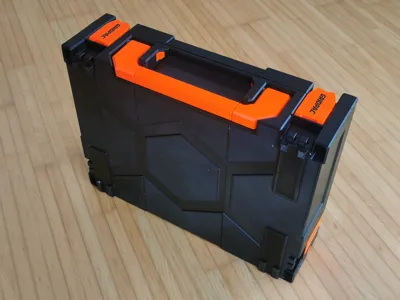
Latches
Latches are available in three variants:
- Plain
- Debossed letters
- Multipart for multicolor (AMS/MMU-ready)
- Pick the version that suits your setup and aesthetic preferences.

Assembly
To assemble the case, you’ll need glue. For PETG or ABS, UHU Hart (affiliate link) works well in my experience.

Base
- If you're using the 3-piece variant, start by assembling the front and rear sections. Once these are fully cured and stable, proceed to glue the left, middle, and right parts together.
- Always assemble on a flat surface
- Prepare weights or clamps to ensure proper alignment and fit
Lid Assembly
- Begin by assembling all lid parts first
- Once the lid is fully cured, insert the hinge blocks
- Double-check orientation before gluing (ask me how I know ...)
Handle
- The handle pieces need to be glued together as well (3 pieces)
Final Assembly
- Once everything is cured and stable, insert the pins to assemble the lid and base
- Latches need to be twisted in, just like with the original Systainer
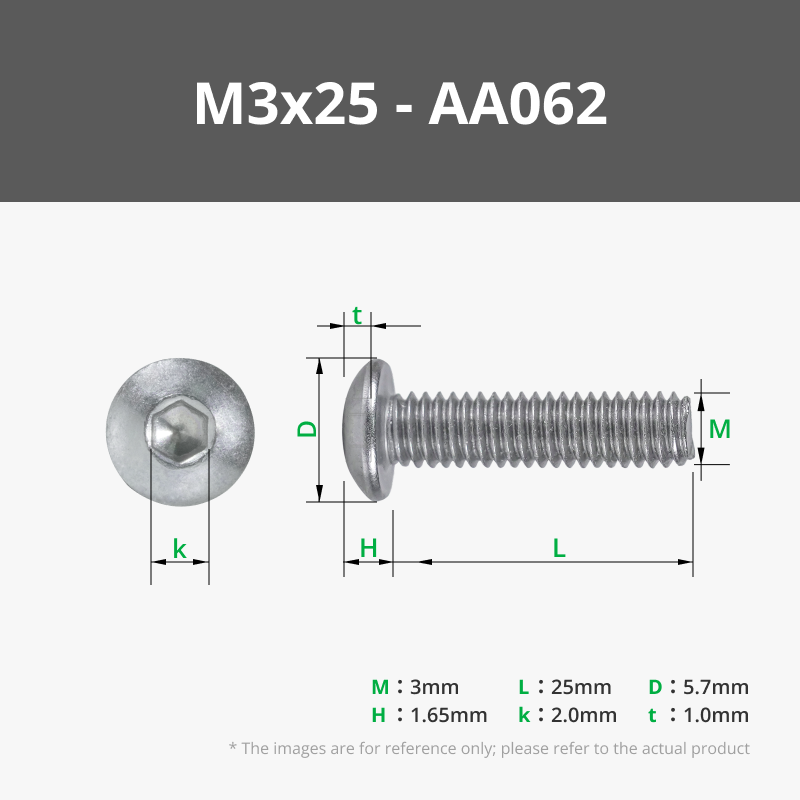
Hinge Pins
- The hinge pins have a hole designed for an M3×25 mm screw
- The bolts are friction-fit,but may loosen over time
- To secure it, you can add a dab of glue or use screws to lock it in place
FAQ:
Q: What size printer do I need?
A: For seamless lid printing, a build area of at least 220x220 mm is recommended. The design is also printable on 180x180 mm beds, but larger parts will need to be split. To print the entire model in one piece, you'll need at least 300x400 mm.
Q: How much material is needed?
A: With a 0.4 mm nozzle and two walls, the model uses roughly 1,4 kg of ABS filament (including all parts and support material). The original weighs about 1,3 kg.
Q: Why Systainer Classic and not Systainer³ with T-Loc?
A: The Classic Systainer patent (EP0555533B1) expired in 2012. The T-Loc patent (EP2315701B1) expires in 2029 and the Systainer³ design will remain protected even longer. I prefer to avoid legal gray areas.
Q: Why not use a real Systainer and print just the insert?
A: I’ve done that too. But honestly — I enjoy creating and experimenting. Why buy something for 30 Euro when you can spend hundreds of hours and kilos of filament building your own?
Q: Can you make Size Y or add Feature X?
A: Check the to-do and planned features list. If it’s not on there, drop me a message and I’ll see what I can do.
To-do:
- Buffer pieces to block off half-grid gaps
- Lid inlay for Gridfinity grid (half-grid "hollow") – alternatively, a 3 mm foam insert can be used
- Bottom inlay for Gridfinity grid (a standard Gridfinity grid from the Fusion Base Plate Generator will work)
Features and ideas for the future:
- Base “Size 0” – 78.75 mm height ("different" design)
- Lid with handle
- Base without handle
- Base with grip holes (left and right)
- Smaller 52.5 mm variant (stackable, no latch)
Change log
2025-08-03 v84
- Initial release for “Size 1” with a front handle and basic design
Boost Me (for free)
Enjoying my models? Show your support with a Boost! Boosting not only adds a few extra points my way - it also helps cover the material costs that goes into prototyping each design. Every bit of support helps me keep creating fresh, high-quality models for you to enjoy! Thank you for helping keep the creativity flowing 💡✨
Comment & Rating (127)