
Print Profile(1)

Description
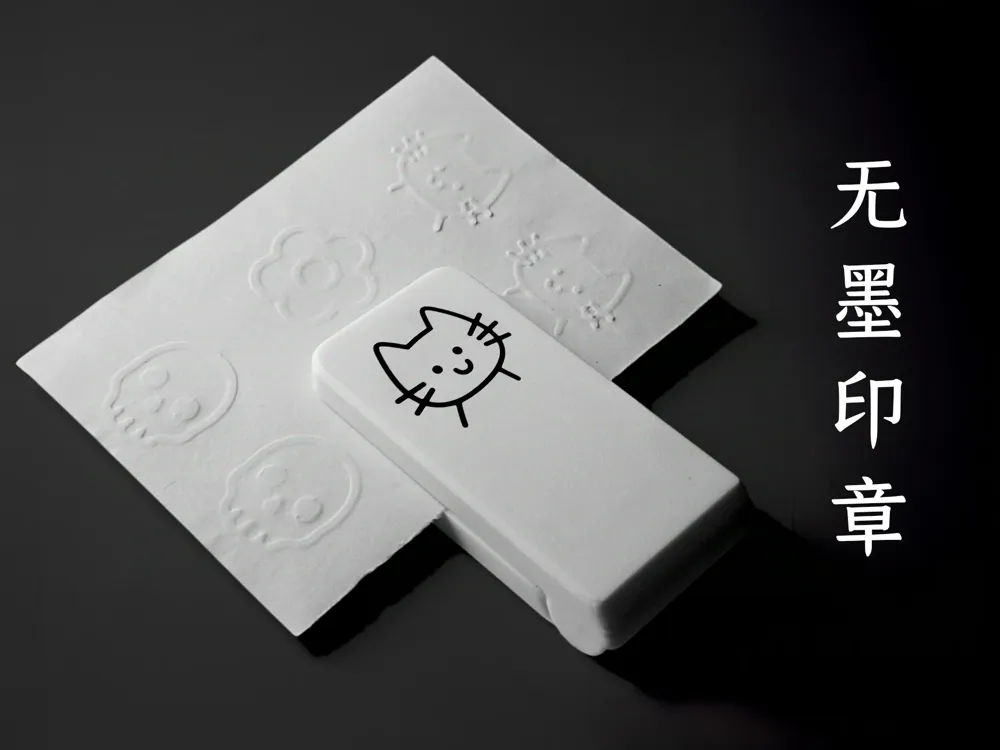
This is a portable embosser, utilizing an embossing method that allows you to impress your desired patterns onto paper without ink. The raised designs present a distinctive appearance, and we trust you will find it appealing.
You can personalize the stamp plate and the overall dimensions of the embosser by utilizing the Customize button on the MakerWorld website. If accessing via a mobile device, you may wish to save it to your favorites first.
Preparation
Should you desire the embosser to remain closed when not in use, you will need to procure four 4mm x 2mm circular magnets, which are available for purchase on the Bambu Lab Store.
Printing Parameters
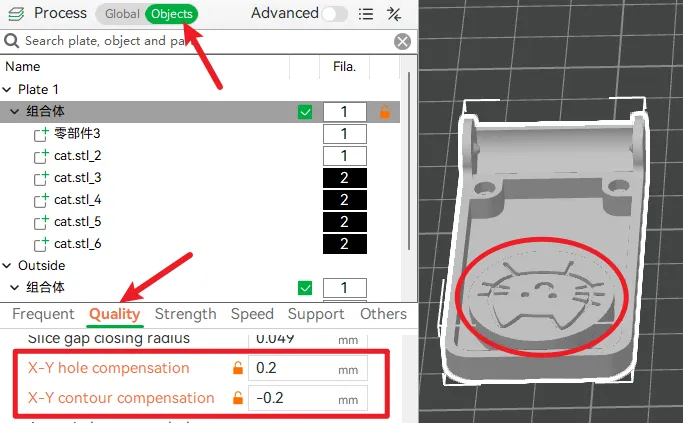
It is noteworthy that the upper cover model (concave stamp) section requires adjustment of the X-Y Hole Compensation, with internal and external compensation set to 0.2mm and -0.2mm respectively.
Customization
Upon clicking the Customize button on the MakerWorld web interface, two customizable files will appear. mainbody customization is dedicated to the primary structural formation of the embosser, allowing for the personalization of the embosser's dimensions, magnet sizes, and other attributes. Conversely, stamp plate customization is designated for the design of the stamp plate itself, enabling you to generate your desired stamp pattern using SVG files or emojis. Should you possess PNG files, you may also convert them to SVG format via web tools.
Assembling the Model
Once you have finalized the customization of both the embosser body and the stamp pattern, download them to your computer and import them into Bambu Studio. Subsequent steps involve certain operations and parameter adjustments.
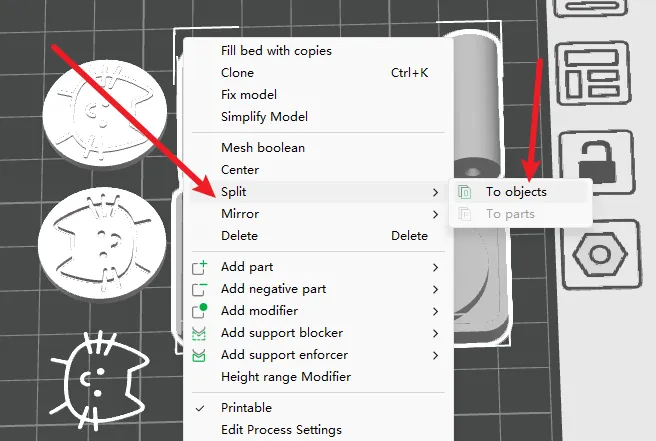
1. Deconstruct the model into objects (right-click after selecting the model)
2. Select the concave pattern and the main body's upper cover, then click the Assemble button on the toolbar
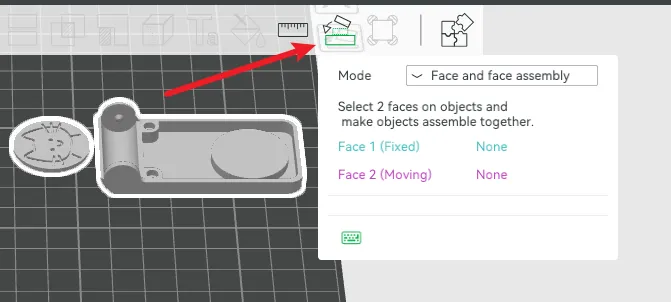
3. Click the bottom of the pattern with your mouse
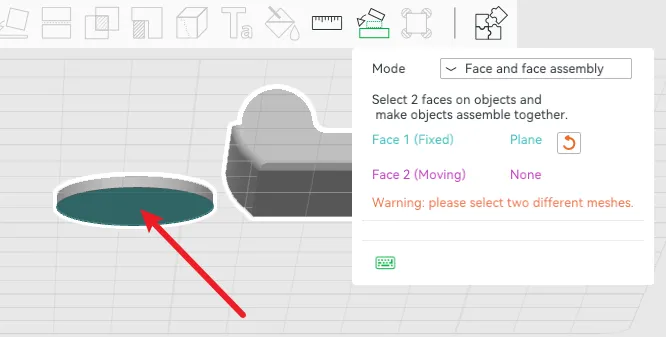
4. Click the base within the upper cover model with your mouse
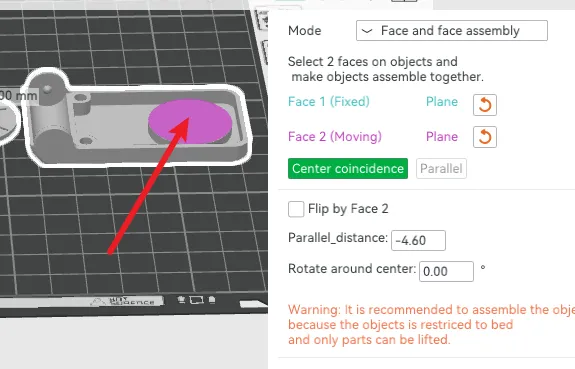
5. Click the Assemble button
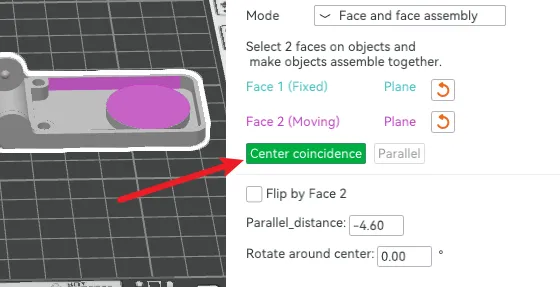
6. Subsequent to completing the assembly, in the Objects tab, select Merge from the right-click menu to combine these two into a single integral entity.
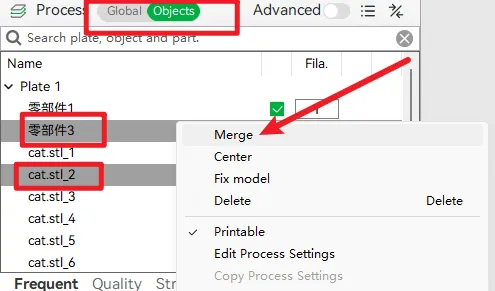
7. Apply the identical procedure for the convex pattern and the lower portion of the main body.
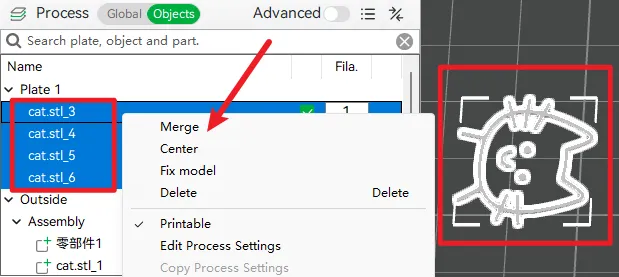
8. Next, to affix the pattern onto the upper cover's surface, should the pattern be relatively intricate, there is a possibility that the pattern model might disjoin. Therefore, select all objects comprising the pattern and merge them.
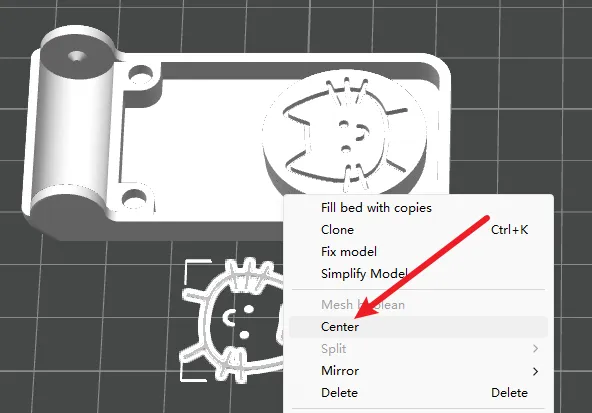
9. Center the upper cover and the pattern.
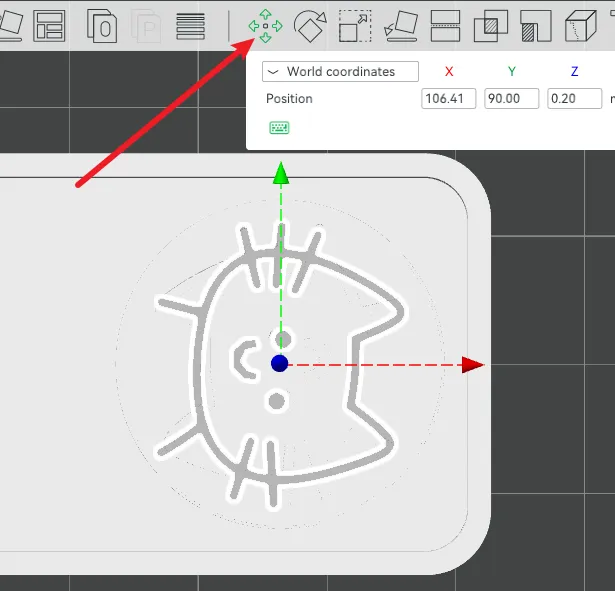
10. Adjust the pattern's position
11. Select both the pattern and the upper cover, then merge them.
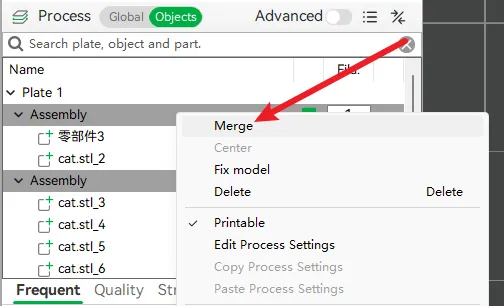
12. Finally, do not neglect to adjust the printing parameters. We extend our gratitude for your perusal and invite you to share your embosser in the comments.
License

You shall not share, sub-license, sell, rent, host, transfer, or distribute in any way the digital or 3D printed versions of this object, nor any other derivative work of this object in its digital or physical format (including - but not limited to - remixes of this object, and hosting on other digital platforms). The objects may not be used without permission in any way whatsoever in which you charge money, or collect fees.


Comment & Rating (31)