ExoGuitar - Neck v3


Print Profile(3)


Bill of Materials
.jpg)
Description
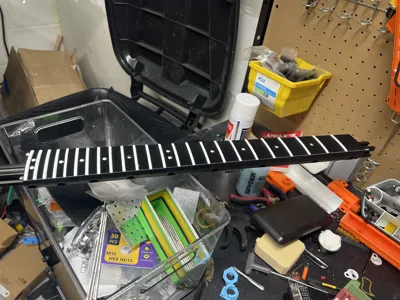
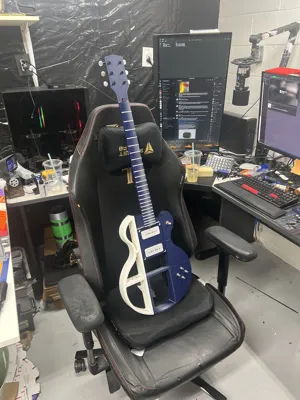
Neck v3
Discover the flexibility of a modular neck design, perfectly suited for seamless integration into your existing builds featuring v3 hardware components.
Why You'll Love It:
- Modular Build Compatibility: Effortlessly integrate this neck into your legacy projects designed around v3 BOM parts.
- Printed Neck + Spine Extrusion Philosophy: Embrace the pioneering design philosophy that enhances durability and customization.
Real-world Inspiration:
This neck embodies the printed neck + spine extrusion concept, offering a robust foundation for your innovative builds.
Design & Print Notes:
- Ensure consistent thickness for thin sidewalls across all 2020 aluminum components.
- Find shoulder components in their dedicated files here.
Assembly for Neck v3 (Fret Inserts):
Step 0: Prepare hardware:
- Cut one section of 2020 to 500mm, tap one end with M5 or M6 thread based on your 2020's hole size.
- Cut two pieces of M3 Threaded rod to 488mm, apply Locktite on one end, and screw an M3 Acorn Nut onto that end until snug.
- For each fret insert: affix the fret into the groove in the fret insert so it sticks out of both ends equally. Trim excess from the back of the fret using metal snips. (Do not trim the front at this point.)
Step 1: Insert Heat Set Inserts
Insert two heat set inserts into the first chunk.
Step 2: Assemble fret board onto M3 Threaded Rods:
- Start with the bottom fret chunk (two recesses for nuts). Put the two M3 threaded rods through the holes so that the M3 Acorn nuts rest in the recesses in the bottom chunk.
- Organize pieces by number (Fret Insert, Rubber Band, and Fret Chunk) and assemble on M3 Threaded Rods in this order:
- Fret Insert, number facing up
- 10mm rubber band, stretched around both M3 Threaded Rods,
- Fret Chunk, flat side facing up
- Repeat until all frets are on the M3 Threaded Rods. Tighten using a 5.5mm nut bit on the M3 Acorn Nuts until snug and there are no visible gaps between them.
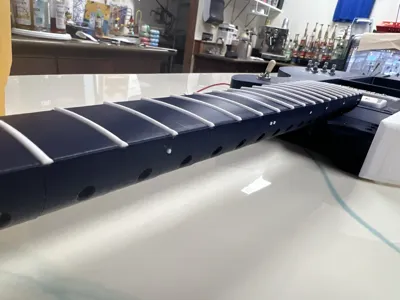
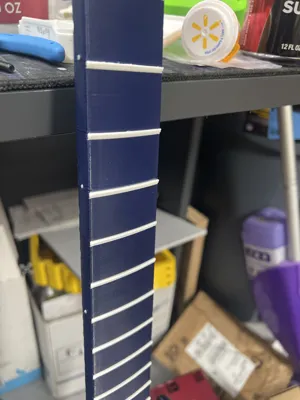
Step 3: Insert Fret Indicators (Optional Lighting):
- Remove adhesive backing from the 5mm strip light and stick it in the front-facing channel of the 2020.
- Put a drop of Medium or Thick CA glue into the front indicator hole, and then put the front indicator in the hole so that the indicator is flush with the surface of the neck. Repeat for all pieces, allow to dry before proceeding.
- Cut a decently sized piece of filament in your neck accent color, insert it in the side of one of the holes on the neck. If it doesn't go in easily, bore the hole using a 2mm drill bit. Insert a tiny amount of thin CA glue if needed, trim it so it's flush, and allow to dry before proceeding.
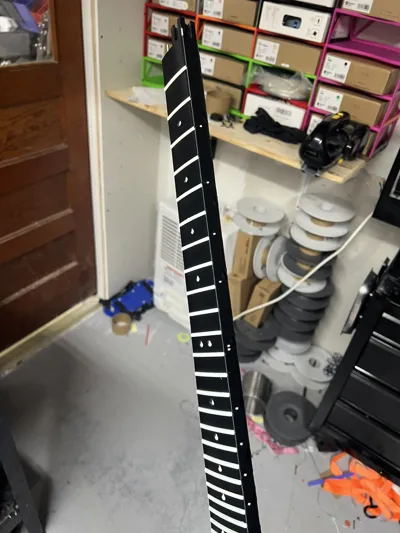
Step 4: Insert 2020:
- Affix your head to the 2020 using its assembly documentation.
- Align the assembled fretboard so that the first neck chunk is directly underneath the head and facing the same direction. Push the top of the neck onto the 2020 until it's fully seated, move down the neck and push until entire neck is on the 2020.
- Put a M5 Slide In Nut in the bottom of the 2020 and tilt / shake the neck until its hole is visible through the top hole in the side of the neck. Use a M5x10 BHCS Screw to secure that neck chunk to the 2020. Repeat for each screw hole in the sides of the fretboard.
Step 5: Shoulder (Assembly instructions can be found in the shoulder file)
Plan your Build
ExoGuitar can be confusing! Check out our Build Planner to plan your build! It'll guide you through the list of available parts and take care of compatibility issues along the way. Also, it has all ExoGuitar parts, including ones not listed on MakerWorld.
Want Hardware?
Hardware packs (and much more) are available here: https://exoguitar.com/part/neck/neck-v3/791
Boost Me (for free)
Want more models like this? Boost Me!
Membership
Want to sell these Models? Join my Membership!
Check out more of my stuff here:
Discord
Join our Discord if you have any questions: https://discord.gg/Qbzapa3WJ5
License
You shall not share, sub-license, sell, rent, host, transfer, or distribute in any way the digital or 3D printed versions of this object, nor any other derivative work of this object in its digital or physical format (including - but not limited to - remixes of this object, and hosting on other digital platforms). The objects may not be used without permission in any way whatsoever in which you charge money, or collect fees.
Comment & Rating (13)