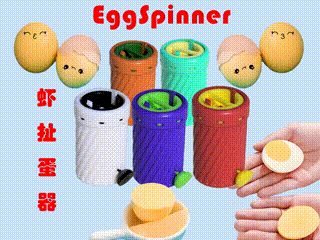
Egg spinner (EggSpinner, egg beater), egg shakers, egg mixers, egg blenders, fidget roller, turbine simulator


Print Profile(4)


Bill of Materials

Description
Total print time approximately five hours, utilizing 170 grams of filament. Your generous likes, favorites, and boosts are deeply appreciated
Your like, favorite, and share mean the world to me—thank you for being my biggest support!
Boost Me (for free)
Thank you for your boost! Thanks!
Kindly utilize PETG, ABS, or PLA-CF for printing; a single nylon cord is requisite, with further specifics detailed in the accompanying instructions
Caution!!!
1. The fastener does not necessitate being tightened to its absolute limit! Merely confirm the egg is securely cradled; excessive torque risks shell fracture!
2. For diminutive eggs, ensure the securing bracket is affixed; when not in active use, it may be inserted in reverse. The four edges must be trimmed by approximately one millimeter. For 'small eggs', the securing bracket is imperative! For 'large eggs', the bracket must be disengaged and should not be inverted for insertion!
Don’t overtighten the holder! Just check that the egg is secure—cranking it down too far can crack the shell.
For small eggs, clip in the support bracket. Pop it on backwards for neat storage when you’re done.

Preparatory Materials:
Materials to prepare: one 65 cm length of core-sheath nylon cord, 1.5–2.0 mm Ø. I use a 1.5 mm core-sheath, non-stretch nylon line. If using 0.8–1.0 mm Ø cord, double it by running two strands together.

This is not a necessary accessory. If the shaft feels loose, you can secure it by threading in an M3×40 screw—both standard head types work.

3.
Guidance:
1. For eggs with delicate shells, observe through the upper aperture; once securely nestled, refrain from further tightening;
2. An estimated 25 to 50 pulls should suffice, though precise iterations may be fine-tuned to individual tactile preference;
2. Should excessive acoustics ensue, remember to administer additional lubrication.
Instructions:
- Some eggs have thin shells. Watch through the top window—once snug, stop tightening to avoid cracking.
- Pull approximately 25–50 times; adjust to your preferred feel.
- If the noise is too loud, add more grease.
Two installation options are available: follow the step-by-step video tutorial or download the printed instruction manual:
Documentation (1)
License
You shall not share, sub-license, sell, rent, host, transfer, or distribute in any way the digital or 3D printed versions of this object, nor any other derivative work of this object in its digital or physical format (including - but not limited to - remixes of this object, and hosting on other digital platforms). The objects may not be used without permission in any way whatsoever in which you charge money, or collect fees.
Comment & Rating (7)