Push-Push Mechanism Phone Charging Dock/Station


Print Profile(2)


Description
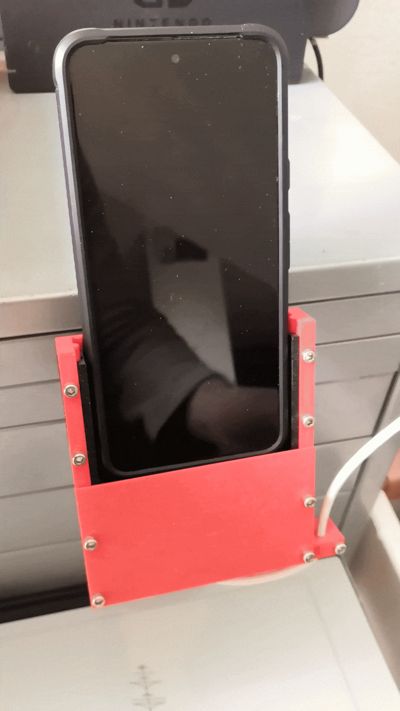
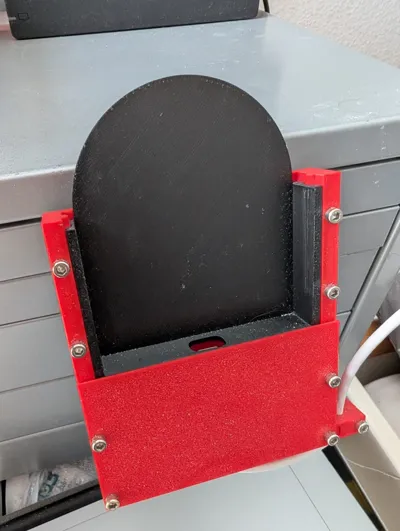
A “charging dock” for your phone with a push-push mechanism (designed for a Pixel 8 with protective cover; your mileage may vary). Inserting the phone into the dock and pushing down will automatically insert the USB-C cable and starting charging/connecting to a connected device (e.g. my car for Android Auto in my case). To remove the phone or disconnect, simply push down onto your phone again. The cable will disconnect and the phone can be retrieved. It is designed, such that the cable will not stick out of the dock and the phone can also be placed into the holding are without charging. Note, that a kind of mount is required, depending on your desired installation. Holes are provided where the screws can be located. Two different designs are provided for two different kinds of charger. The “_Original” version uses the USB-C cable which was provided with the phone. The “_3rdParty” version uses a 3rd-party cable (duh!), witha a vastly thicker and overall longer port (see the last pic above).
Required additional parts:
- 2 5.5x39 mm springs
- 1 M3x6 mm bolt for the actuator (2 if both are used, NOT ADVISED! Might lock the mechanism)
- 5 Nuts (+X, when mounted to your own mount)
- 4 M3x20+ mm Bolts for the cover (+X, when mounted to your own mount)
- 1 M3x18+ mm Bolt for the clamp
Assembly steps:
Place springs into designated places in the “bottom” part and slide the phone holder into position

Push down on the phone holder, insert the actuator at one location and screw the M3x6mm bolt into its designated area. If you mount the phone holder at an angle, choose the actuator position to be the top position for better mechanism reliance. Afterwards, test that the macha
nism works. The bolt should not sit too tight and allow some play for the actuator. However too much play and the mechanism might not work as reliably. So test a bit before the next step

Insert the according USB-C cable into its slot

Put on the top cover and screw it down tightly with the 4 M3x20+ Bolts. The Nuts have to be inserted into the bottom of the provided holes.

Test that the mechanism works. Now insert your phone and use the mechanism with the cable being able to freely move. The cable should lock into the phone and then move up into the dock a bit. Then pull on the cable without pulling it out of the phone. Since we don't want the cable to stick to the phone, it has to be clamped down. This is achieved with the clamp to the side. Pull the cable through and clamp it down hard with the remaining nut and M3x18+ bolt (easier with the original cable since it is thinner and the rubber results in more friction). This is the hardest part of the assembly to get right. After everything, pushing down on the mechanism should move the holder up and you can remove the phone without pulling the cable out

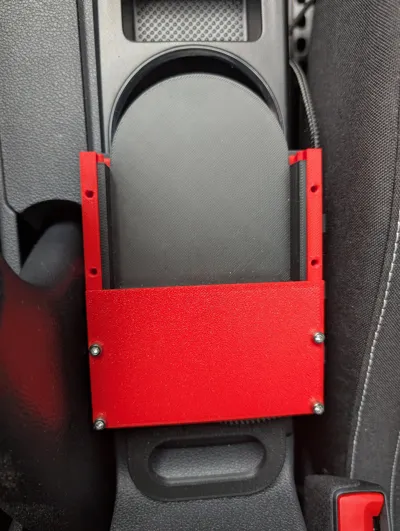
- Install into (your own designed) mounting system. An example is provided as I use it in the image.
Remarks:
- This is designed for a Pixel 8 phone with a (specific) protective cover. It might not work perfectly with your phone and might require adjustments. The step files are uploaded if you want to adapt it.
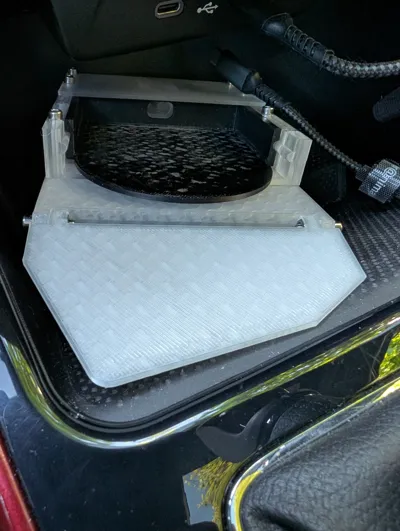
I tested a first prototype back in december and the first images are from that one. Not much changed (I improved the clamp in step 5, which is not visible in the first assembly images). However, the first version was installed in my car to simplify connecting to Android Auto and did not survive the first hot summer days, hence a slight alteration. Therefore, if you want to install it in your car make sure to print it out of (at least PETG) and keep it out of the sun. My version of this lasted the summer (it's the transparent one in the images above) and still works flawlessly.
For your amusement, the results of the first warm spring day:

License
You shall not share, sub-license, sell, rent, host, transfer, or distribute in any way the digital or 3D printed versions of this object, nor any other derivative work of this object in its digital or physical format (including - but not limited to - remixes of this object, and hosting on other digital platforms). The objects may not be used without permission in any way whatsoever in which you charge money, or collect fees.
Comment & Rating (0)