Sectional Ramp For Model/RC Cars


Print Profile(2)

Description
Features:
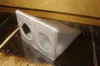
An easy to print ramp that comes in just three different pieces.
No extra hardware needed other then some hot glue.
TPU feet to stop it sliding around on slippery surfaces.
Gentle incline to allow whatever vehicle you put on the ramp to make it to the top such as an RC car.
Each ramp is 86.90mm wide (this is to help you determine how many you will need to print).
Settings:
Material= something strong such as PETG or ABS and then TPU for the optional feet
Support= not needed
Build plate adhesion= Brim + glue stick to stop the edges from warping
Infill= 8%
Walls= 3
Layer height= 0.20mm
To decrease print times you can print with a bigger nozzle and/or higher layer heights such as a maximum of 0.32mm layer height if you have a 0.4mm nozzle and a maximum layer height of 0.48mm layer height if you are using a 0.6mm nozzle.
Printing times.
1. Firstly
Print at least two ramps. Each ramp took me about 6 hours.
2. Secondly
Print the dowels. For me this took about 20 minutes.
3. Thirdly
Print the TPU feet/strips. Each one took about 10 minutes for me.
How to assemble.
1 .Glue the dowels into one side of the ramp with hot glue or epoxy (there are 2 different sizes of dowels).
2. Slot the next ramp on to the dowels (make sure to put a bit of glue onto the tips of each dowel first.
3. Repeat steps 1 and 2 until all the ramps are joined together.
4. Glue 2 TPU strips onto the bottom of each ramp (there are outlines for them on the ramp).
Comment & Rating (1)