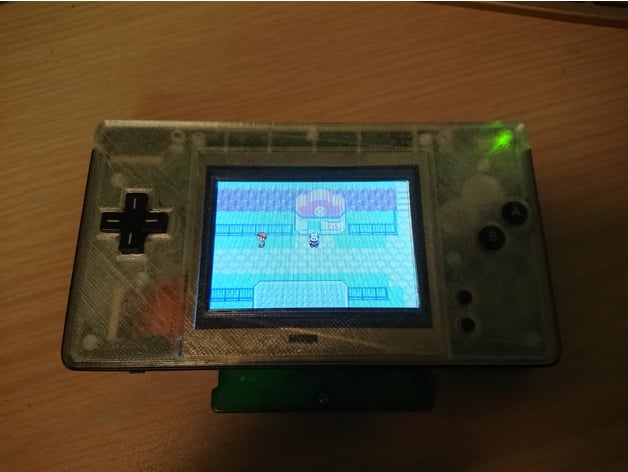
gameboy macro faceplate


Print Profile(3)


Description
This is a faceplate for a Game Boy Macro/GBA Lite mod inspired by the boxy pixel design for those who want to make one in plastic. It has been designed from scratch except the back part, which is the Makho one with some reinforcements in the screw holes and the holes a little bit bigger than the originals. The screen frame has also been enlarged and centered, I had issues with the original one.
The part has a design of three principal layers. One is the bottom of the hollow for the select and start button, the other is the one for the d-pad and a/b buttons, which is the one in where the top and bottom faceplate's cuts are and the third one is the top layer.
It has been created this way because I wanted a smooth surface, and the ironing process leaves a tiny accumulation of material in the borders of the hollows. With this design, you can make a complete ironed intermediate layer and avoid this issue just with two ironing layers. Anyway, you can also print it as usual and won't have any problem further than the listed one and can be solved with a soft sanding.
The faceplate has room only for the LCD screen, the touchscreen should be removed.
There are two versions for the faceplate, a complete one and a split one. I made the split one because the complete one should be printed face up due to the fact that there is no room for supports if you print it face down and also the visible part results in a non-desirable surface. The problem is that the electronics face is a big flat part that is full of screw pillars, so the supports are difficult to remove and I couldn't obtain a real flat frame on the screen bezel, even using support interface. But someone with soluble supports will do it perfectly with the complete model.
If you use the split model, just glue it together with a non-instant glue in order to have time to align the two parts.
It also has a thin zone over the LED area that if you use a non-dark material you can see slightly the LED light.
Case for Game Boy Macro or GBA Lite inspired by the boxy pixel designed for those who want to make one in plastic. It has been designed from scratch except the back part, which is the Makho one with some reinforcements in the screw holes and the holes a little bit bigger. The screen frame has also been enlarged and centered, the original one gave me problems.
It has a design of three main layers, the bottom of the select and start button hole, the bottom of the d-pad and a and b button hole, and the top one.
It has been done this way because I wanted a finish as smooth as possible, but ironing left some material on the edges of the hole and with this design, you can avoid that by completely ironing two intermediate layers. If you don't want to do that process, you can print normally and then sand it with sandpaper, it looks good too.
The case only has room for the LCD screen, the touch screen must be removed.
There are two versions of the piece, a whole one and a split one. I made the split one because the whole one has to be printed face up because if it's done face down the supports for the recesses don't fit well and are very difficult to remove and leave the visible part with a bad finish. The problem when printing face up is that it's a very flat surface with many holes for the screws and it's difficult to remove the supports; Also, the area of the screen frame didn't manage to be completely flat, but someone who uses soluble supports will have no problem.
If you use the split model, just glue it together with some non-instant adhesive so that you have time to align the two parts well.
It has a thinner area in the LED part that if you print it with some clear material you can see the LEDs without much problem.
Comment & Rating (7)