Search models, users, collections, and posts


Print Profile(1)

0.2mm layer, 2 walls, 12% infill
Designer
6.2 h
10 plates
Open in Bambu Studio
Boost
71
203
6
3
127
53
Released
Description
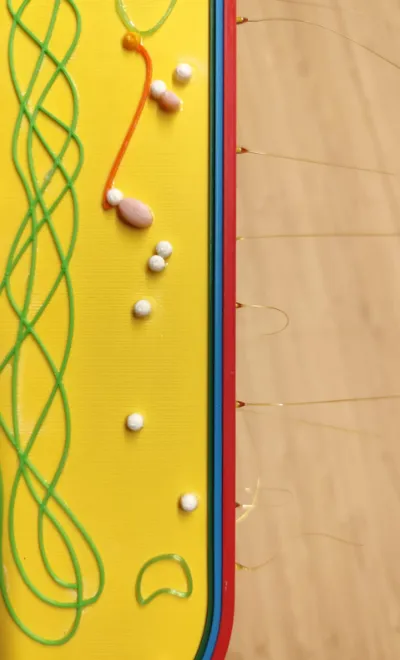
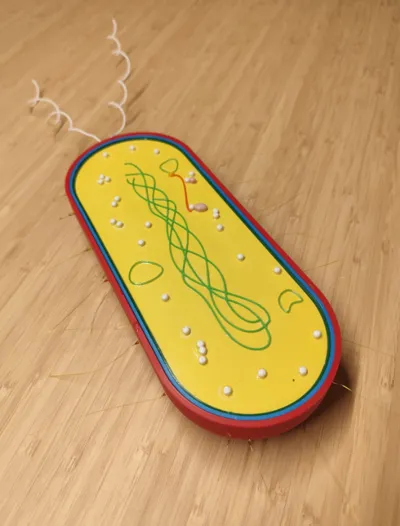
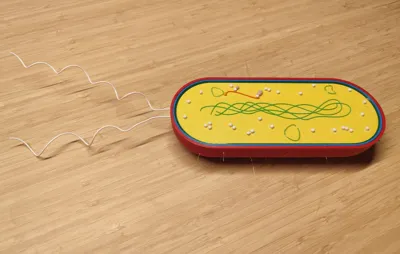
Rod‑shaped bacteria model designed for demos and displays.
The kit shows the envelope layers and key internal components, and uses real 1.75 mm filament to create realistic pili and a helical flagellum.
What’s included:
- Capsule shell with perimeter anchor holes
- Cell wall ring (blue)
- Plasma membrane ring (green)
- Cytoplasm plate (yellow)
- Nucleoid / chromosomal DNA (rope‑like solid)
- Plasmid loops (small DNA rings)
- Ribosomes
- mRNA strand, polymerase bead, protein beads
Printing
- PETG or PLA · 0.20 mm layers · 3 perimeters · 15–25 % infill
- No supports required
- Anchor holes sized for Ø 1.85 mm (tuned for 1.75 mm filament; lightly ream if your printer runs tight)
Assembly (cyanoacrylate/CA glue)
- Dry‑fit, then glue the cell wall and membrane rings onto the capsule.
- Glue in the cytoplasm plate.
- Place the nucleoid centrally and the plasmids away from the wall for visibility.
- Glue ribosomes scattered through the cytoplasm (slightly fewer directly above the DNA).
- Optional polysome: glue the mRNA starting near a plasmid, then attach 2 ribosomes along it; add same‑color protein beads near the ribosomes; the polymerase bead sits at the plasmid where the mRNA begins.
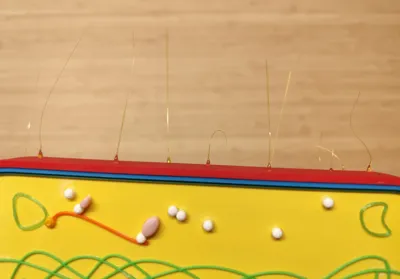
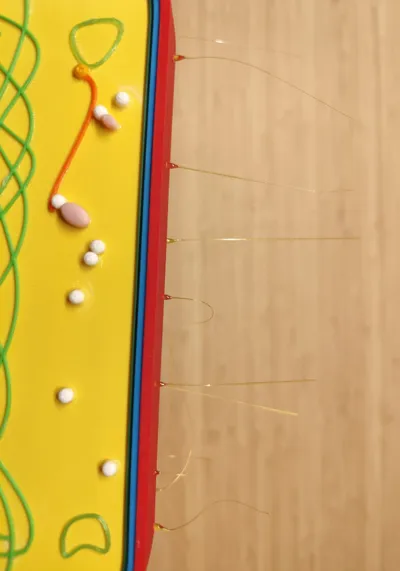
Pili (press‑fit + heat‑pull)
- Press‑fit 1.75 mm filament into the Ø 1.85 mm holes.
- Warm each protruding end with a lighter or PTC hot‑air blower from a soldering station; grip with tweezers and pull to form a tapered hair‑like pilus. Trim as needed.
Flagellum (filament coil)
- Wrap filament around a pen to make a coil
- Press‑fit one end into a side anchor hole (add a drop of CA inside if desired).
Safety
- Heat‑forming should be done carefully and in a ventilated area.
- Small parts and sharp filament ends—handle responsibly
License
This user content is licensed under a Standard Digital File License.
You shall not share, sub-license, sell, rent, host, transfer, or distribute in any way the digital or 3D printed versions of this object, nor any other derivative work of this object in its digital or physical format (including - but not limited to - remixes of this object, and hosting on other digital platforms). The objects may not be used without permission in any way whatsoever in which you charge money, or collect fees.
Comment & Rating (6)