Hat and Cap Expander


Print Profile(1)

Description
🧢 Hat and Cap Expander
📌 Object Description
This 3D model is a hat and cap expander, designed to adjust hats or caps that are too small. Through pressure exerted by a central nut, the device gently pushes from the inside, allowing you to expand the garment to achieve a more comfortable fit.
Many people use this type of tool in conjunction with water, alcohol, or steam, which makes it easier for the hat material to yield and adapt better to the new shape.
🔩 Model Parts
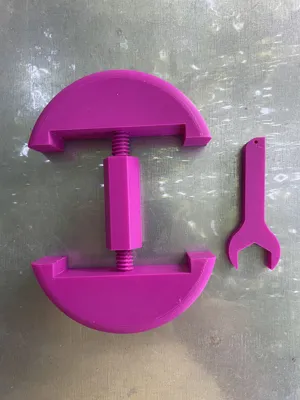
The design comprises six components:
1️⃣ Expander 1 – Upper semicircle, main pressure piece.
2️⃣ Expander 2 – Lower semicircle, fits with the previous one to encompass the inside of the hat.
3️⃣ Two screws – Pressure elements to join and secure the semicircular pieces.
4️⃣ Hexagonal central nut – Allows the application of the necessary pressure.
5️⃣ Fixed wrench – Printed tool for tightening and loosening the nut.
🖨 Printing Recommendations
✅ Semicircular pieces (Expander 1 and 2) and fixed wrench: PLA with 15% infill (sufficient for its function, reducing material and printing time).
✅ Screws and nut: PLA at 100% infill for maximum strength. (They can also be printed in other more robust materials, such as PETG or Nylon, if greater durability is desired).
📏 Technical Data
- Recommended material: PLA (easy to print, economical, and sufficient for domestic use).
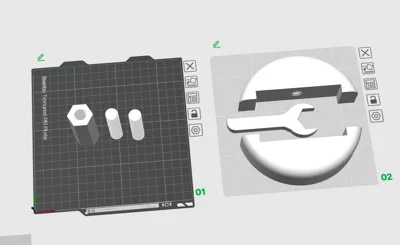
- Orientation: Print the semicircular pieces with the flat side on the printer bed.
- Supports: Not necessary on most FDM printers, depending on the configuration.
- Nozzle size: Standard 0.4 mm.
- Layer height: 0.2 mm recommended for a good finish and precision in the threads.
🧢 Instructions for Use – Hat and Cap Expander
📦 3D Model Contents
The design includes six parts to print:
1️⃣ Expander 1 (upper semicircle)
2️⃣ Expander 2 (lower semicircle)
3️⃣ Two pressure screws
4️⃣ Hexagonal central nut
5️⃣ Printed fixed wrench
🔧 1️⃣ Printing the Parts
✅ Recommended material: PLA (you can use PETG or Nylon if you want greater strength).
✅ Infill:
- Expanders 1 and 2 + fixed wrench → 15%
- Screws and nut → 100%
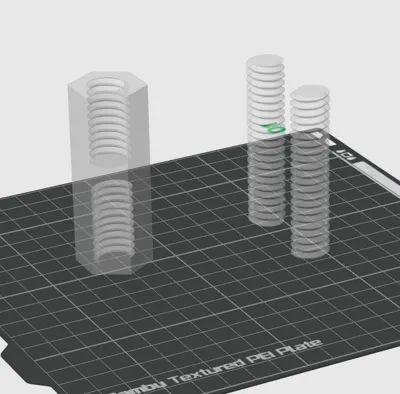
✅ Print orientation:
- Place the semicircular pieces with the flat side on the print bed.
- The screws and the nut should be printed vertically so that the thread is well-defined.
✅ Recommended layer height: 0.2 mm
🛠 2️⃣ Assembling the Expander
- Place Expander 1 and Expander 2 facing each other, so that they form an almost complete circle.
- Insert the screws into the threads of both semicircular pieces.
- Screw the hexagonal nut into the center.
- Use the printed fixed wrench to tighten the nut until the pieces are securely fastened.
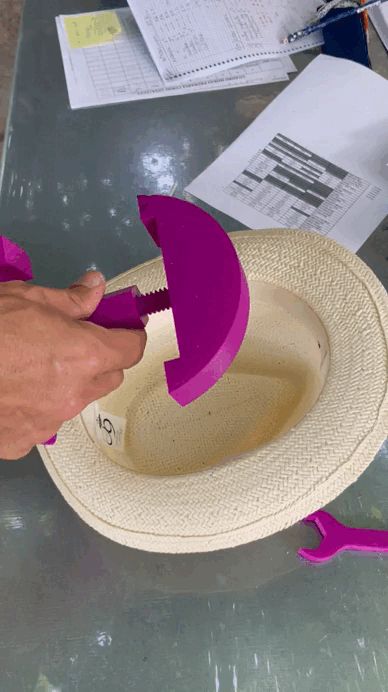
🎩 3️⃣ Using the Expander
1️⃣ Place the expander inside the hat or cap.
2️⃣ Turn the central nut with the wrench so that the semicircular pieces push outwards.
3️⃣ Adjust the pressure gradually.
4️⃣ If you want the material to yield more easily, you can slightly moisten the inside of the hat with water, alcohol, or steam.
5️⃣ Leave the expander in place for several hours (or overnight) for best results.
⚠️ 4️⃣ Tips and Precautions
- Do not apply too much pressure at once; turn the nut gradually.
- Check the adjustment from time to time to prevent the hat from losing its original shape.
- If you print in PLA and notice wear on the screws, consider printing them in PETG or Nylon.
Comment & Rating (8)