Perfect Fit Picopresso Travel Funnel & Tamper V2


Print Profile(1)

Description
My other Picopresso Prints:
Perfect-Fit Wacaco Picopresso Travel Dosing Funnel and Telescoping Tamper Upgrade
Making espresso on the go should feel just as elegant as at home—but the stock Picopresso travel funnel makes that nearly impossible. It’s short, it’s messy, and it forces a clunky two-step tamping process that never felt right to me.
I set out to fix that.
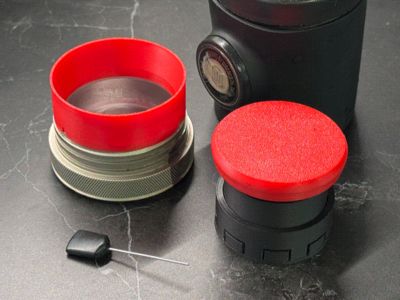
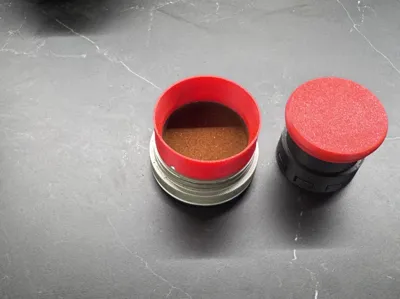
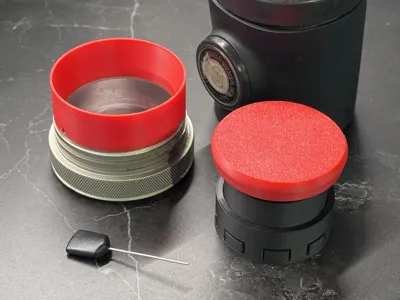
After designing my Perfect-Fit Dosing Funnel for home use, I knew the travel version needed a rethink from first principles. My goal: build the tallest possible dosing funnel that still fits cleanly inside the Picopresso body for travel. Turns out, there’s far more room than the original funnel uses—so I designed one that’s 19mm tall, over 50% taller than the stock funnel.
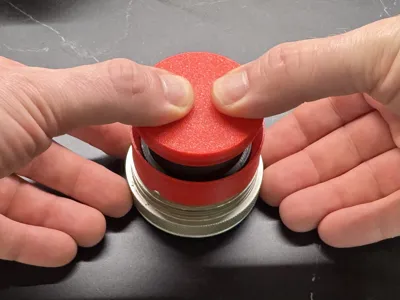
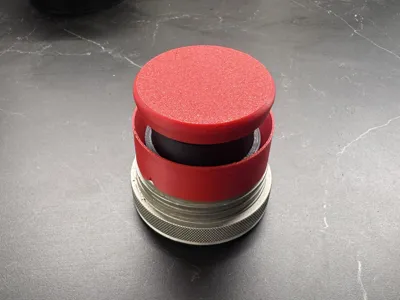
That created a new problem: the stock tamper isn’t even close to tall enough. And honestly, it never worked well with a funnel anyway—always requiring two tamps. So I engineered a telescoping tamper that expands to a full height over two times taller than the stock tamper, locks solid for a single firm press, and collapses back down to exactly 19mm to pack alongside the funnel.
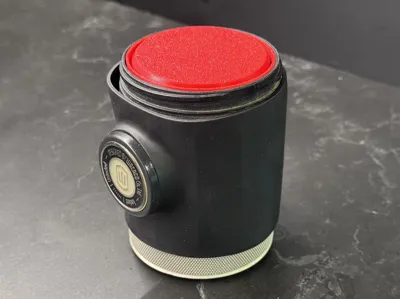
The result is a travel kit that’s tighter, cleaner, and far more satisfying to use. The funnel and tamper nest perfectly snug inside the Picopresso body—not a millimeter wasted—for an ultra-compact, ultra-refined fit that just feels right.

Key Features
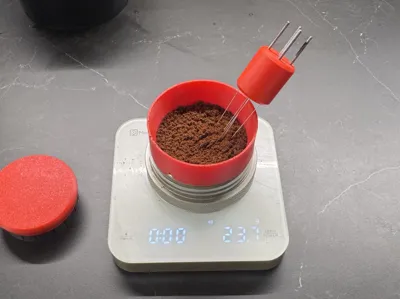
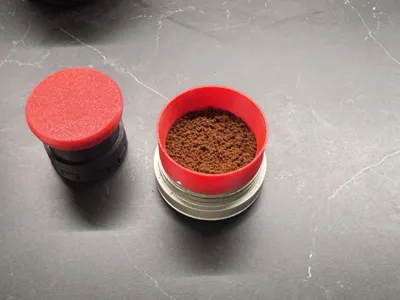
- Zero-mess - get 100% of your grounds in your puck
- Single-Tamp workflow - no more tamp, remove-the-funnel, tamp-again
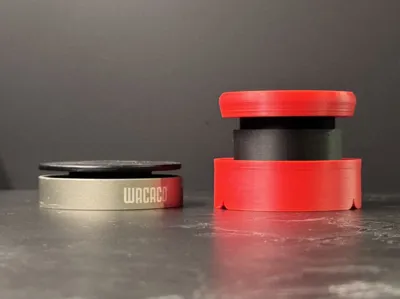
- 63% Lighter than the stock metal tamper (42g vs 112g)—while I appreciate Wacaco for providing us with a metal tamper, when traveling, every gram counts; getting a quality tamp on your puck doesn't require a heavy tamper
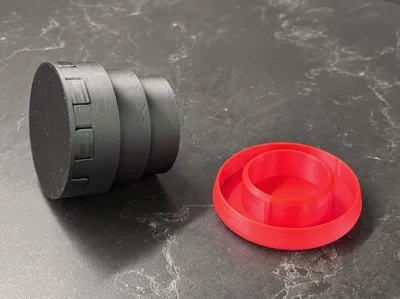
Max-Sized Travel Dosing Funnel
Having designed a 5000x better Perfect Fit Dosing Funnel for using the Picopresso at home, the whole focus of this project was improve the workflow around the travel funnel.
- Less mess improved WDT workflow with 50% taller, 19mm-tall funnel
- Mess further reduced with the same perfect-fit geometry as my home funnel with an inner lip as well as an outer lip (stock funnel only has outer) so grounds don't get trapped on the rim and spill when removing the funnel
- Maximum Size Possible: Uses every millimeter of free space inside the Picopresso body
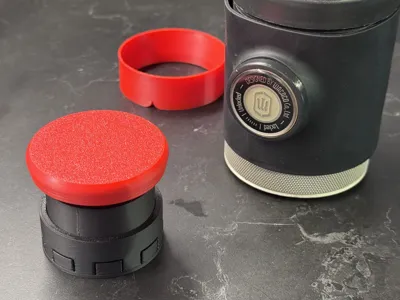
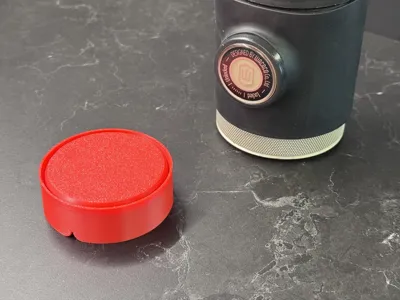
Collapsible Telescoping Tamper
- Single-tamp workflow—height matters
- Expands to 46mm—over 2.5× the height of the stock tamper
- Collapses to 20mm flat for travel—fits perfectly inside the dosing funnel
- Twist-locks into place with a simple clockwise turn; counter-clockwise to unlock and snaps flat
Designing the telescoping system took me weeks! I'm pretty happy with the final result. I hope you will be, too. I included some photos of the insides for those who are curious.
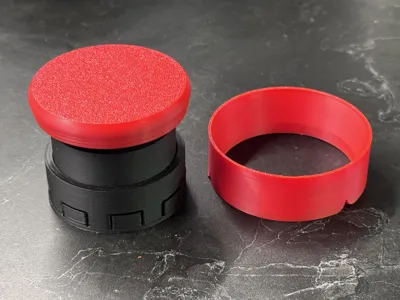
Modular, Customizable Design
Prints in 4 parts, so you can choose your filament color for each part - or just print all 4 parts on one plate - even on the A1Mini. I recommend choosing one color (PLA wood in the pictures) for the funnel and handle and another for the telescope and tamper-base (black in the pictures).
- Funnel: 3 concentric interlocking rings print
- Tamper: 3 physical parts
- Handle
- Base
- Telescoping body (prints as one piece, functions as three interlocked moving parts)
- Mix and match materials colors for each part to customize
Assembly Guide
- Snap-fit the handle on top (alignment notch provides added friction).
Snap-fit the tamp base on the bottom.

Assembly
Development of V2
After over a dozen iterations, I found the prefect solution for the telescoping tamp. V2 solves many problems with the original design:
- V2 comes off the plate perfectly, never binding, already freely moving
- V2 needs no supports
- V2 has 10% more extension
- V2 has dramatically less slop


My Other Perfect-Fit Coffee Gear
- Perfect-Fit Dosing Funnel for Wacaco Picopresso - my “home use” ultimate Picopresso dosing funnel - even taller and more snug for an effortless, mess-free tamping workflow
- Perfect-Fit Modular Tamper - fits any hand and any basket (recommend for use with the home dosing funnel)
- Perfect-Fit Picopresso Workstation (gridfinity) - space-efficient, gridfinity based home drying rack
Why This Exists
Because the Picopresso deserves better—and so do you.
This funnel + tamper system is optimized for travel, maximized for usability, and thoughtfully engineered to fix the parts of the workflow that never felt quite right.
Boost Me (for free)
Want more 3D-printed coffee gear? Give me a boost - it keeps me motivated! Thank you.
License
You may create derivative works based on this object, provided that all such derivative works are published exclusively on the MakerWorld platform and include proper attribution to the original creator. You may not share, upload, host, distribute, or publish this object—or any derivative work of this object—on any other digital platform, marketplace, or distribution channel. Commercial use of this object and any derivative works is strictly prohibited. This includes, but is not limited to, selling, renting, sublicensing, or using the object in any context in which you receive monetary compensation or other financial benefits.
Comment & Rating (12)