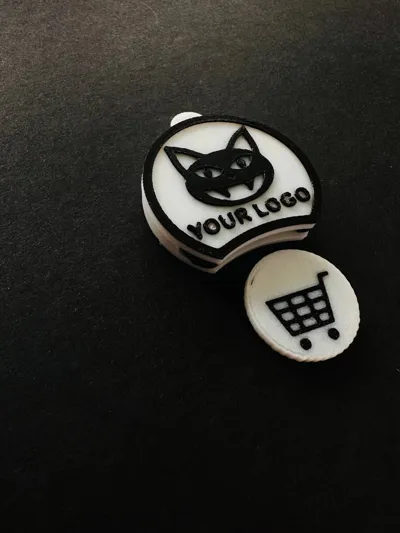
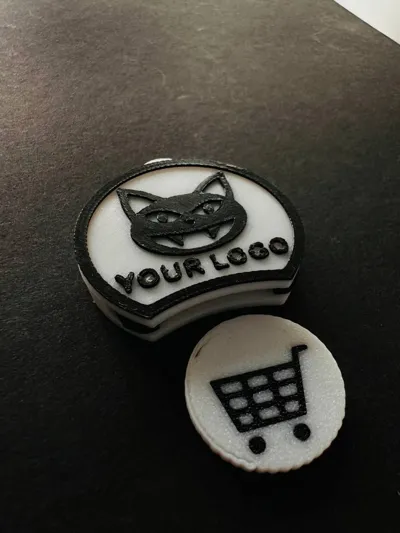
Shopping Cart Token Keychain with QR


Print Profile(1)

Description
Boost Me (for free)
Support my work
🛒
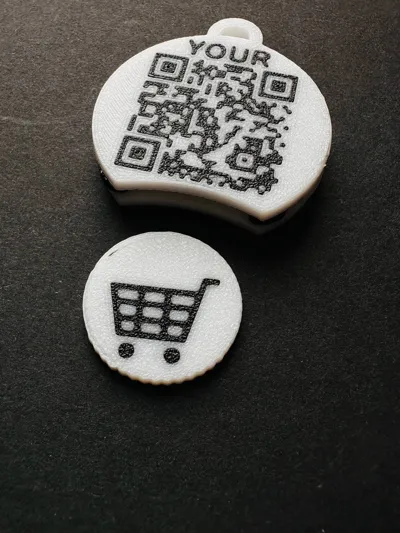
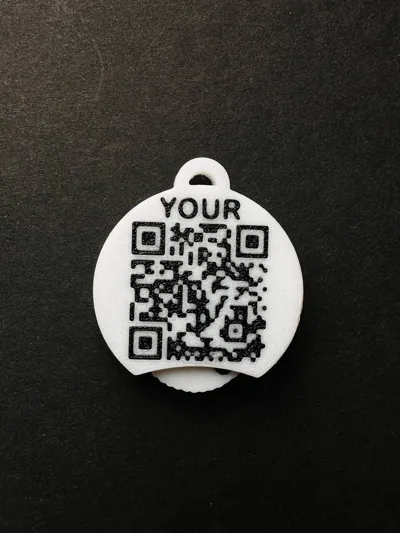
This keychain incorporates a detachable token (similar to a €0.50 coin) compatible with most shopping carts in Germany and other EU countries. The housing integrates a QR code that, in this version, links to my MakerWorld page.
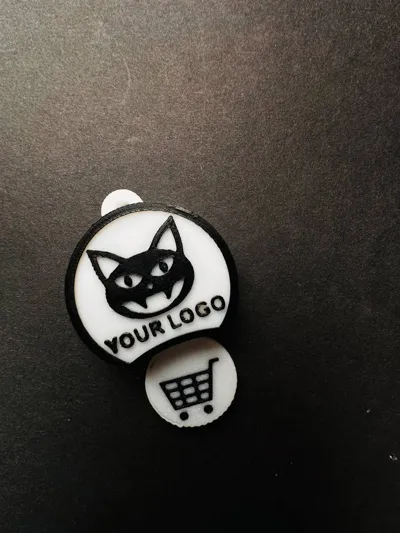
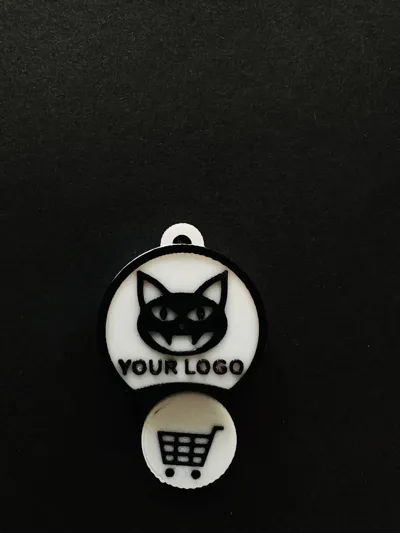
🔧 Optionally, replace this QR code with your own using a QR code generator like https://goqr.me (for example, linking to a website, social media, or messenger), and modify the logo to your company's logo or personal emblem.
💡 The original Fusion 360 (.f3d) file is also included—allowing for customized model modifications.
The token is securely held within the keychain yet easily removable when needed.
🔧 Features:
- Suitable for printing on standard FDM printers
- Optimized for PLA/PETG
- The QR code is clear and easily scanned with a smartphone
- Conveniently carried on a key ring
- Can be used as a corporate souvenir
🔓 License and Terms of Use:
- ✅ Non-commercial use permitted
- ✅ Remixing/modifications permitted
- 🚫 Commercial use of both the original and remixes is prohibited
- 🏷 When publishing remixes, please credit me as the author
📦 Don't have a 3D printer?
Order a printed keychain directly from me (delivery within Germany). Personalization with your logo and QR code is also available.
🎨 Multicolor Printing and STL Structure:
- The QR code and the keychain body are separate bodies within a single STL file. This facilitates convenient multi-color painting in your slicer.
- All inscriptions on the token, as well as the shopping cart image, are also separate bodies integrated into the overall file.
- For correct color display:
🔹 In the slicer, click the “Split into parts” button
🔹 Each element can then be colored individually, but they will remain in their original positions (in the body tab displaying the list of bodies).
Recommendations for High-Quality QR Code Printing (Important!)
For crisp, durable, and easily scannable QR code printing, adhere to these proven settings:
✅ 1. Print the QR code after the token base
Printing the QR code first often leads to small elements failing to adhere properly and being scraped off by the nozzle.
🔧 Configuration:
- In OrcaSlicer/Bambu Studio, click
“Configure current print plate”
(⚠️This button is located near the print plate visualization, not in the left-hand menu!) 

In the dialog box, ensure that the token base is printed first, followed by the QR code (using a different filament).
✅ 2. Print infill before walls
- Enable the option: “Print infill before walls”
This creates an even base for the QR code, improving adhesion.
✅ 3. Correct perimeter printing order
- Set the order to:
External → Internal
This ensures crisp QR code edges and prevents excess plastic buildup inside the elements.
✅ 4. First layer settings:
- Layer height: 0.3 mm
- Print speed: 10 mm/s
- Flow rate: 0.85 (Bambu Studio lacks first-layer flow rate adjustment; use OrcaSlicer or Anycubic Slicer Next if needed; subsequent layers use standard flow rate)
✅ 5. First layer temperature:
📌 PLA:
- Hotend: 190–195°C
- Bed: 50–55°C
📌 PET-G:
- Hotend: 205°C
- Bed: 75°C (or the minimum stable temperature for your material)
⚠️ The bed should not be too hot! Otherwise, the plastic will spread, flooding the fine details of the QR code.
✅ 6. Subsequent layers:
- Layer height: 0.2 mm
- PLA temperature: 200–210°C
- PET-G temperature: 235–245°C
These parameters ensure consistently printed, well-adhered, and flawlessly scannable QR codes.
Comment & Rating (0)