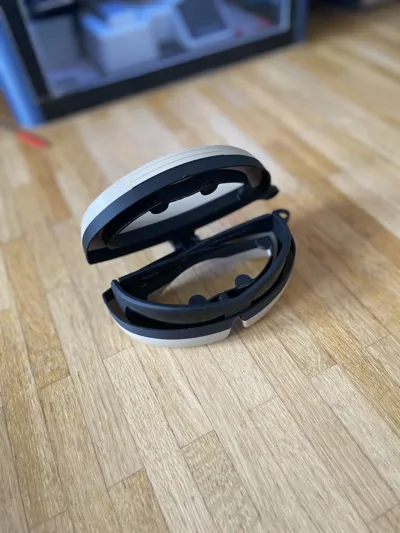
Eyeglass Case


Print Profile(1)

Bill of Materials


Description
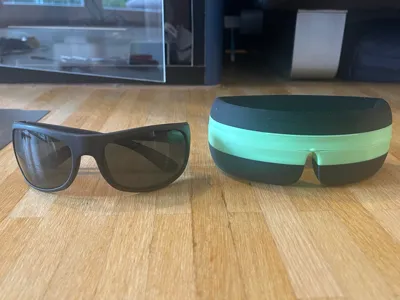
I designed this glasses case for myself because there were no good cases available for sports glasses. If there was a case, it was far too thick due to the strong curvature. That is why I designed this one myself. It is available with and without a loop
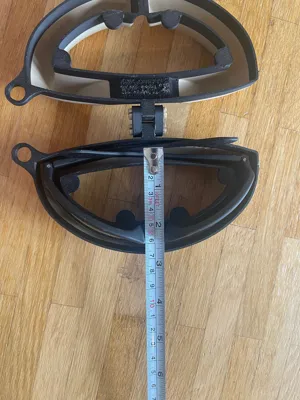
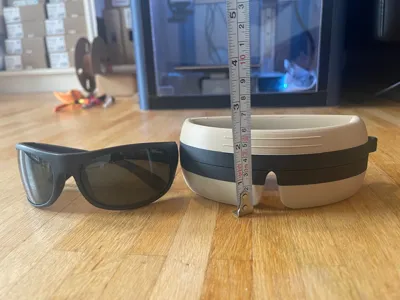
My glasses are the Polaroid 07886 model. This is important because your glasses must have similar dimensions or curvature. See photos. Or search for the model online, as you can usually find the measurements there
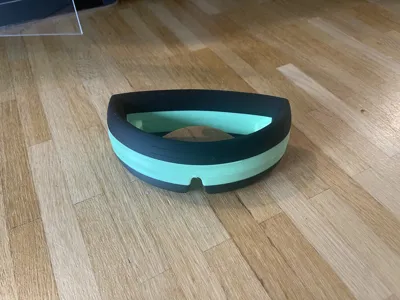
The opening in the middle makes the glasses case much more comfortable to carry in your hands. With the eyelet, it can even be attached to a belt or backpack with a carabiner
Boost Me (for free)
Thanks!
Also check out my other models!
I only have an A1 mini without AMS. Therefore, I had to work with pauses in the print profile for the models in the photos. However, I have removed these again. So if you want to work with multiple colors, you will need to implement this yourself and are then welcome to upload it as a profile
The profile has a layer height of 0.08 mm. This means no supports are needed for the basic structure. As soon as you increase the layer, supports are required. I do not want that, hence 0.08
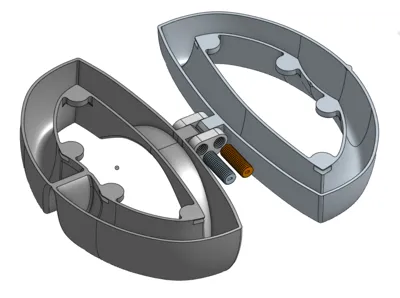
You will need glue and 8 round magnets with a diameter of 8 mm and a height of 2 mm
I printed both models, with and without the loop. The filament and other materials used are linked below
The filament should be well dried to prevent warping. I added 2 mm brims inside and outside
You can also copy everything onto 1 plate in Bambu Studio, there is space. I separated it because I do not have an AMS but wanted different colors
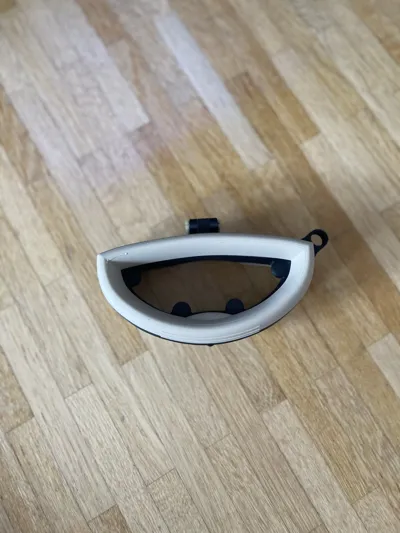
In the photos, you can still see the old pins. But with only 2 pins or screws, it becomes easier to assemble

With the appropriate tool, clean up all edges, meaning remove the excess material

Now you can simply push the 8 magnets into the openings. Make sure the orientation is correct:-)

In my print, I did not have supports for the magnets yet. That is why this error occurred in the picture. After inserting the magnets, you can seal the openings with glue if necessary. From above, the error is barely visible

Now you just need to screw in the two pins. You can also see the assembly in the photo with the CAD model
In the photo, you can see the finished case. For the curved green surface, I intentionally did not use supports. It might be necessary to cut off a few strings

It does not look very good. Therefore, make sure it does not happen to you
Also check out my other models: Fanki The Printer
Boost Me (for free)
I would appreciate it...
License
You shall not share, sub-license, sell, rent, host, transfer, or distribute in any way the digital or 3D printed versions of this object, nor any other derivative work of this object in its digital or physical format (including - but not limited to - remixes of this object, and hosting on other digital platforms). The objects may not be used without permission in any way whatsoever in which you charge money, or collect fees.
Comment & Rating (0)